How To Cinematic BLACK BARS (Final Cut Pro iPad)
In this article/video I will show you how you can create cinematic black bars in Final Cut Pro for the iPad. We will also look at how to animate them so they slide in smoothly.

Contents
- [Video] How to Create Cinematic Black Bars in Final Cut Pro for iPad
- Understanding Aspect Ratios for Cinematic Video
- Solution 1: How to Change Timeline Resolution in Final Cut Pro for iPad
- Solution 2: How to Create Black Bars Using Cropping in Final Cut Pro iPad
- How to Calculate the Correct Crop Values for 2.35:1
- How to Animate Black Bars in Final Cut Pro for iPad
- If you want to host your own Online Course use CC360
[Video] How to Create Cinematic Black Bars in Final Cut Pro for iPad
Understanding Aspect Ratios for Cinematic Video
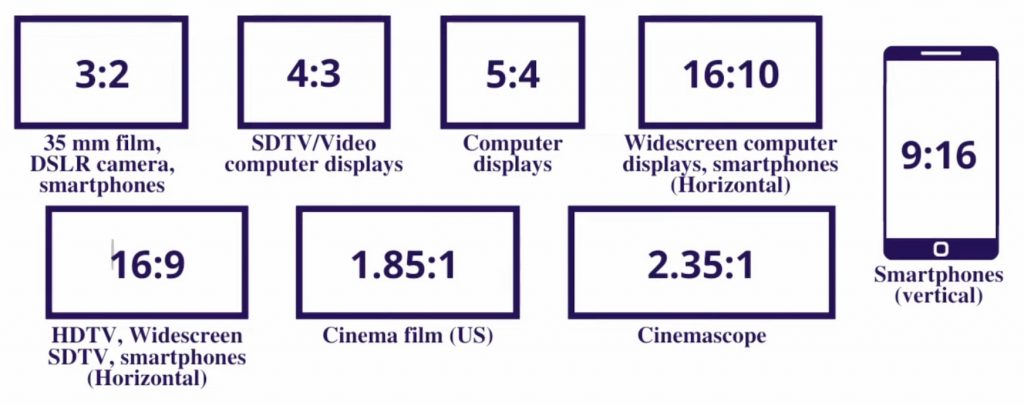
Before we start, let’s quickly understand why these black bars exist. The standard aspect ratio for most screens, phones and TVs is 16×9. But when you watch a Hollywood movie in a cinema, the aspect ratio is usually wider, either 1.85×1 or even CinemaScope at 2.35×1.
When you take footage shot in these wider formats and display it on a standard 16×9 screen, the black bars appear on top and bottom. So the black bars are not added on top of the footage. They are simply the result of a wider resolution being displayed on a narrower screen.
Solution 1: How to Change Timeline Resolution in Final Cut Pro for iPad
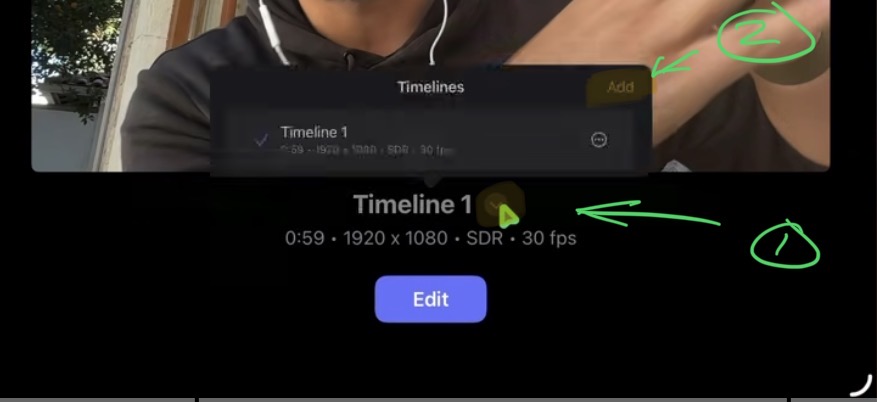
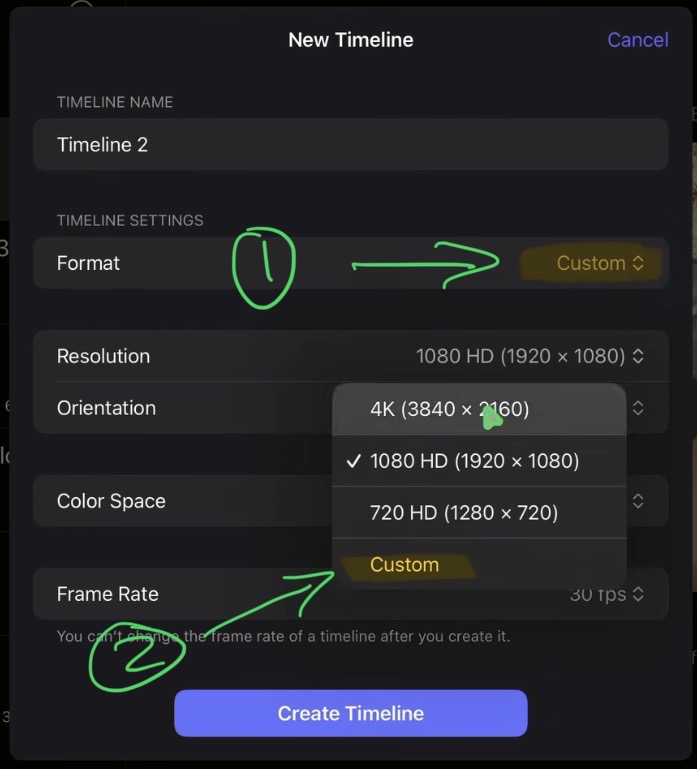
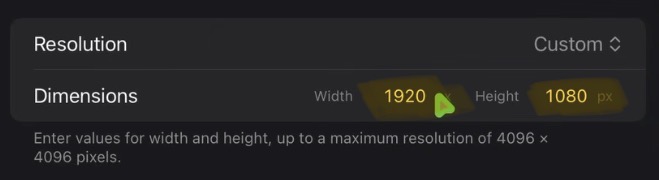
The first method is how Hollywood actually does it. Instead of adding black bars, you simply create your timeline in the wider resolution. In Final Cut Pro on iPad, go to your project, click on it and select Add. Under Format, change from Automatic to Custom. Now you can change the resolution and set a custom width and height in pixels. If you know the exact resolution you want, set it here and your timeline will be in that format from the start.
But most of you are probably here because you normally shoot in 16×9 and just want to add the black bars as a creative effect, maybe for a B-roll segment. That’s what we will do next.
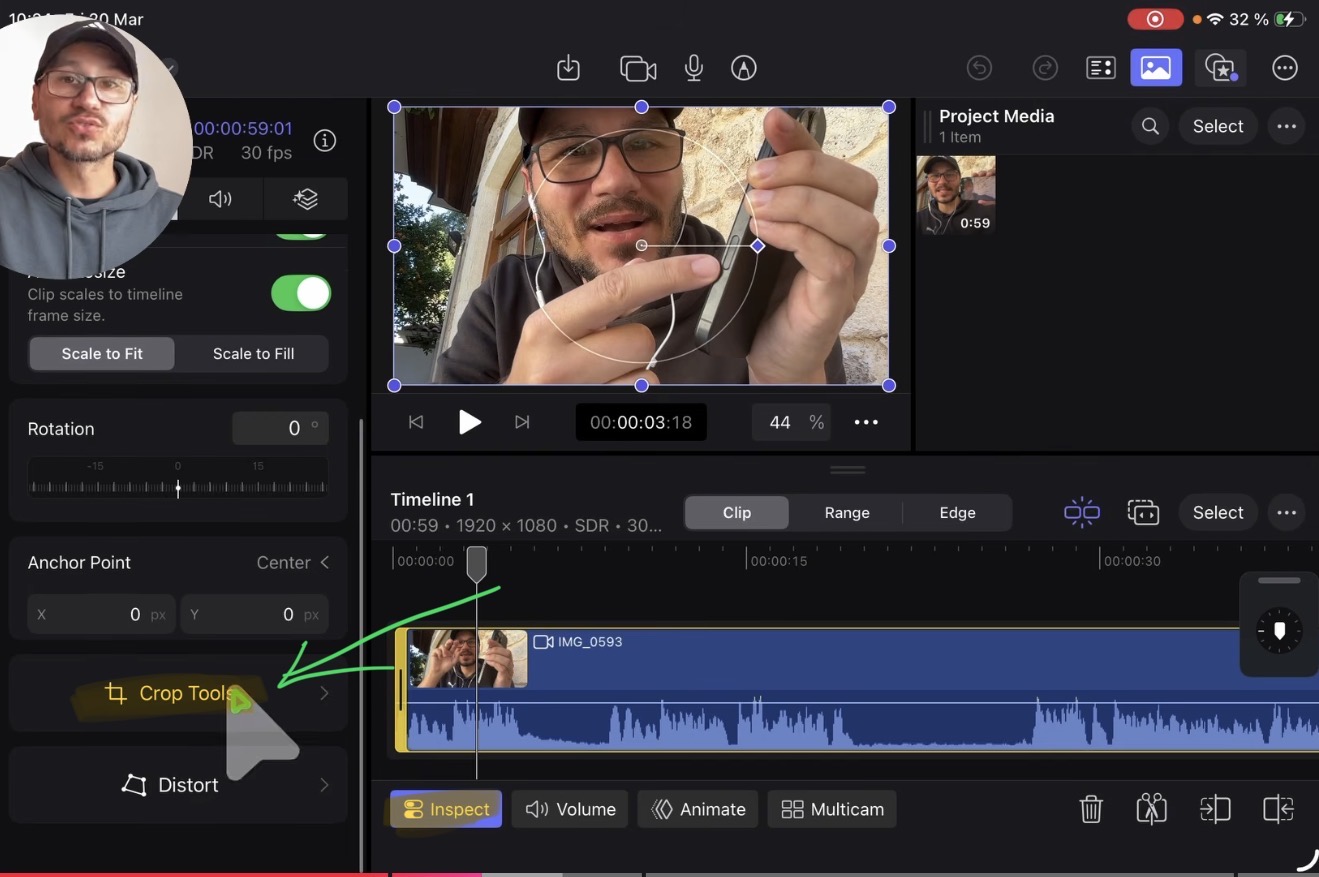
Solution 2: How to Create Black Bars Using Cropping in Final Cut Pro iPad
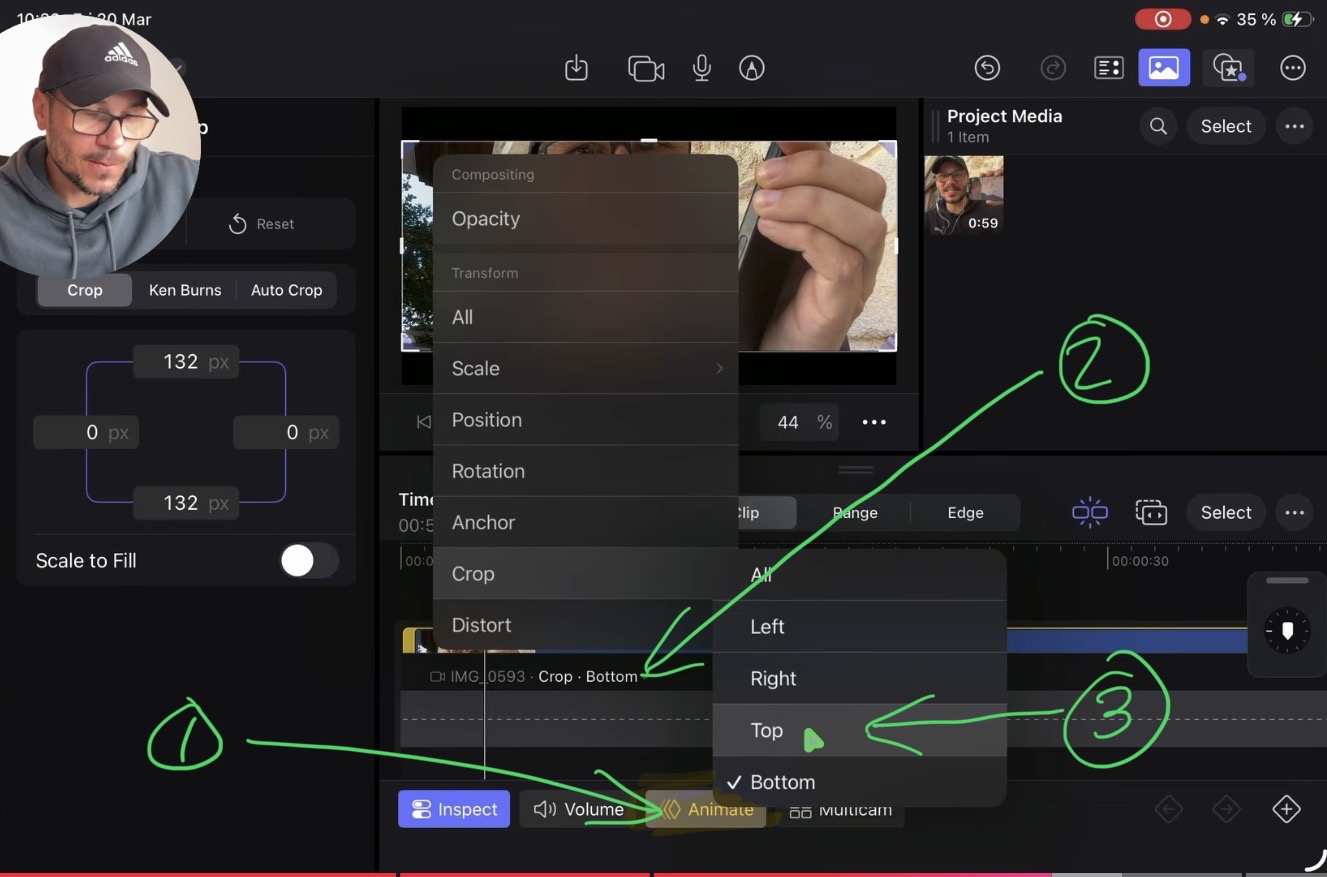
To create black bars on a standard 16×9 timeline, we use the cropping feature. Select your video clip, open the Inspector and go to the second tab. Scroll down and you will find the Crop tools. Here you can crop from the Top, Left, Right and Bottom by pixel values.
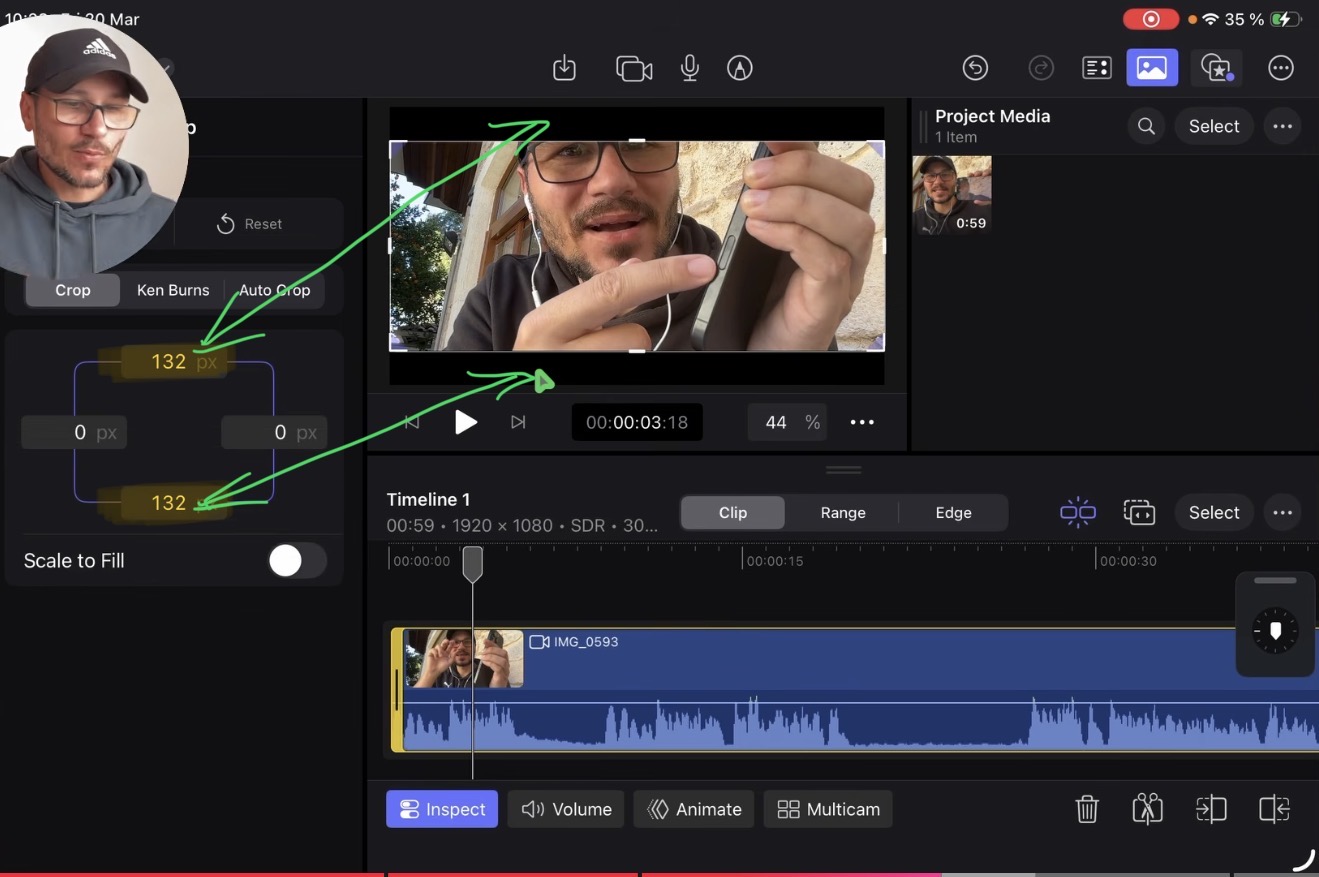
Your 16×9 timeline is 1920×1080, so the height is 1080 pixels. If you crop 1080 pixels from the top, the entire image disappears. But if you crop just 50 pixels from the top, you get a small black bar.
How to Calculate the Correct Crop Values for 2.35:1
Let’s say you want to match the CinemaScope 2.35×1 look. Here is how you calculate it. Take your timeline width of 1920 and divide it by 2.35. That gives you roughly 817 pixels for the height. Your timeline height is 1080, so 1080 minus 817 equals 263 pixels total that need to be cropped. Divide 263 by 2 and you get about 132 pixels. So you set Crop Top to 132 and Crop Bottom to 132. Now you have perfectly symmetrical cinematic black bars.
Calculation Example
Step 1: 1920:2.35 = 817
Step 2: 1080-817 = 263
Step 3: 263:2 = 131.5
How to Animate Black Bars in Final Cut Pro for iPad
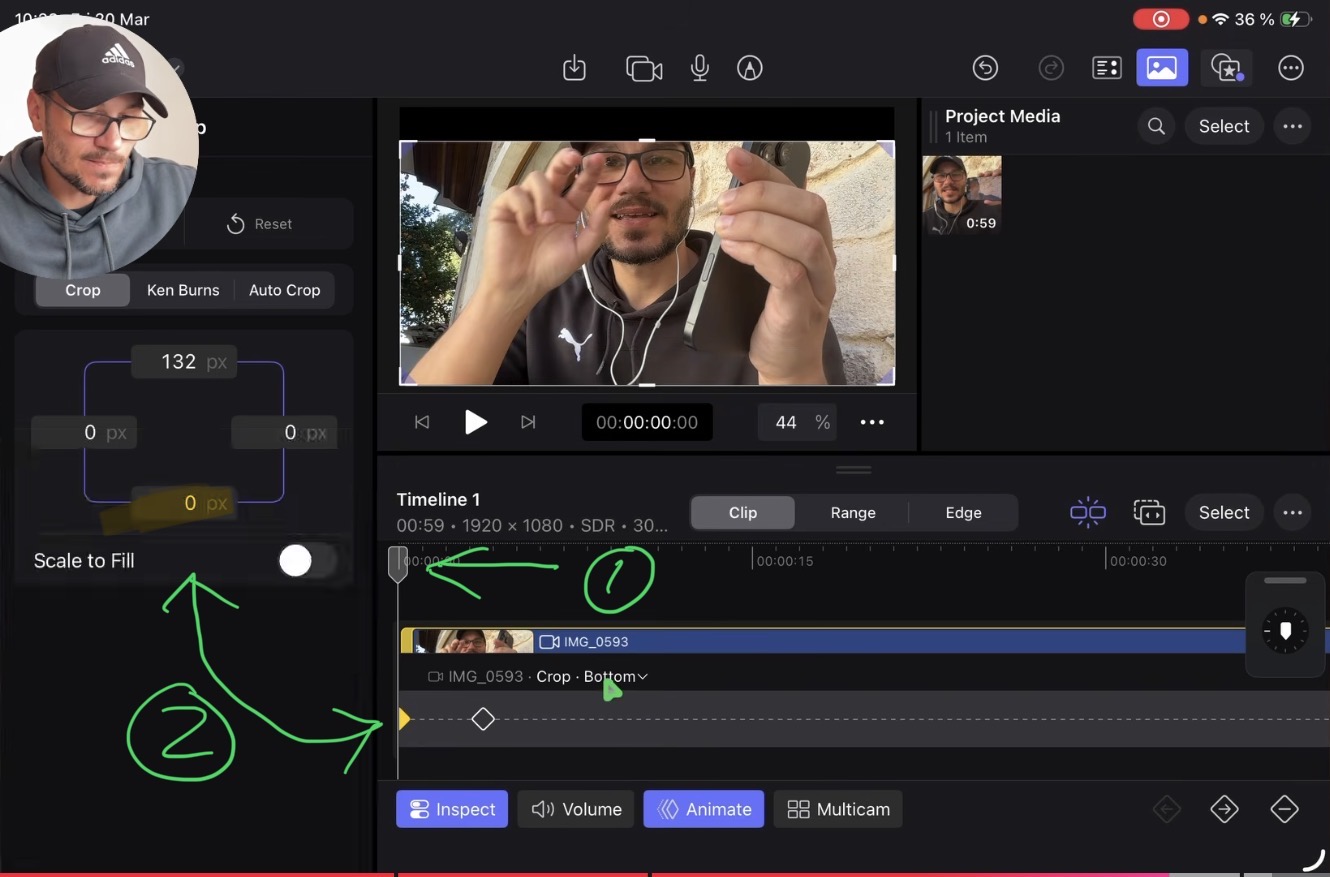
Now let’s animate the black bars so they slide in from the top and bottom. First, make sure the crop values for Top and Bottom are already set to 132 (or whatever your target value is). Then activate the Animate toggle in the Inspector.
Move your playhead to the position where you want the black bars to be fully visible. Create a keyframe for Crop Top and a keyframe for Crop Bottom at this position. The values are already set to 132, so these keyframes lock in the final state.
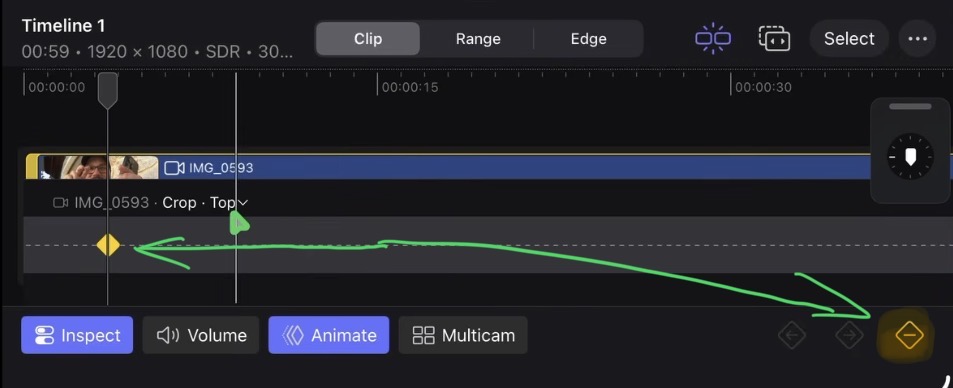
Now move the playhead back to the beginning of the clip. Add another keyframe for both Crop Top and Crop Bottom, but this time set both values to zero. When you hit play, the black bars will smoothly animate in from the edges. That’s it.
If you want to host your own Online Course use CC360
I really believe, that CC360 is the best Platform to host your own Online Course currently on the market. And each week they introduce new features. Amazing. Check it out here.
Read Next
• How To Turn ON/OFF Audio Skimming in Final Cut Pro iPad
• How To DUPLICATE Timeline in Final Cut Pro iPad
• How to add KEYFRAMES in Final Cut Pro iPad