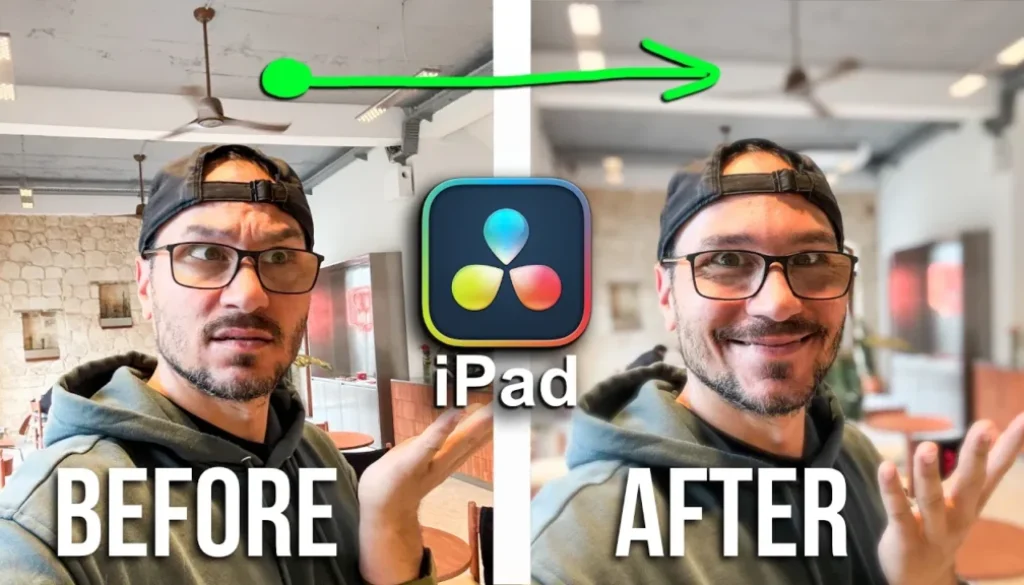
Blur Backgrounds Like a PRO (DaVinci Resolve iPad)
In this article/video i will show you how to use the new Defocus Background effect in DaVinci Resolve for iPad. This effect lets you blur the background behind your subject, similar to the cinematic mode on the iPhone. Combined with Magic Mask, you can get great results fast.
Pro Tip: Make your Videos Cinematic (and save a tone of time) with our Seamless Transition Pack for DaVinci Resolve iPad.

Contents
- [Video] Defocus Background in DaVinci Resolve iPad
- How to Use Defocus Background in DaVinci Resolve iPad
- Step 1: Create a Magic Mask on the Color Page
- Step 2: Add the Defocus Background Effect
- Defocus Background Settings Explained
- Tips for Natural Looking Background Blur
- If you want to host your own Online Course use CC360
- BONUS: All DaVinci Resolve iPad Masterclass Students get the Transition Pack & the 8K Film Grain Pack for FREE!
[Video] Defocus Background in DaVinci Resolve iPad
How to Use Defocus Background in DaVinci Resolve iPad
The Defocus Background effect is a new way to isolate the foreground and blur the background in DaVinci Resolve for iPad. It works best when you combine it with Magic Mask on the Color Page. Note that Magic Mask is a DaVinci Resolve Studio feature.
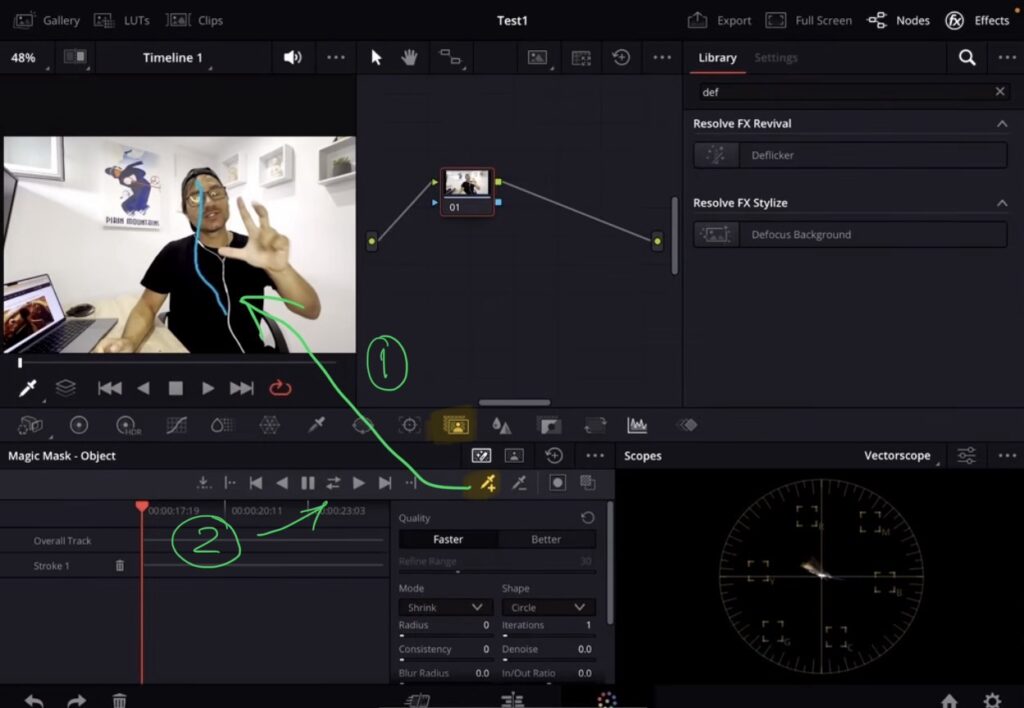
Step 1: Create a Magic Mask on the Color Page
First, go to the Color Page and open Magic Mask. Simply take your Apple Pencil (or your finger) and draw over your subject. Then track backward and forward. DaVinci Resolve will analyze your subject and follow it throughout the clip. This gives you a very clean mask that works perfectly with the Defocus Background effect.
Step 2: Add the Defocus Background Effect
Once your Magic Mask is done tracking, add the Defocus Background effect onto that node. You will now see the Defocus Background settings where you can adjust the effect.

Defocus Background Settings Explained
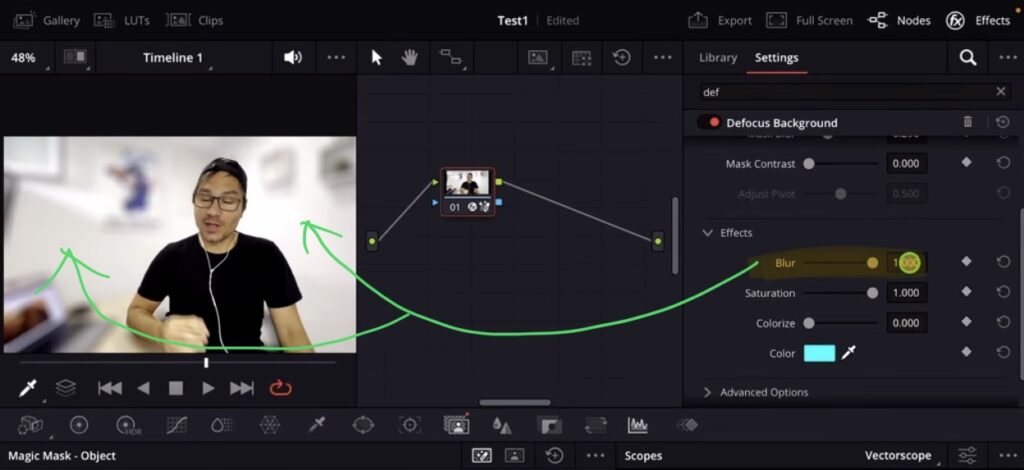
The Defocus Background effect gives you several controls to fine-tune the result:
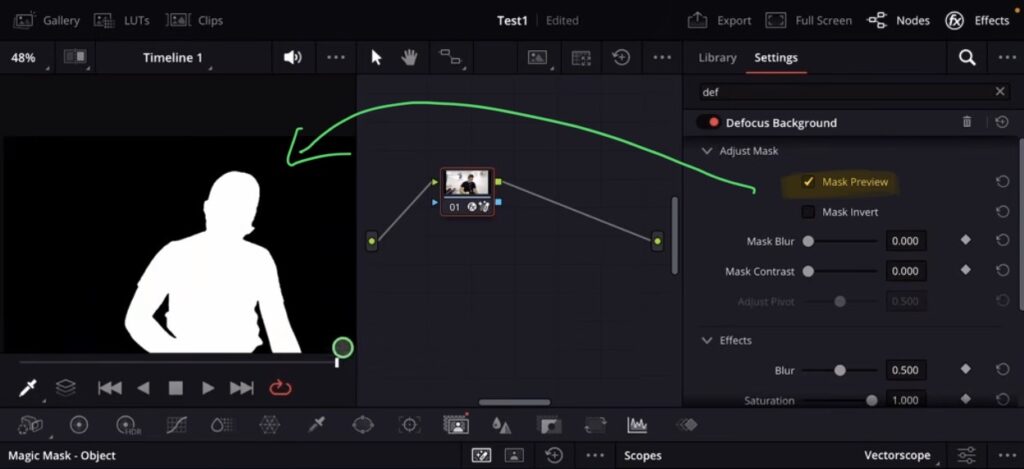
Mask Adjustments: You can preview your mask to see how well it follows your subject. You can adjust the mask blurriness and mask contrast to refine the edges. You also have the option to invert the mask, which will blur the foreground instead of the background.
Effect Controls: The main blurriness slider lets you control how much background blur you want. You can increase it to extreme levels, but keeping it subtle usually looks more natural.
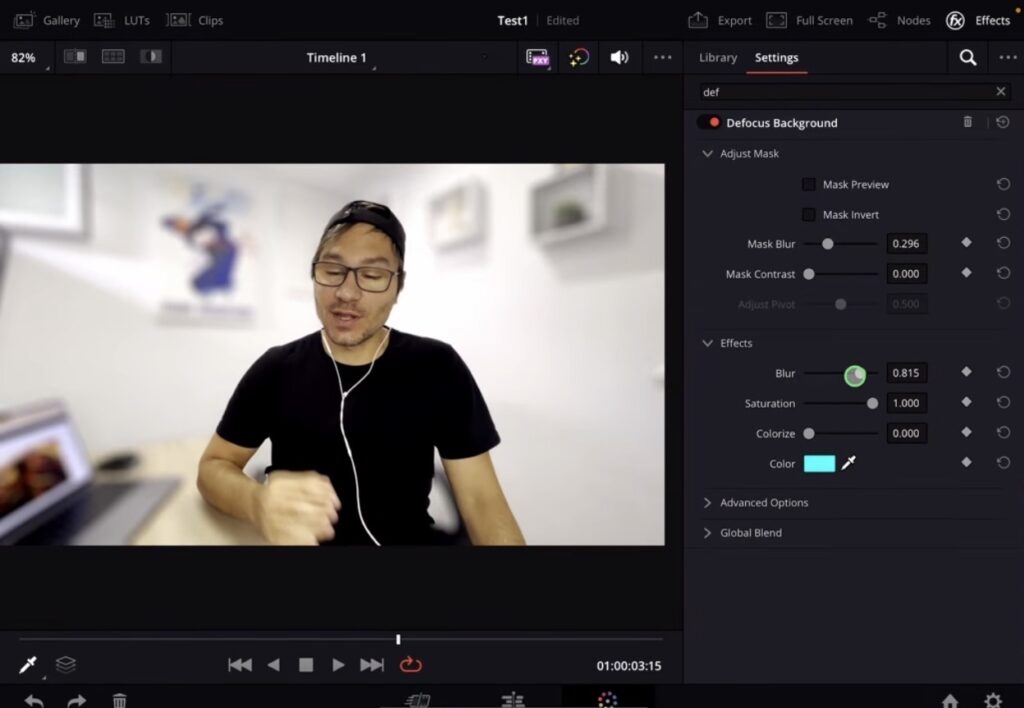
Tips for Natural Looking Background Blur
Keep the blurriness at a subtle level for the most natural look. If you push it too high, it can look unnatural. Also keep in mind that real camera blur depends on the distance between your subject and the background. If the wall behind you is very close, even a real camera will not create much blur. So adjust the effect accordingly to match what would look realistic.
Tip: If you don’t know how to get the other pages (FUSION, FAIRLIGHT, EDIT) on the iPad read this article first: How to UNLOCK ALL PAGES in DaVinci Resolve for iPad Pro
If you want to host your own Online Course use CC360
I really believe, that CC360 is the best Platform to host your own Online Course currently on the market. And each week they introduce new features. Amazing. Check it out here.
BONUS: All DaVinci Resolve iPad Masterclass Students get the Transition Pack & the 8K Film Grain Pack for FREE!
You can either get the Transition Pack separate here: Seamless Transition Pack for DaVinci Resolve iPad. Or the 8K Film Grain Pack here: 8K Film Grain Bundle. but all of our DaVinci Resolve iPad Packs are a FREE Bonus for the DaVinci Resolve iPad Masterclass Students.
Check It Out here DaVinci Resolve iPad MasterClass: From Beginner To Pro.
Read Next
• How COPY Color Grade to MULTIPLE Clips in DaVinci Resolve iPad
• DO THIS to make DaVinci Resolve FASTER! (Instead of rage smashing your iPad)
• How To Delete Cache Files in DaVinci Resolve iPad
• How To Color Correct iPhone Footage in DaVinci Resolve iPad
• Easy Sync Audio & Video in DaVinci Resolve iPad