How To Color Correct iPhone Footage in DaVinci Resolve iPad
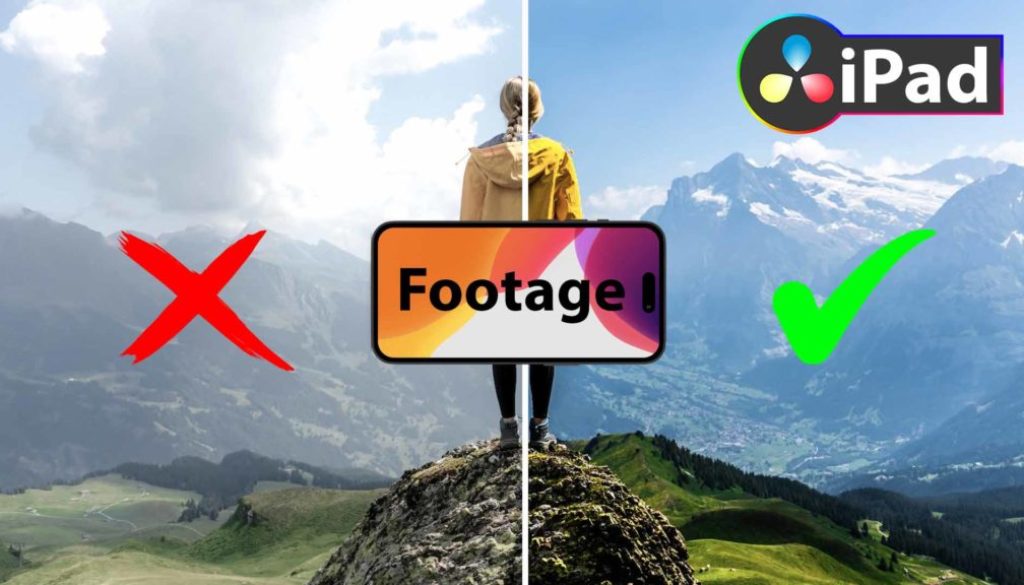
In this article i will show you how you can color correct the HDR iPhone Footage that looks completly burned when you bring it into DaVinci Resolve for the iPad.
Contents
[Video] How To Fix iPhone Footage in DaVinci Resolve iPad
Why does the footage even looks washed out?
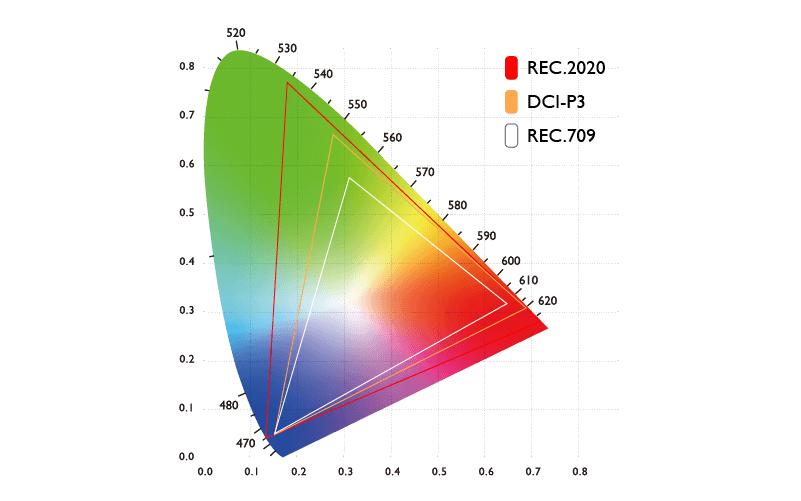
When i preview my clips in the Photos App of my iPad all looks good. But when i bring the Clips into DaVinci Resolve the clips seem burned and washed out. The reason this is happening because the default Timeline Settings in DaVinci Resolve is a Rec.709 Color space. Which is still the most common used Color Space in TV and Movies. But the iPhone Pro is capable in shooting HDR Videos which is in a different color space. See the Screenshot above. The area of Rec.709 is smaller. This is all the colours you can see in a Rec.709 footage. So a Clip that is shoot in Rec.2020 has more colours and luminance information.
Solution? Either change the Timeline settings to Rec.2020 or change the color space for the individual clips. Because most TV’s and screens can’t even show the HDR Footage, i would recommend the second solutions and today i show you how this works.
Step 1: Bring the Clips to the Timeline and go to the Color Page of DaVinci Resolve for the iPad
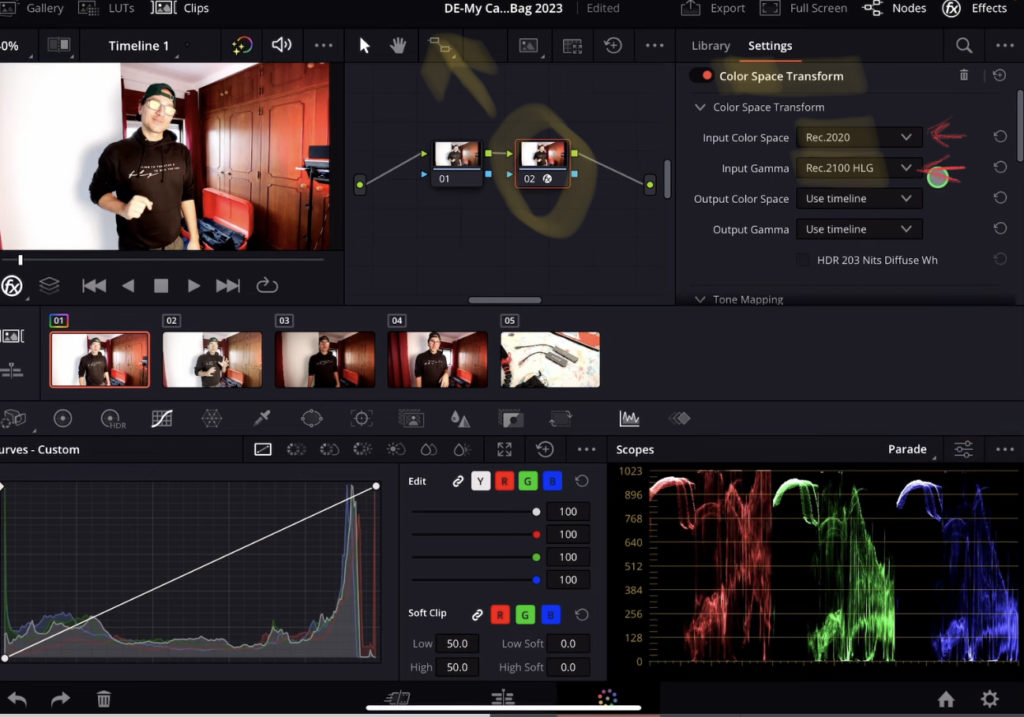
Add a new node (Command + S) or the icon on the Top. See screenshot. Add the Effect Color Space Transform to that Node and change the values for:
- Input Color Space: Rec.2020
- Input Gamma: Rec.2100 HLG
- Gammut Methode: Saturation Compression
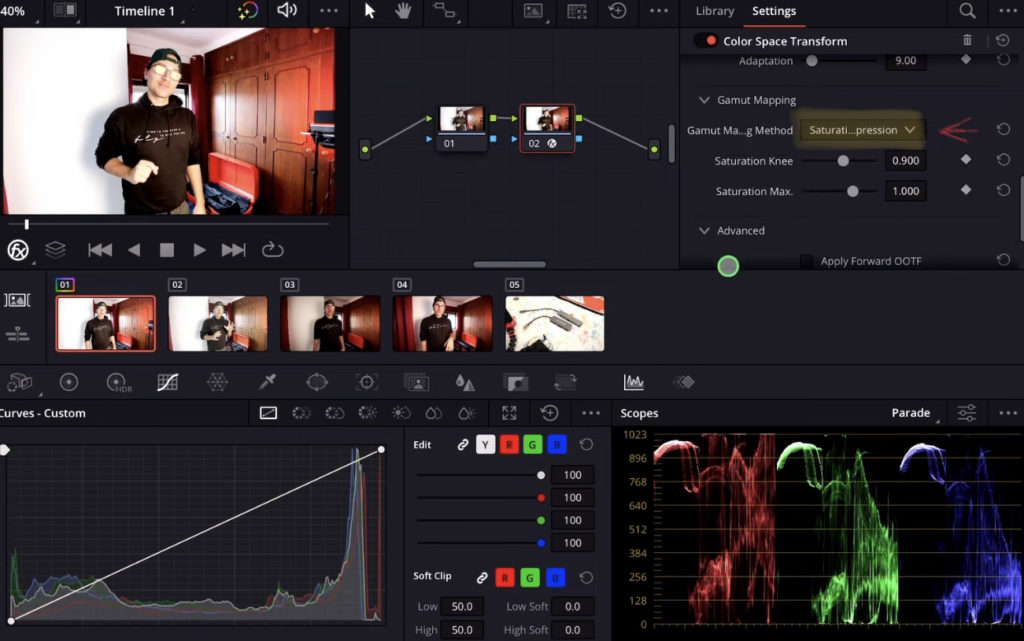
Step 2: Add some Curve adjustments
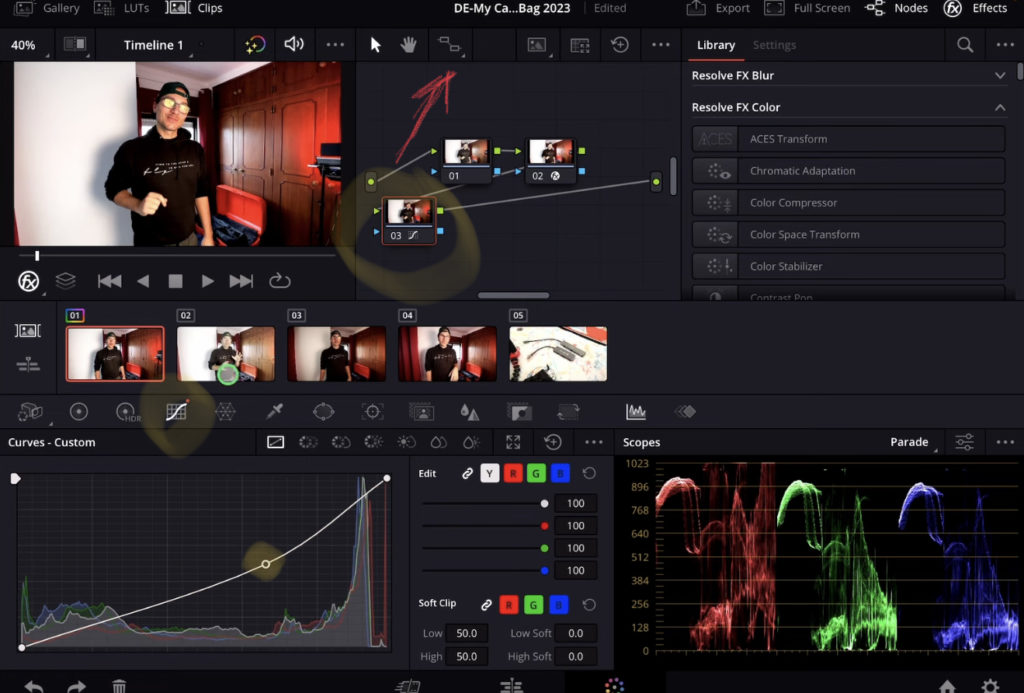
I still think that the image is a bit to bright so create another node and there we go to custom curves and add this slight darker curve to the image. Done. In most cases this is already enough. Now its up to your preferences if you want to color correct the image more.
How to Copy the Color Correction to another Clip?
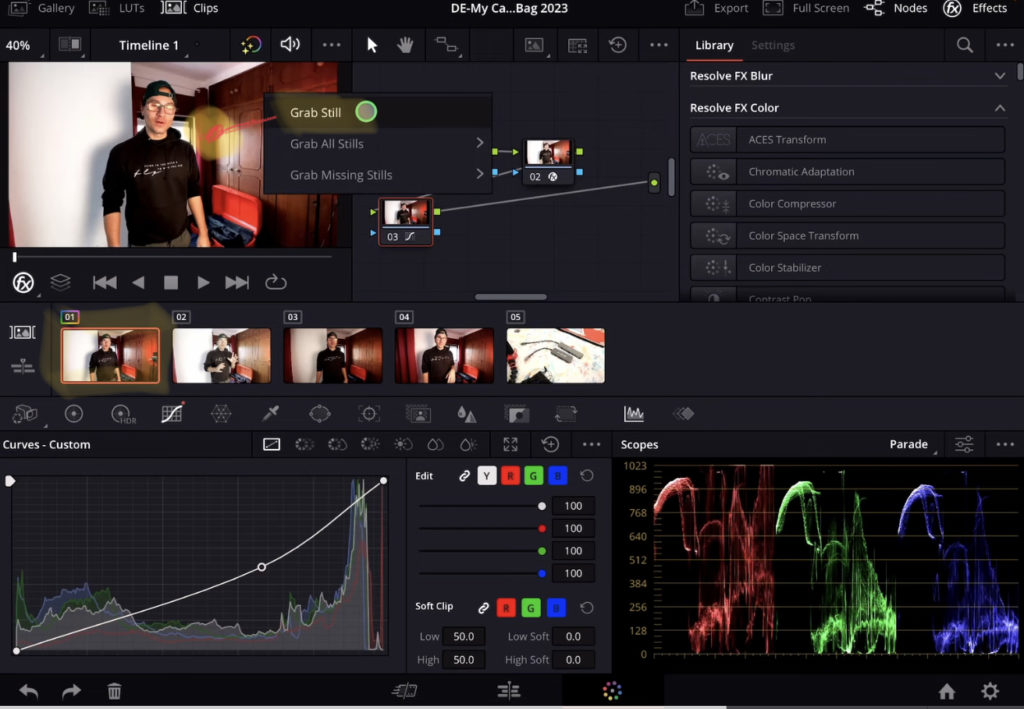
If you have multiple clips that you want to apply this just created color correction, simply click on the clip that has the color correction you want and in the viewer window right click (longer press with pencil) and select Grab Still.
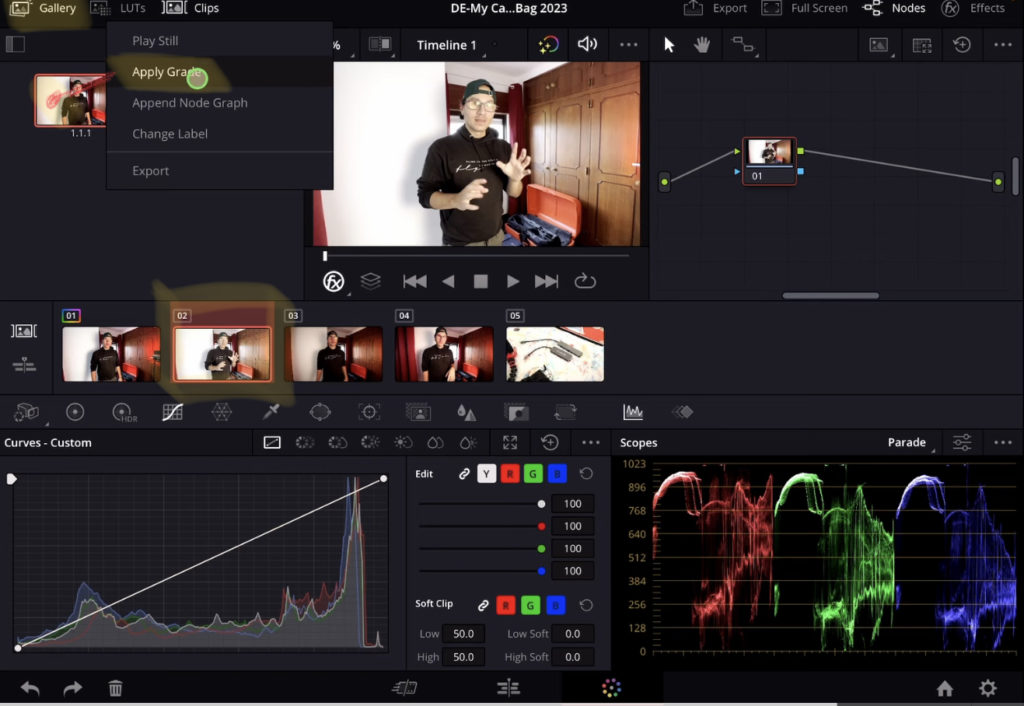
Open the Gallery and you will see the Still you just created. In order to copy that Grade mark the clips you want the new grade to be applied. Right click on the Still in the Gallery and chose Apply Grade. Now all the other clips will have the exact same Nodes and corrections on them.


