5 Hidden Keyframe Tricks in DaVinci Resolve for iPad (Loop, Ping Pong & More)
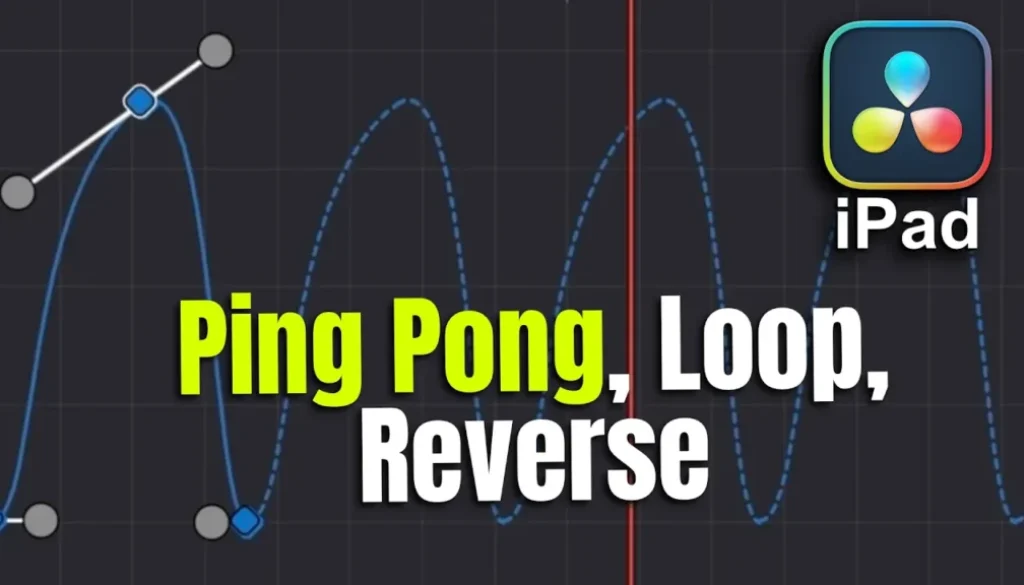
The Keyframe Editor in DaVinci Resolve for iPad got even more options. In this article I show you 5 hidden keyframe tricks: Step In and Step Out, Loop, Ping Pong, Relative, Reverse and the new Stretch tool. With these you can create repeating animations without setting dozens of keyframes by hand.
Pro Tip: Make your Videos Cinematic (and save a tone of time) with our Seamless Transition Pack for DaVinci Resolve iPad.

Contents
- [Video] 5 Hidden Keyframe Tricks in DaVinci Resolve for iPad (Loop, Ping Pong & More)
- How to open the Keyframe Editor in DaVinci Resolve for iPad
- Step In and Step Out Keyframes
- How to Loop Keyframes in DaVinci Resolve iPad
- Ping Pong Keyframes
- Relative Loop
- How to Reverse Keyframes in DaVinci Resolve iPad
- How to Stretch Keyframes with the Stretch Box
- If you want to host your own Online Course use CC360
- BONUS: All DaVinci Resolve iPad Masterclass Students get the Transition Pack & the 8K Film Grain Pack for FREE!
[Video] 5 Hidden Keyframe Tricks in DaVinci Resolve for iPad (Loop, Ping Pong & More)
How to open the Keyframe Editor in DaVinci Resolve for iPad
For this example I created a simple zoom. I set a keyframe, moved the playhead, zoomed in a bit and repeated that a few times. Then I opened the Keyframe Editor, popped it out into its own window and set it to only show parameters with keyframes. That way you don’t get overwhelmed by all the other parameters.
Step In and Step Out Keyframes
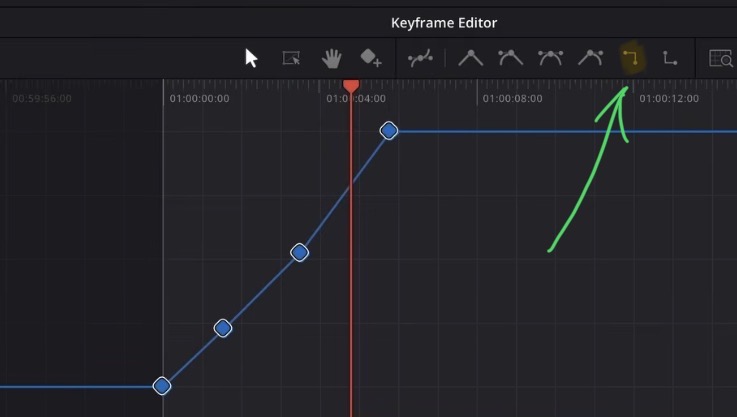
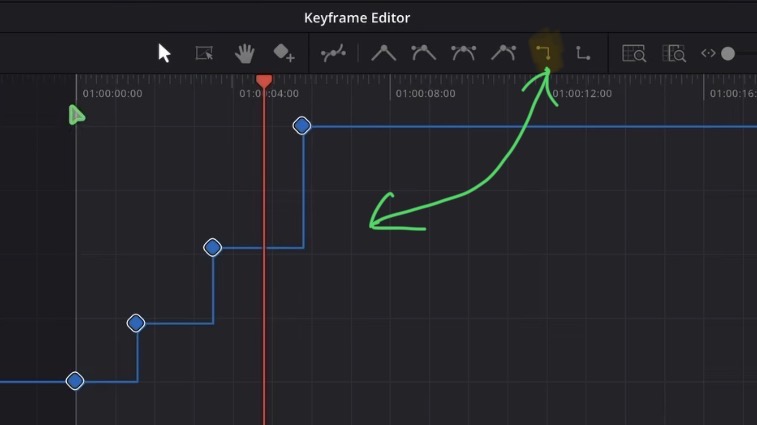
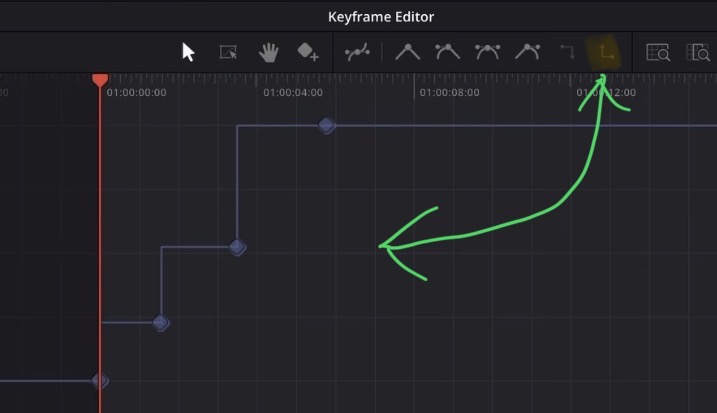
So now you have two different types of staircases you can create. Step In and Step Out don’t work with Retime Curves (and it also wouldn’t make sense there). If you want to learn more about Retime Curves read this: Smooth Speed Ramps on iPad with Bezier Retime Curves in DaVinci Resolve
How to Loop Keyframes in DaVinci Resolve iPad
Let’s say you created a smooth zoom in and zoom out. I used Ease In and Ease Out on my keyframes for that (here is how: How to Ease In & Out on Keyframes in DaVinci Resolve iPad). Now you want to repeat exactly this animation as long as the clip goes. Instead of creating all these keyframes again, you can just loop them.
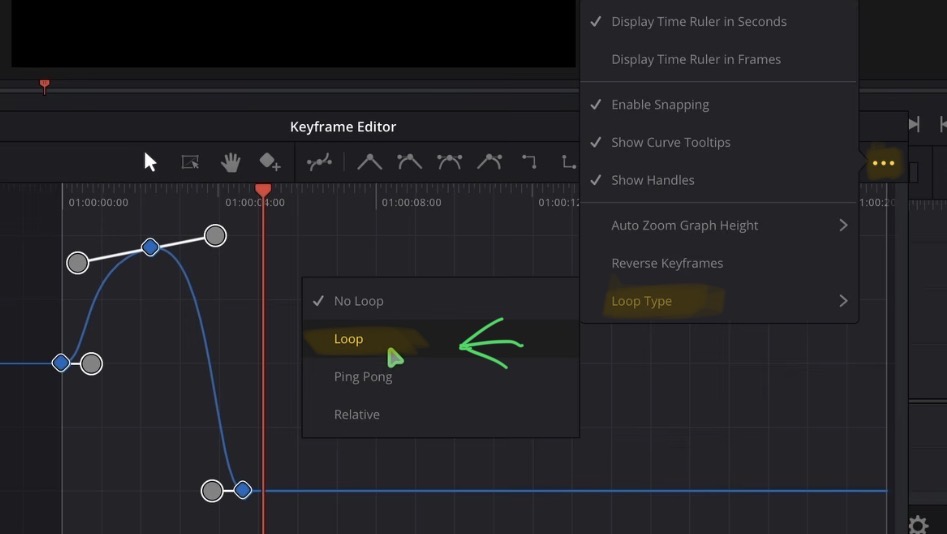
• Loop = Repeats your animation exactly and jumps back to the first keyframe each time
• Ping Pong = Plays your animation forward, then backward, then forward again
• Relative = Each repeat continues from where the last one ended
• Non-Loop = No repeat, back to a normal animation
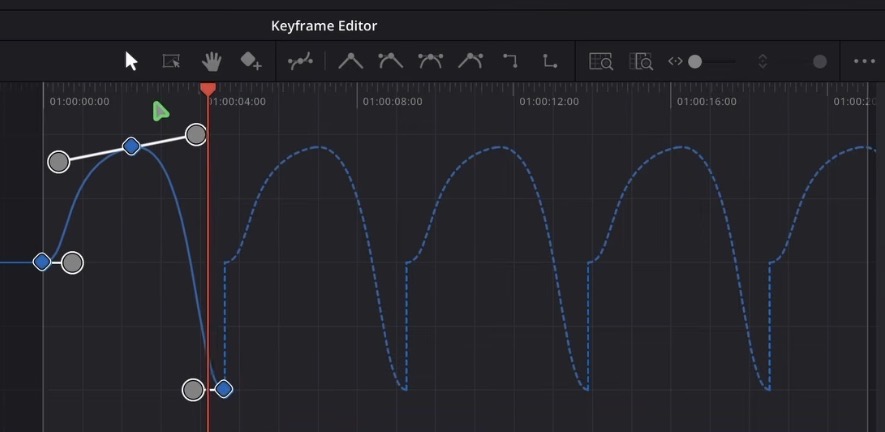
Loop copies exactly what you created. At the end it jumps back to the first position and starts again. That’s why you should move your last keyframe to the same value as your first one. Then the loop is smooth from end to beginning. And the best part: you can still change your original keyframes afterwards and every repeat updates with it.
Ping Pong Keyframes
If your first and last keyframe don’t match, a normal Loop will look awkward because of the jump. That’s where Ping Pong comes in. It smooths everything out because it goes forward, then backward, then forward again. You don’t need a matching start and end.
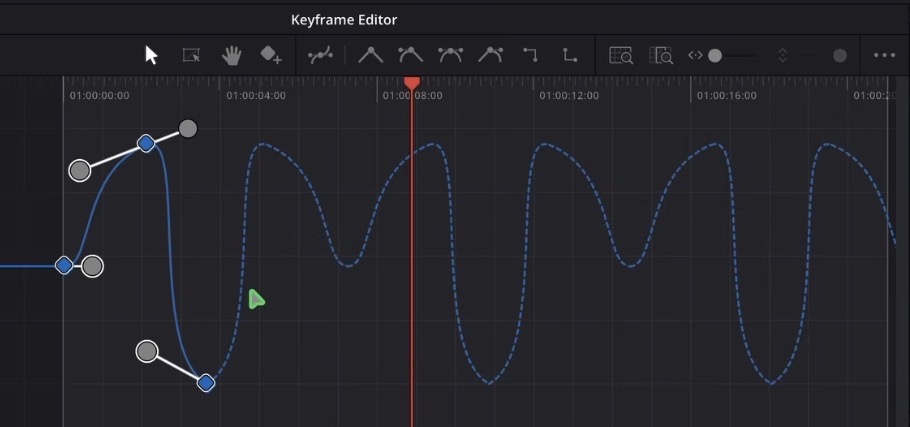
Just like with Loop, you can still adjust the original keyframes afterwards and the whole ping pong animation changes with it.
Relative Loop
Relative doesn’t jump back to the start. Every repeat continues from where the last one ended. In my example the animation has a tendency to go downwards, so the video zooms out more and more with every repeat. That’s actually a very cool effect to bring your video out at the end.
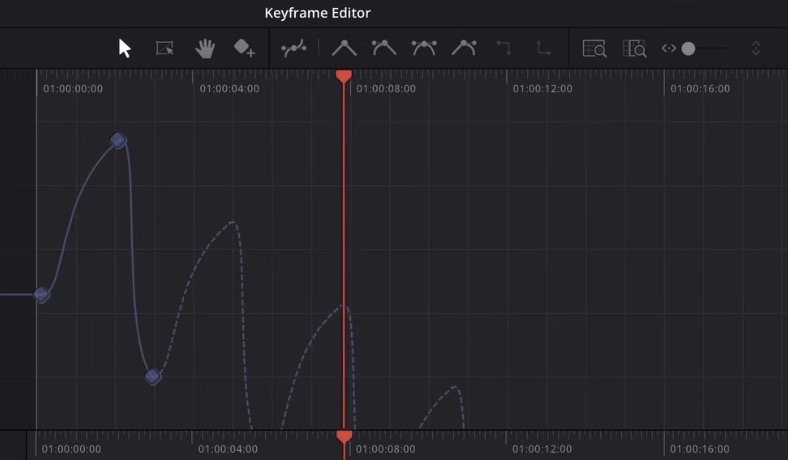
The difference between Loop, Ping Pong and Relative is much easier to understand when you see it moving. So check out the video above to see all three loop types in action.
How to Reverse Keyframes in DaVinci Resolve iPad
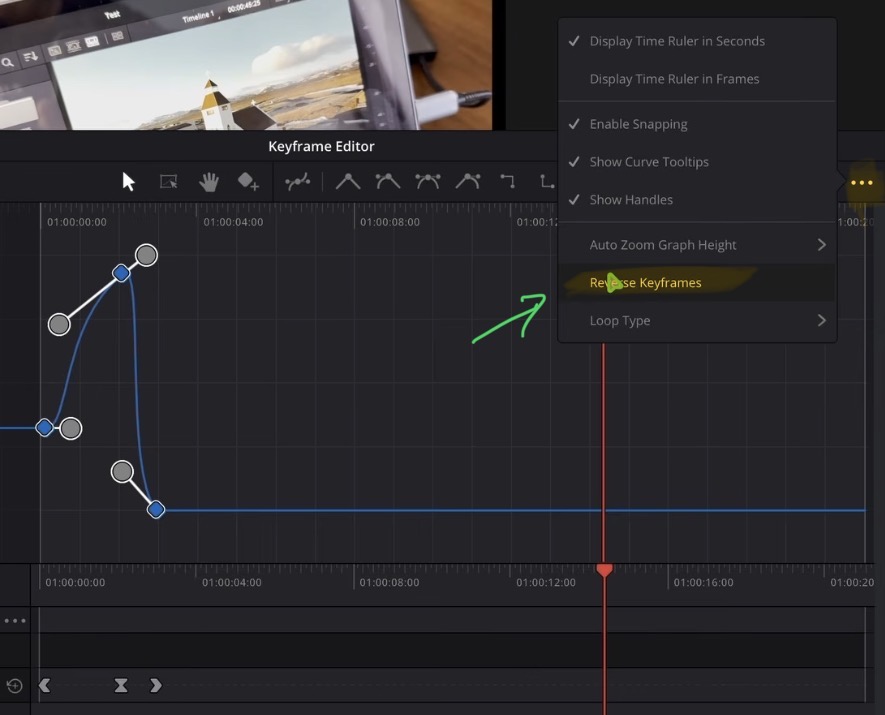
If you don’t want any loop anymore, set the Loop Type back to Non-Loop. Then select your keyframes, tap the three dots and choose Reverse Keyframes. The last keyframe becomes the first one, the first one becomes the last one and the middle one stays in the middle. All of that with just one button.
How to Stretch Keyframes with the Stretch Box
Stretch is a new tool in the Keyframe Editor. With it you draw a box around your keyframes and then reshape the box. All keyframes inside always stay inside the box and change with it.
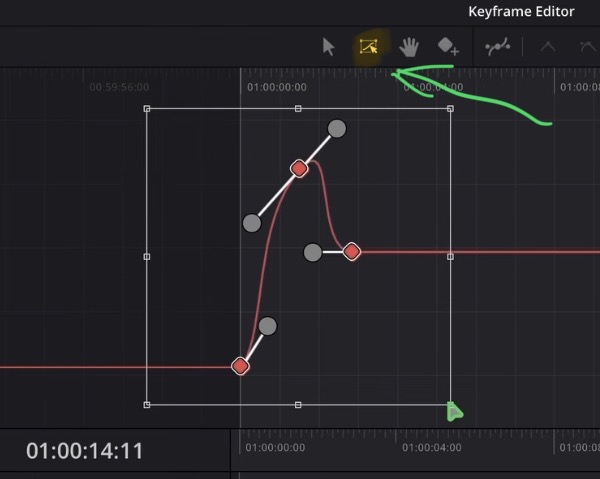
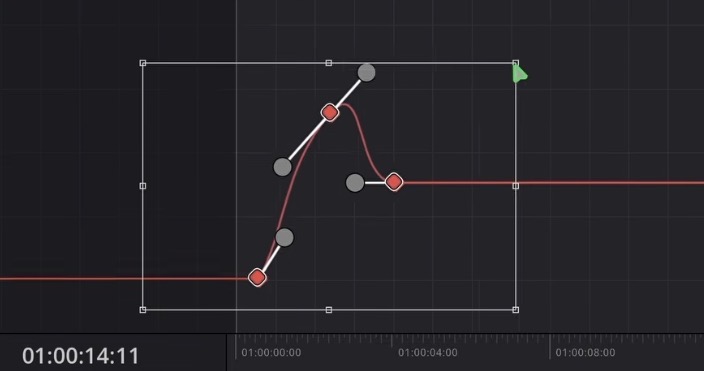
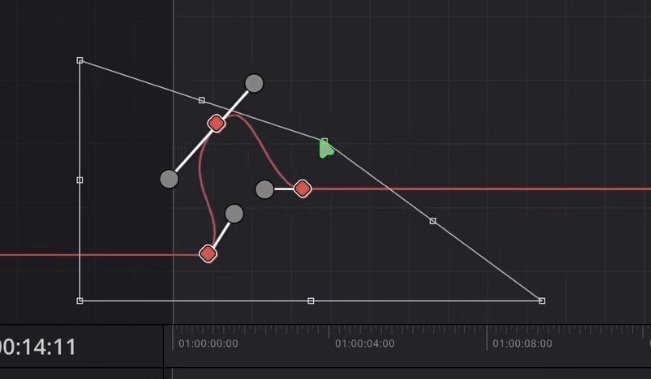
Imagine what you can do with all of this. And you can do all of it right here on the iPad.
Tip: If you don’t know how to get the other pages (FUSION, FAIRLIGHT, EDIT) on the iPad read this article first: How to UNLOCK ALL PAGES in DaVinci Resolve for iPad Pro
If you want to host your own Online Course use CC360
I really believe, that CC360 is the best Platform to host your own Online Course currently on the market. And each week they introduce new features. Amazing. Check it out here.
BONUS: All DaVinci Resolve iPad Masterclass Students get the Transition Pack & the 8K Film Grain Pack for FREE!
You can either get the Transition Pack separate here: Seamless Transition Pack for DaVinci Resolve iPad. Or the 8K Film Grain Pack here: 8K Film Grain Bundle. but all of our DaVinci Resolve iPad Packs are a FREE Bonus for the DaVinci Resolve iPad Masterclass Students.
Check It Out here DaVinci Resolve iPad MasterClass: From Beginner To Pro.
Read Next
• How COPY Color Grade to MULTIPLE Clips in DaVinci Resolve iPad
• DO THIS to make DaVinci Resolve FASTER! (Instead of rage smashing your iPad)
• How To Delete Cache Files in DaVinci Resolve iPad
• How To Color Correct iPhone Footage in DaVinci Resolve iPad
• Easy Sync Audio & Video in DaVinci Resolve iPad