
Smooth Speed Ramps on iPad: Bezier Retime Curves in DaVinci Resolve
The Keyframe Editor in DaVinci Resolve for iPad finally got a big update. In this article/video I will show you how to create smooth speed ramps with the new 4-point Bezier retime curves, how to edit keyframes on multiple clips at the same time and how to keyframe Fusion effects right in the Keyframe Editor.
Pro Tip: Make your Videos Cinematic (and save a tone of time) with our Seamless Transition Pack for DaVinci Resolve iPad.

Contents
- [Video] Smooth Speed Ramps on iPad: Bezier Retime Curves in DaVinci Resolve
- What’s new in the Keyframe Editor of DaVinci Resolve iPad?
- Where to find the Keyframe Editor in the Cut Page
- How to make the Keyframe Editor bigger in the Edit Page
- How to create Speed Ramps with the Retime Controls
- How to make Smooth Speed Ramps with Bezier Curves (Ease In and Ease Out)
- How to play a Clip Forward and Backward in one Clip
- Keyframe Editor in the Timeline: Handles don’t work yet on iPad
- How to edit Keyframes on Multiple Selected Clips
- How to Keyframe Fusion Effects in the Keyframe Editor
- If you want to host your own Online Course use CC360
- BONUS: All DaVinci Resolve iPad Masterclass Students get the Transition Pack & the 8K Film Grain Pack for FREE!
[Video] Smooth Speed Ramps on iPad: Bezier Retime Curves in DaVinci Resolve
What’s new in the Keyframe Editor of DaVinci Resolve iPad?
• Keyframes and curves support for 4-point Bezier retime curves (smooth speed ramps)
• Edit the keyframes of multiple selected clips at the same time
• Keyframe Fusion effect parameters directly in the Keyframe Editor
Where to find the Keyframe Editor in the Cut Page
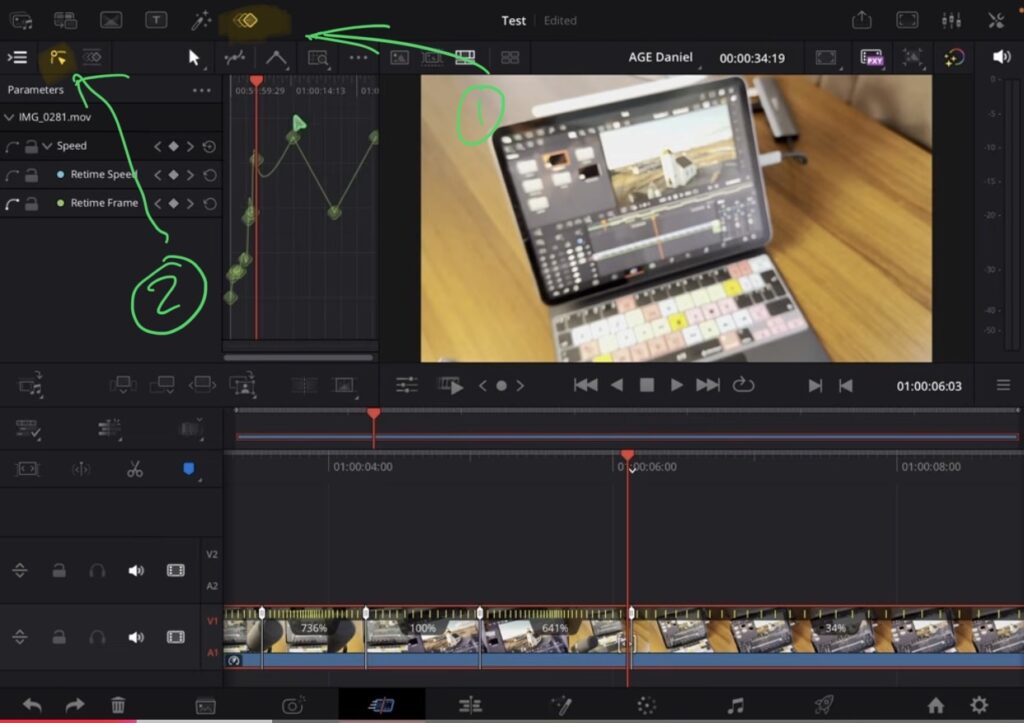
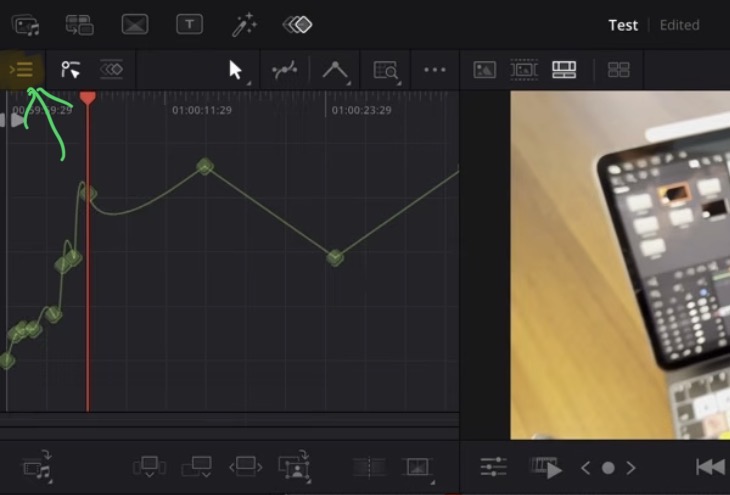
You can hide the parameters to get a bit more space. But on a smaller iPad I still find the Keyframe Editor in the Cut Page way too small to really work with it. That’s why I do my speed ramps in the Edit Page.
How to make the Keyframe Editor bigger in the Edit Page
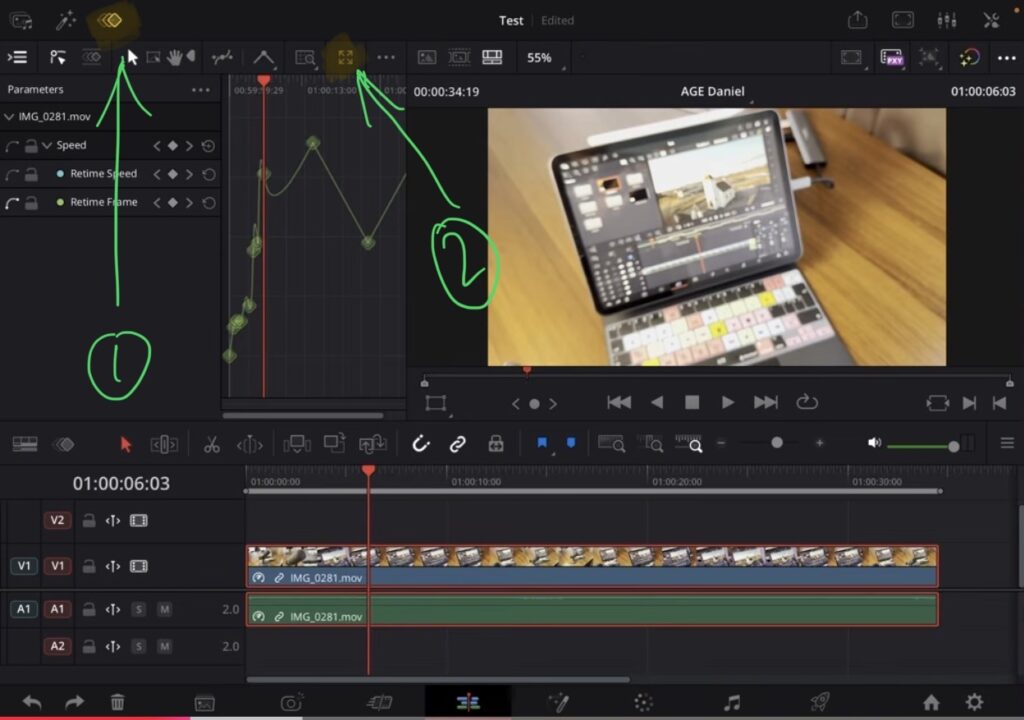
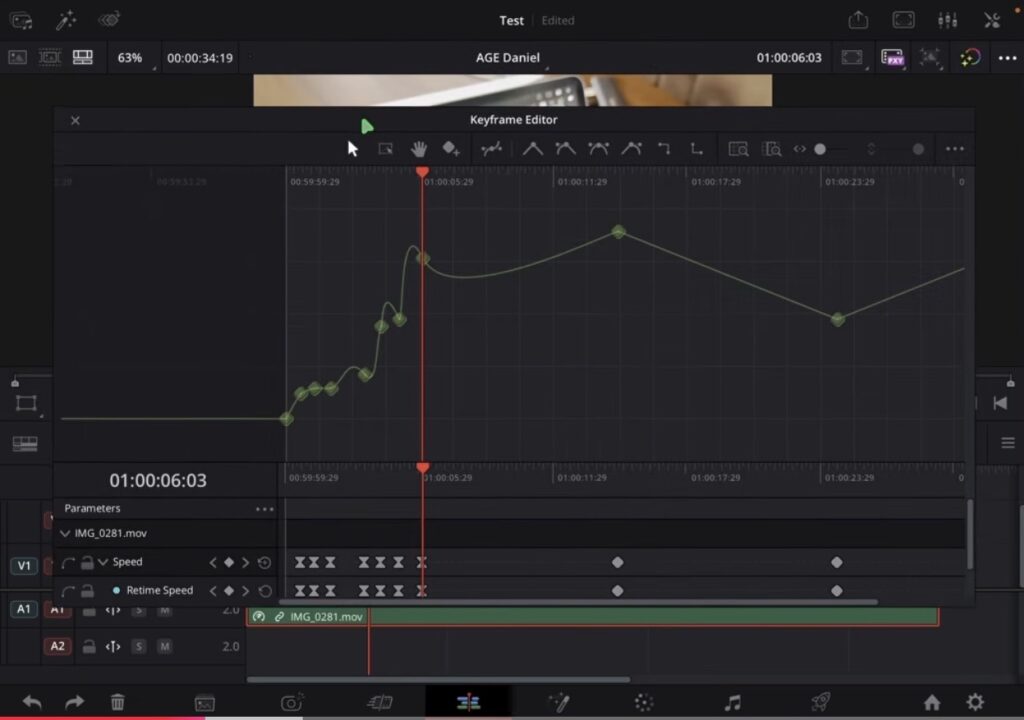
The cool thing about this window: you see the keyframes on top and the parameters on the bottom. If you don’t need the parameters, just make that area smaller. Or use a second screen for previewing and use this whole window for your speed ramps.
Tip: If you don’t know how to get the other pages (FUSION, FAIRLIGHT, EDIT) on the iPad read this article first: How to UNLOCK ALL PAGES in DaVinci Resolve for iPad Pro
How to create Speed Ramps with the Retime Controls
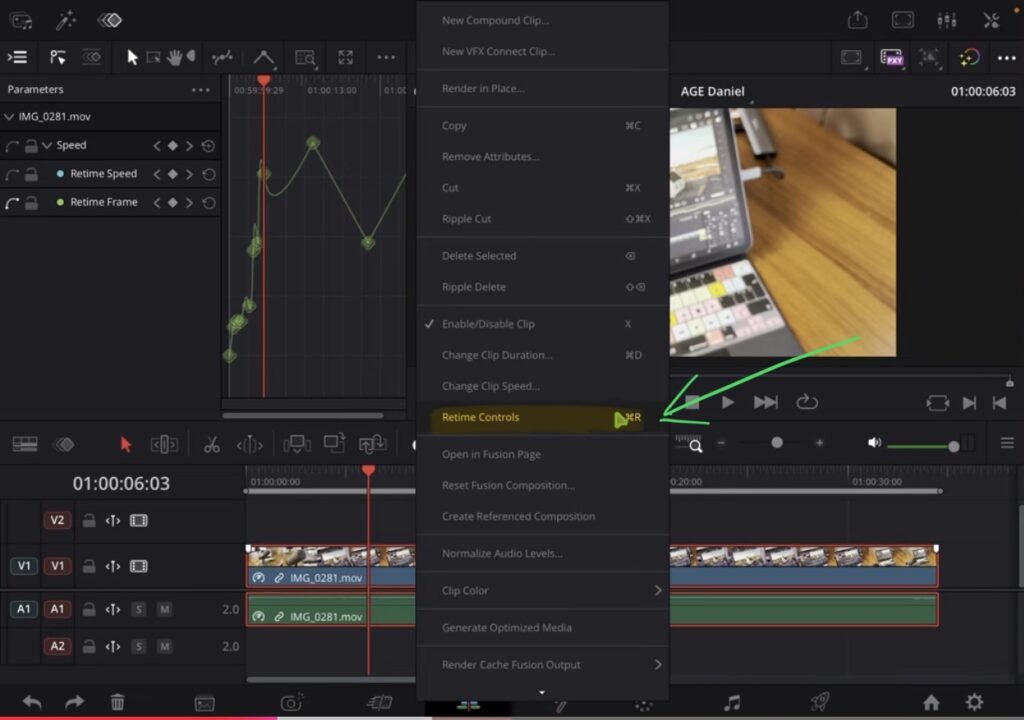
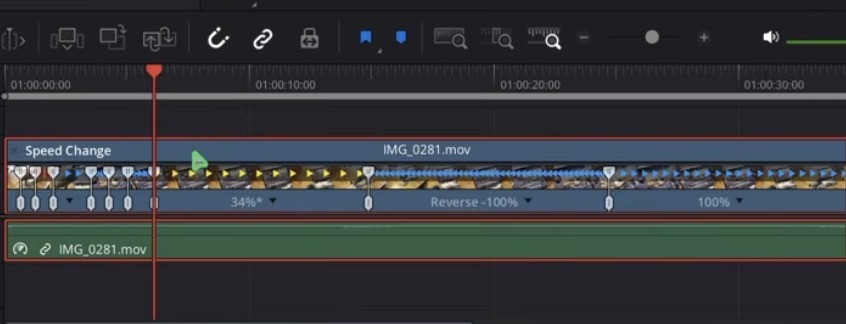
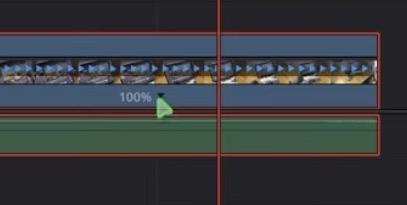
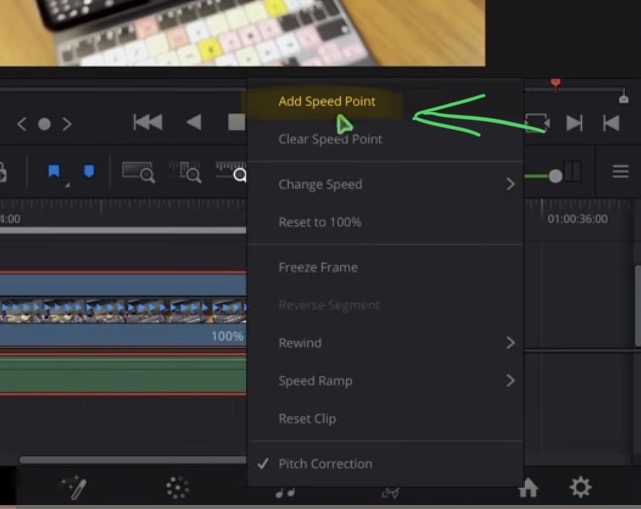
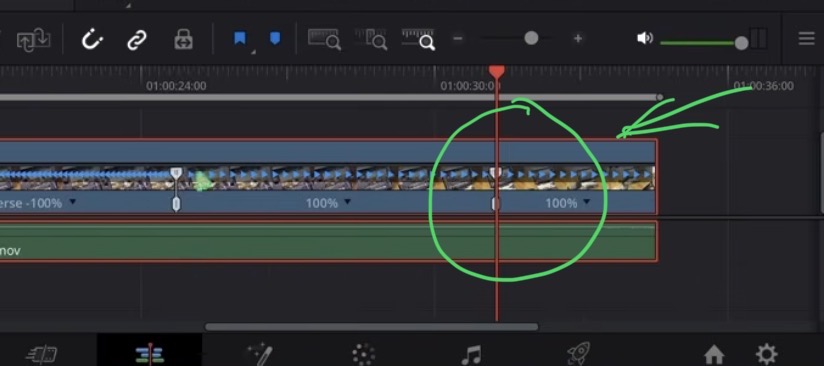
This gives you a hard speed ramp without any ease in or ease out. That was already possible before and you don’t even need the Keyframe Editor for it. If you want to change where the fast part begins and ends instead of the speed, drag the bottom part of the speed point.
How to make Smooth Speed Ramps with Bezier Curves (Ease In and Ease Out)
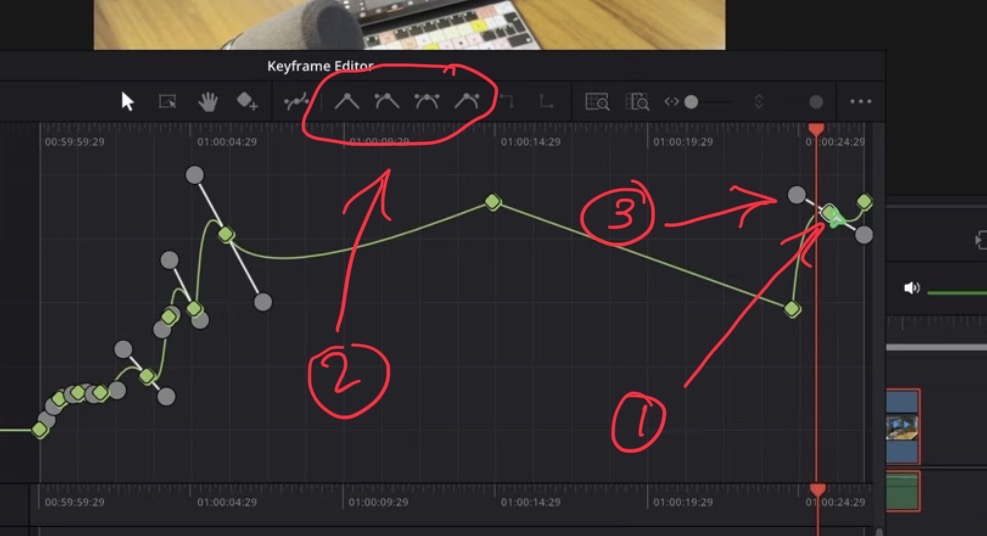
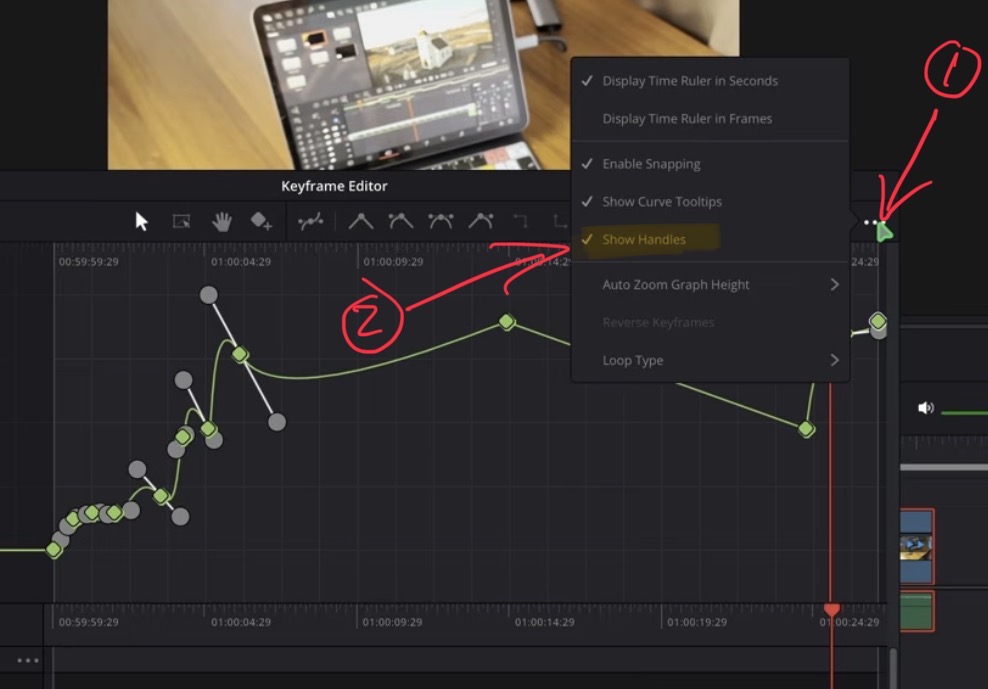
This is massive. Before you had to use a shortcut to grab one side of a handle. Now the handles are bigger and you can just drag them. If you don’t see any handles, tap the three dots and make sure Show Handles is enabled.
How to play a Clip Forward and Backward in one Clip
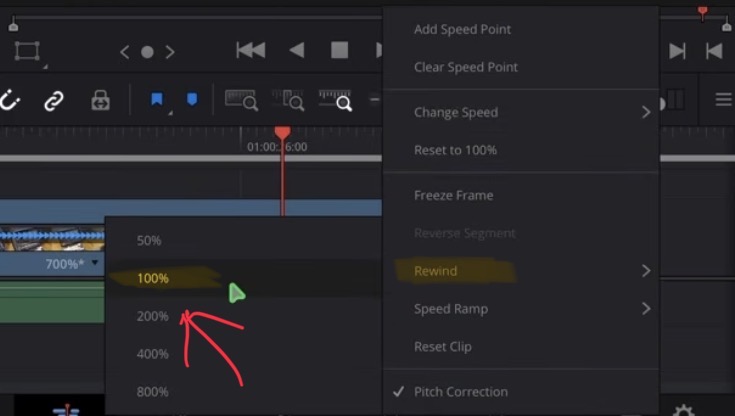
Inside the reverse part you can add more speed points and use ease in and ease out like before. This way I created a clip that moves forward, backward and forward again with smooth speed changes and freeze frames. All in one clip, without chopping it up. This is hard to show in screenshots, so watch the video to see how it looks in action. I will also make a separate video about advanced speed ramping in the future.
Keyframe Editor in the Timeline: Handles don’t work yet on iPad
In the Edit Page you can also open the Keyframe Editor directly in the timeline. It works like on the desktop and has the same zoom as your timeline. But on the iPad there is still one big problem: you can add and change points, but you cannot drag the handles. For that you still have to use the pop out Keyframe Editor. Maybe they fix this in the future.
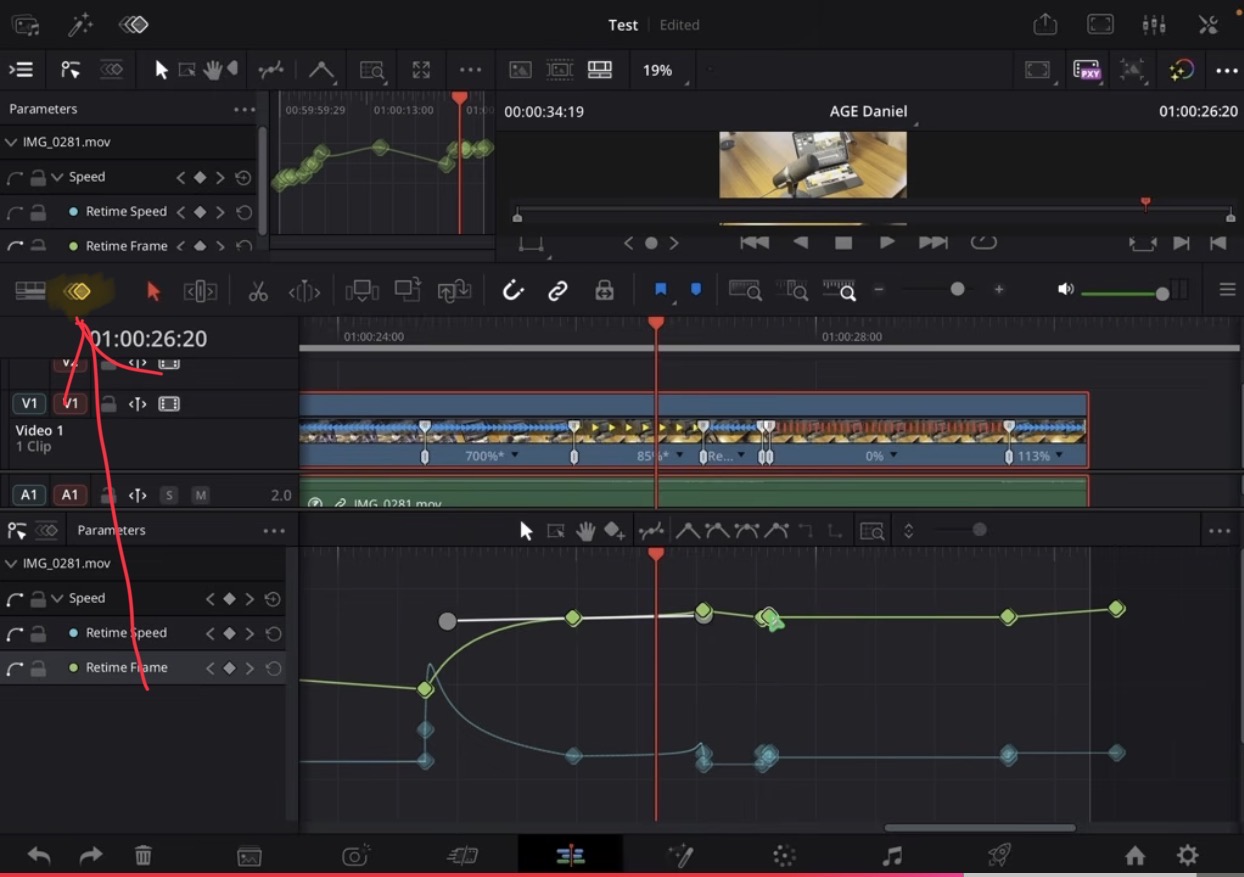
So my workflow on a smaller iPad is: pop out the Keyframe Editor, make it big, place it so I still see a bit of my video and then play the timeline and set all my points.
How to edit Keyframes on Multiple Selected Clips
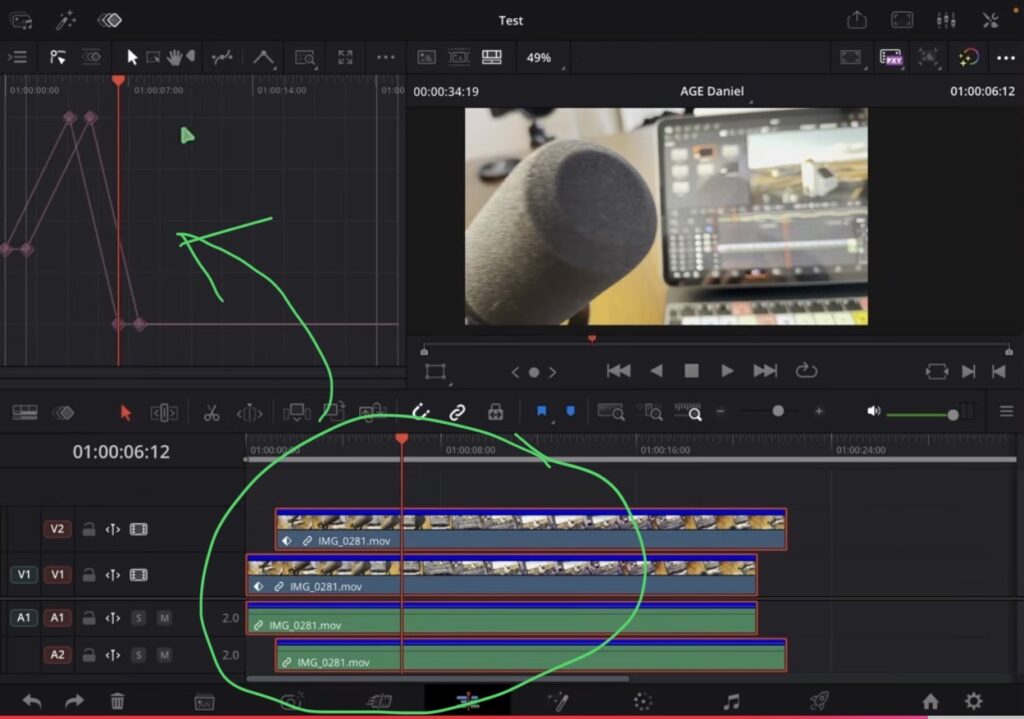
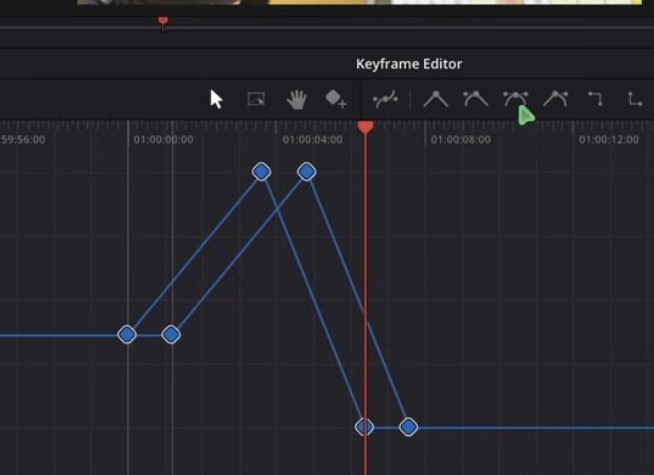
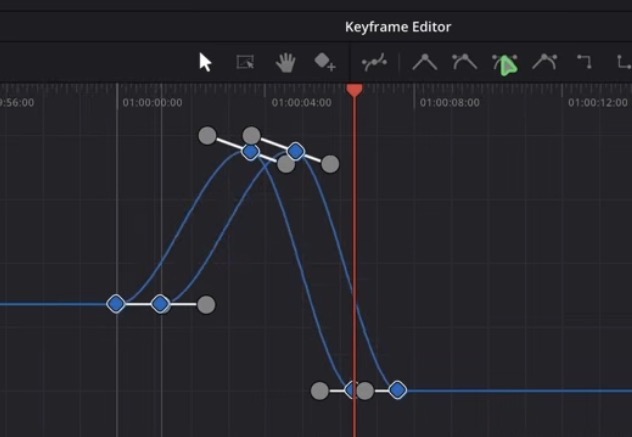
In my example I added three zoom keyframes in the Inspector under Transform and put a second clip on the track above. Select all points to add ease in and ease out to both clips at once, or move everything around together. This works with speed ramps and any other keyframes. I have never seen any program that does this.
How to Keyframe Fusion Effects in the Keyframe Editor
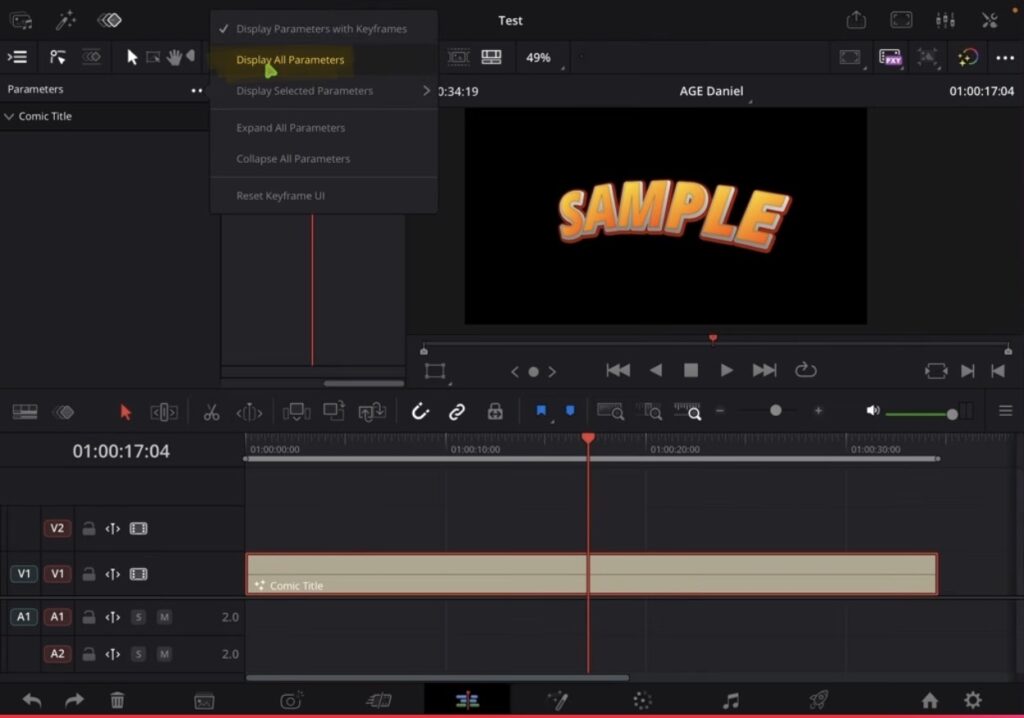
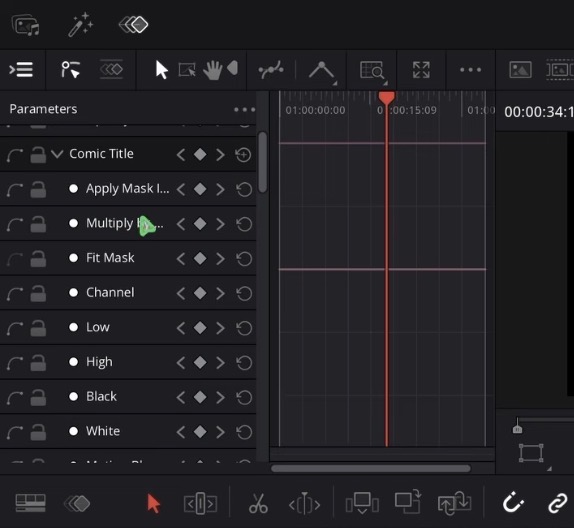
Fusion titles, generators and effects use the power of the Fusion Page. Before, you had to use the Keyframe Editor in the Fusion Page to animate them. Now you can keyframe these parameters right in the normal Keyframe Editor. It doesn’t work for everything from the Fusion Page yet, but this is the right step toward one Keyframe Editor for everything in DaVinci Resolve.
If you want to host your own Online Course use CC360
I really believe, that CC360 is the best Platform to host your own Online Course currently on the market. And each week they introduce new features. Amazing. Check it out here.
BONUS: All DaVinci Resolve iPad Masterclass Students get the Transition Pack & the 8K Film Grain Pack for FREE!
You can either get the Transition Pack separate here: Seamless Transition Pack for DaVinci Resolve iPad. Or the 8K Film Grain Pack here: 8K Film Grain Bundle. but all of our DaVinci Resolve iPad Packs are a FREE Bonus for the DaVinci Resolve iPad Masterclass Students.
Check It Out here DaVinci Resolve iPad MasterClass: From Beginner To Pro.
Read Next
• How COPY Color Grade to MULTIPLE Clips in DaVinci Resolve iPad
• DO THIS to make DaVinci Resolve FASTER! (Instead of rage smashing your iPad)
• How To Delete Cache Files in DaVinci Resolve iPad
• How To Color Correct iPhone Footage in DaVinci Resolve iPad
• Easy Sync Audio & Video in DaVinci Resolve iPad


![Grainy Night Shots? [This Fixes It!]](https://exlima.net/wp-content/uploads/2026/10/Grainy-Night-Shots-This-Fixes-It-1024x576-394x330.webp)