![How to Install Phoenix Flow App to Mac? [Solved]](https://exlima.net/wp-content/uploads/2026/09/How-to-Install-Phoenix-Flow-App-to-Mac-Solved-1024x576-1024x585.webp)
How to Install Phoenix Flow App to Mac? [Solved]
In this article/video I will show you how to install the Phoenix Flow app on your Mac. This is the complete installation guide with every step you have to take, so the app works properly from the first minute.
Get Phoenix Flow (Early Access): 100% private dictation for your Mac. One-time payment, no subscription.
Contents
- [Video] How to Install Phoenix Flow App to Mac? [Solved]
- Where to download Phoenix Flow
- How to install the Phoenix Flow DMG file
- Fix “Apple could not verify Phoenix Flow” on Mac
- Give Phoenix Flow access to your microphone
- How to record system audio with Phoenix Flow
- The 2 most important installation steps
- Don’t have Phoenix Flow yet?
[Video] How to Install Phoenix Flow App to Mac? [Solved]
If you don’t know Phoenix Flow yet: it’s a voice to text app for your Mac, like Wispr Flow, but without a monthly subscription. You can read the full overview here: I Built My Own Wispr Flow. 100% Private. No Subscription. (Early Access)
Where to download Phoenix Flow
When you purchase Phoenix Flow you get an email with your login to the dashboard. You can also log in directly on exlima.net. This is the same dashboard for every product you buy from me, courses included.
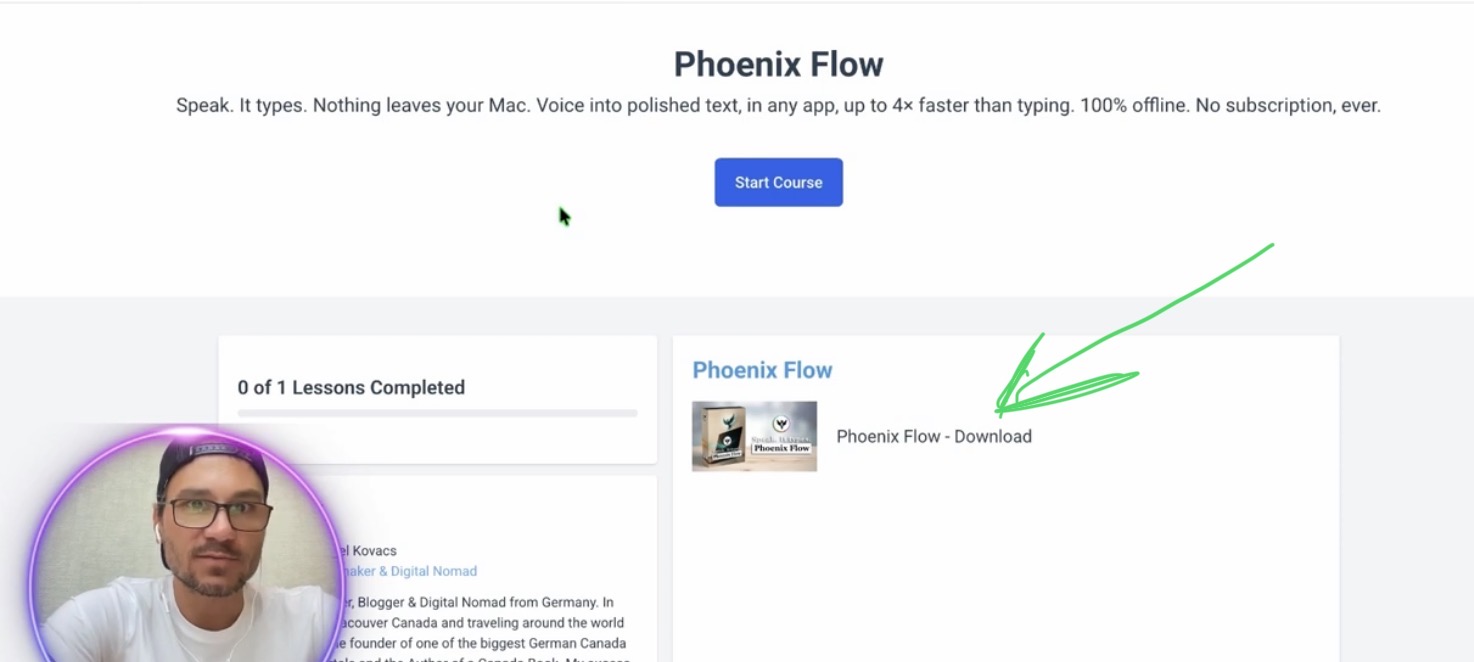
The zip file also includes a readme file with the full installation guide. So you can follow all the steps offline too.
How to install the Phoenix Flow DMG file
First double click the zip file to unzip it. Now you have the DMG file, which is the application file for your Mac. Double click the DMG file to open it.
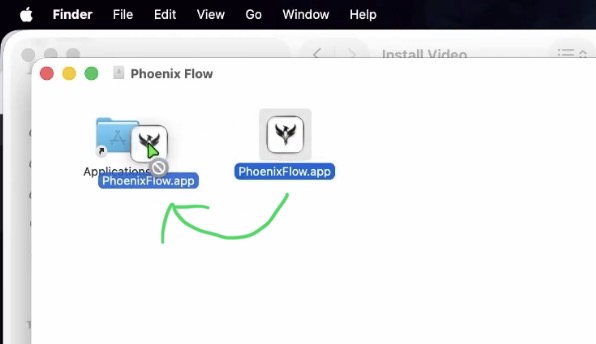
Important: Always start the Phoenix Flow app that is inside your Applications folder, not the one inside the DMG window.
Fix “Apple could not verify Phoenix Flow” on Mac
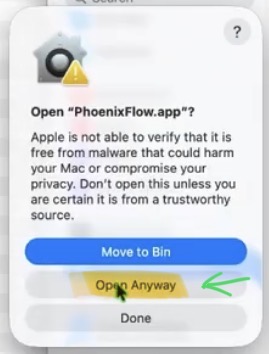
The first time you start the app, macOS will block it and tell you that Apple could not verify Phoenix Flow. This is normal. As long as Phoenix Flow is in Early Access and not yet in the App Store, Apple doesn’t trust the developer yet. So you have to give the app access manually.
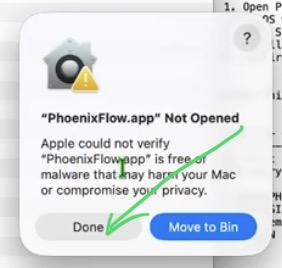
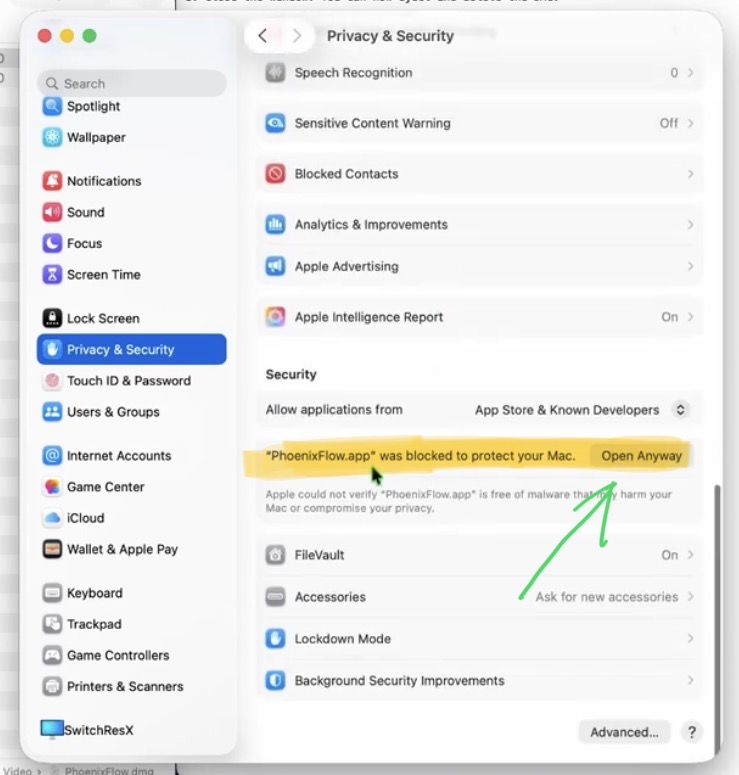
Confirm with “Open Anyway” one more time in the popup and enter your Mac password. Now the app opens.
Give Phoenix Flow access to your microphone
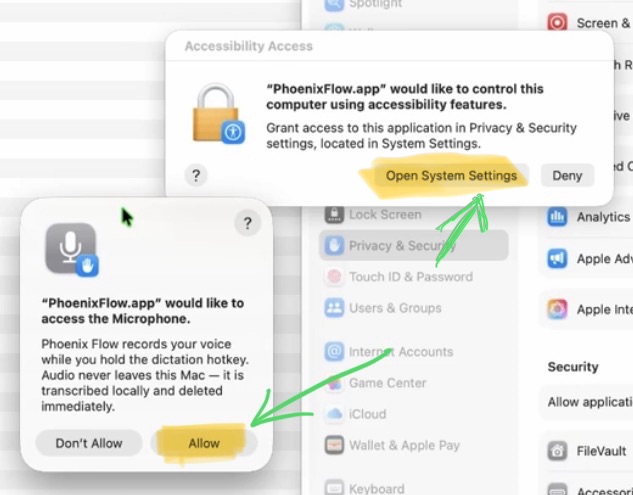
Next Phoenix Flow asks for access to your microphone. Click on “Allow”. After that it asks to control your computer. This is needed so Phoenix Flow can type the text into any app for you.
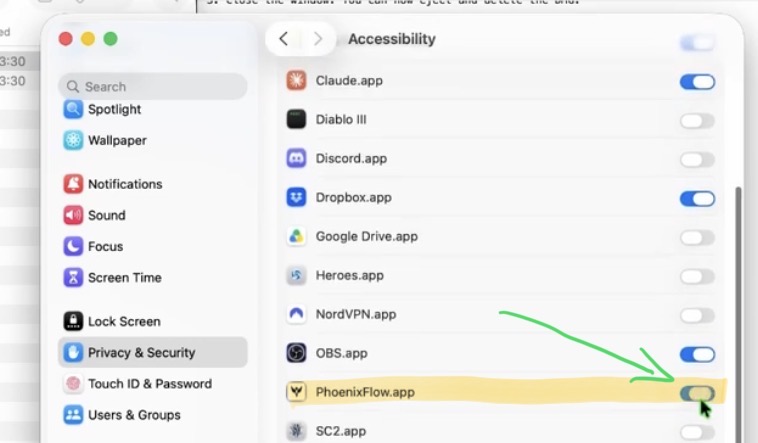
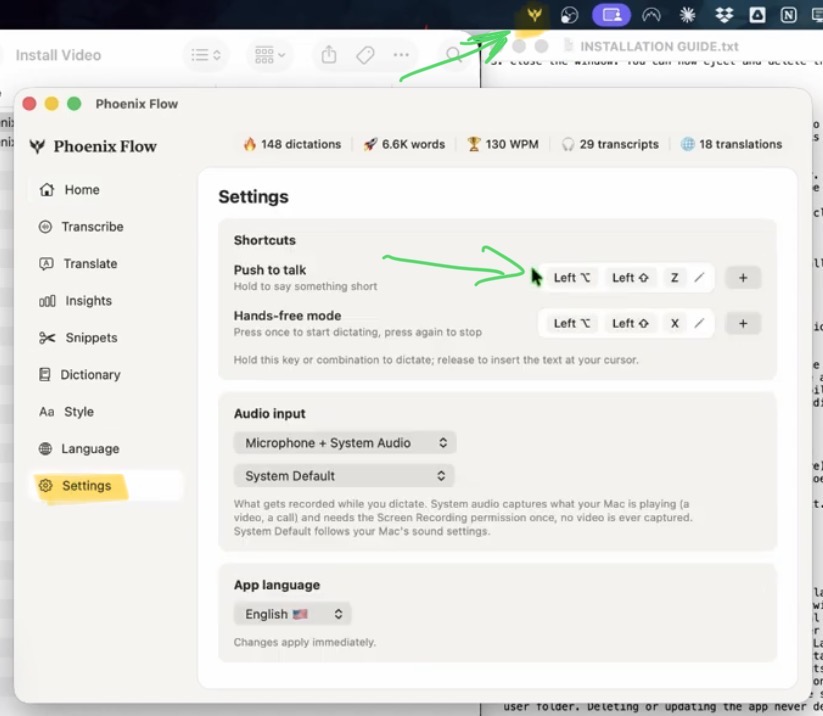
Now Phoenix Flow works. You see the Phoenix Flow icon in the menu bar at the top of your screen. From there you can open the app and change the settings, for example your push to talk button.
How to record system audio with Phoenix Flow
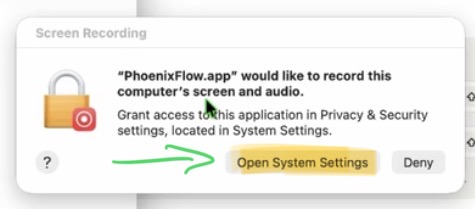
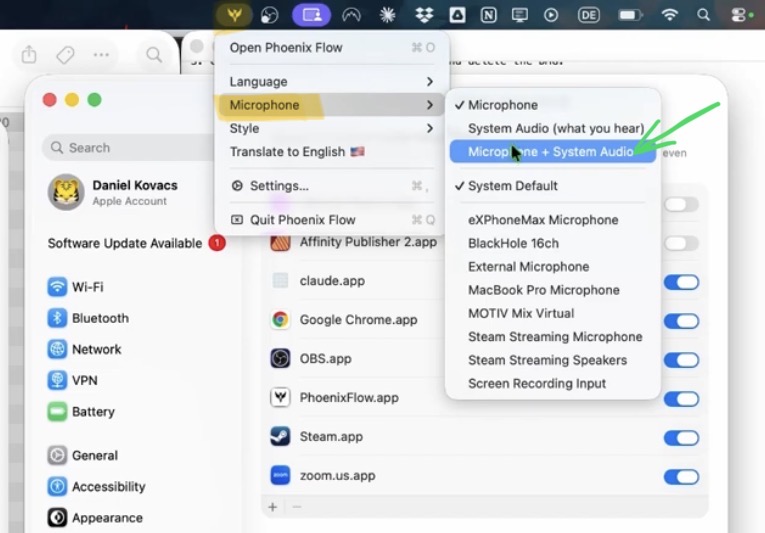
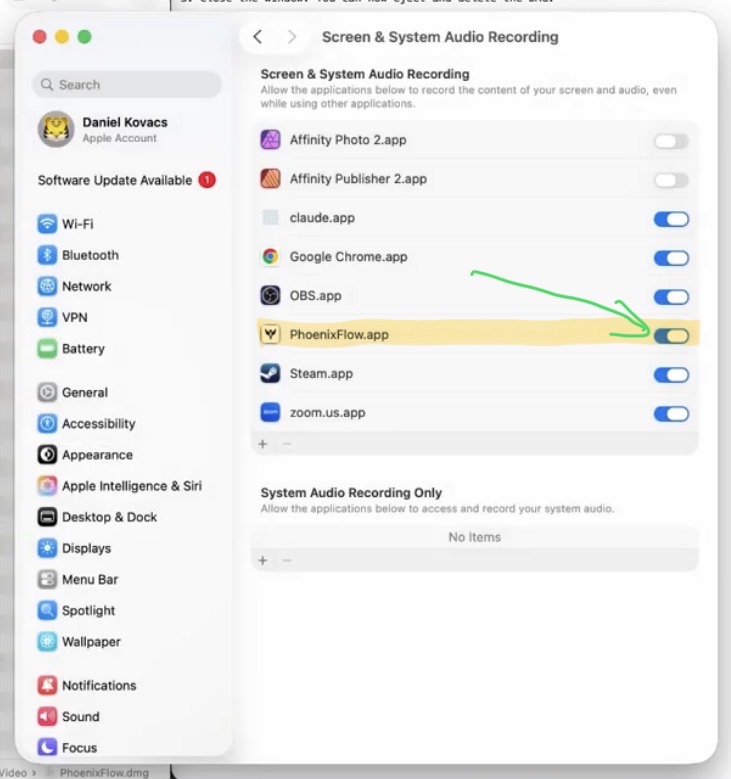
Phoenix Flow can not only listen to your microphone. It can also record the system audio of your Mac, for example from a Zoom call or a YouTube video. For that you need a second permission. When you switch the setting to system audio you get another popup. Open the settings there and give the permission.
After that you have to quit Phoenix Flow and reopen the app. Otherwise the new permission doesn’t work.
To test it, hold your push to talk button, say something and release the button. If your text shows up, the installation is done.
The 2 most important installation steps
1. Use “Open Anyway” in Privacy & Security to trust the developer.
2. Give Phoenix Flow permission for your microphone (and the system audio if you need it). Then quit and reopen the app.
That’s it. Phoenix Flow now runs in the background and is always available in your menu bar.
Don’t have Phoenix Flow yet?
Right now Phoenix Flow is in Early Access. You pay once, instead of 12 to 15 dollars per month for a subscription like Wispr Flow. It can do everything Wispr Flow can do and supports up to 100 languages. I built this app for myself, but it’s so good that I want to share it with you.
Get Phoenix Flow (Early Access): 100% private dictation for your Mac. One-time payment, no subscription.