Go BETWEEN Frames: Subframe Keyframes in DaVinci Resolve for iPad
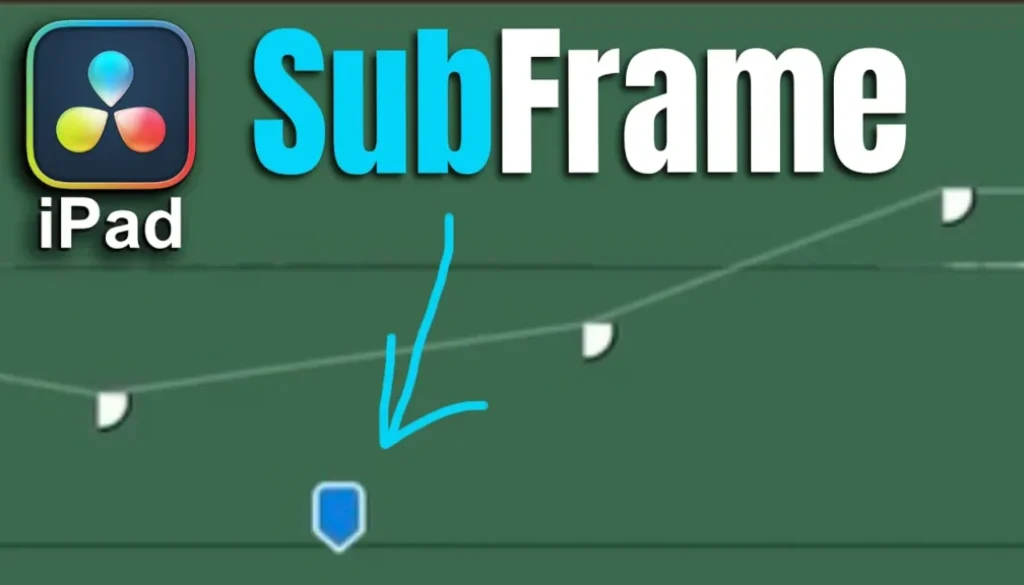
DaVinci Resolve for iPad now supports subframes for audio keyframes and markers. In this article I show you what subframes are, how to make sure they are enabled, and how to move your keyframes and markers in between frames for much more precise audio edits.
Pro Tip: Make your Videos Cinematic (and save a tone of time) with our Seamless Transition Pack for DaVinci Resolve iPad.

Contents
- [Video] Subframe Support for Keyframes & Markers in DaVinci Resolve iPad
- What are Subframes in DaVinci Resolve?
- How to Enable Subframe Editing in DaVinci Resolve iPad
- Move Audio Keyframes on a Subframe Level
- Move Markers on a Subframe Level
- Moving Keyframes on iPad vs Desktop
- If you want to host your own Online Course use CC360
- BONUS: All DaVinci Resolve iPad Masterclass Students get the Transition Pack & the 8K Film Grain Pack for FREE!
[Video] Subframe Support for Keyframes & Markers in DaVinci Resolve iPad
What are Subframes in DaVinci Resolve?
A subframe is exactly what the name suggests: a position smaller than one frame. In a 24 fps timeline, every frame is roughly 41 milliseconds long. When you use the arrow keys, you jump from one full frame to the next. For video that’s fine, but for audio it’s often not precise enough to align a sound or place a volume change exactly where you need it.
You could already move and edit audio clips on a subframe level. What’s new is that you can now also move audio keyframes and markers in between frames. And if you need even more precision, the Fairlight Page lets you zoom in further and work with audio like in any other audio program.
How to Enable Subframe Editing in DaVinci Resolve iPad
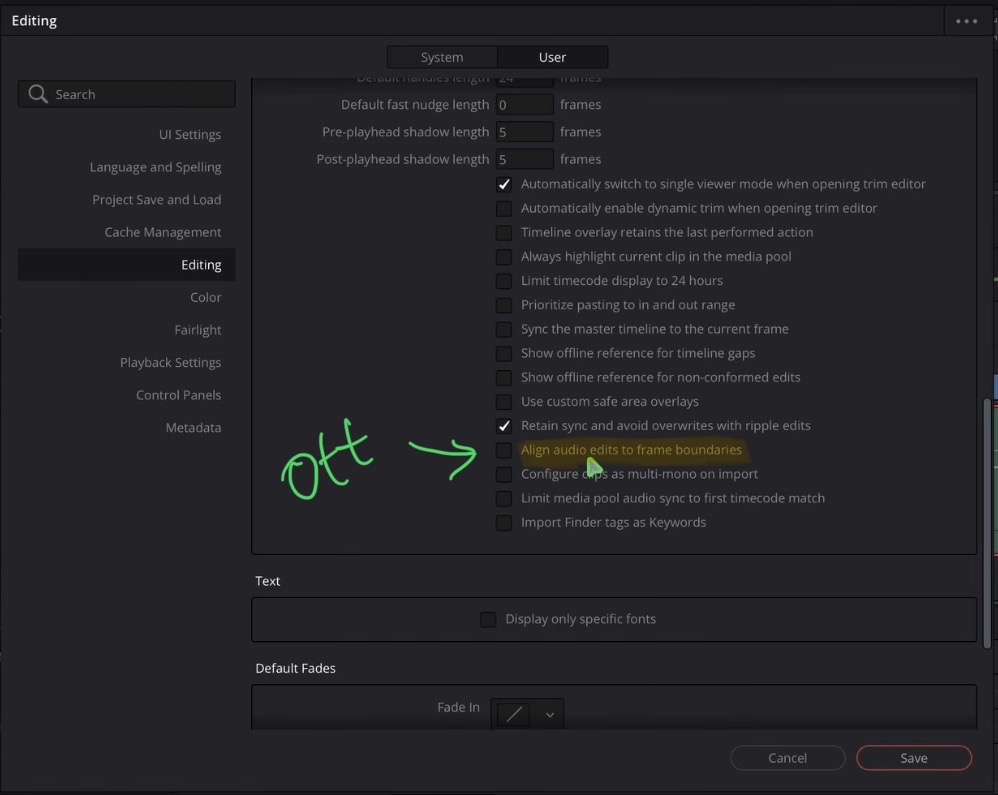
There is one setting that can block subframe editing completely. Go to the DaVinci Resolve Preferences, open User, then Editing, and scroll down to General Settings. Make sure Align audio edits to frame boundaries is turned off. If it’s checked, every audio edit snaps to full frames. It should be off by default, but it’s always a good idea to double check.
Move Audio Keyframes on a Subframe Level
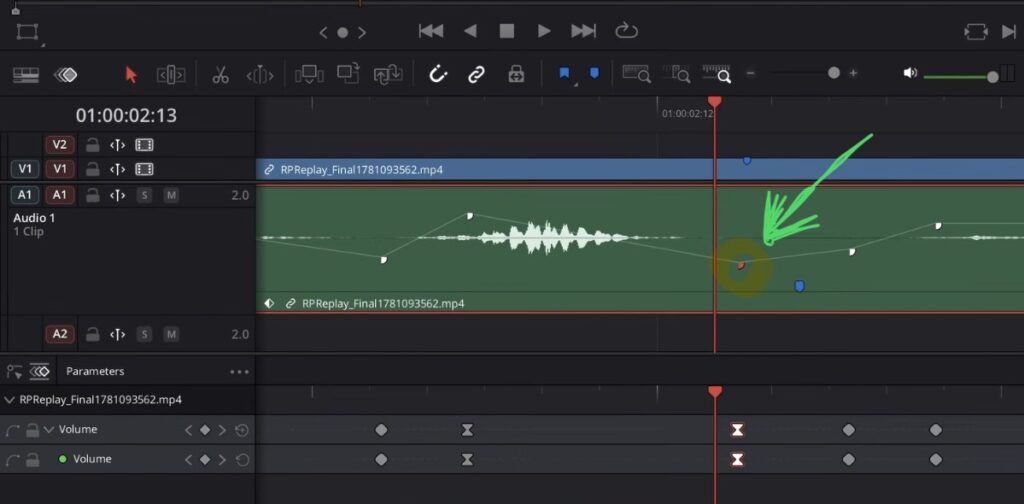
In my example I added three volume keyframes to an audio clip on the Edit Page. Open the keyframes editor on the clip to see them in the timeline. If you step through with the arrow keys, you still jump frame by frame. But when you drag a keyframe, you can now place it in between two frames. That’s the subframe position.
Quick shortcut if you use a keyboard and mouse: hold Option and click on the volume line of a clip that already has keyframes to add a new keyframe at that spot.
Tip: If you don’t know how to get the other pages (FUSION, FAIRLIGHT, EDIT) on the iPad read this article first: How to UNLOCK ALL PAGES in DaVinci Resolve for iPad Pro
Move Markers on a Subframe Level
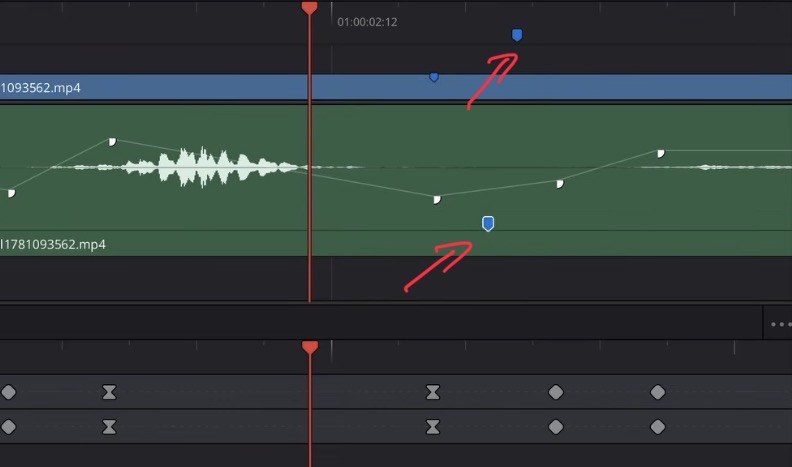
The same works for markers. If no clip is selected, you create a timeline marker (on the top of the timeline). If a clip is selected, you create a clip marker (on the clip itself). To move either one freely on a subframe level, make sure snapping is turned off. Then just drag the marker to the exact position you need.
Moving Keyframes on iPad vs Desktop
One difference I noticed: on the desktop version you can click a keyframe and drag it freely in any direction. On the iPad, dragging a keyframe only changes the volume up and down. To change its position left or right, you have to open a keyframes editor. If you know a setting that changes this, let me know in the comments of the video.
For accurate changes, use the timeline keyframe editor. Activate it, switch from Curves to Parameters, and select your keyframe. Now you can move it left or right in time, or up and down to change the volume.
If you want to host your own Online Course use CC360
I really believe, that CC360 is the best Platform to host your own Online Course currently on the market. And each week they introduce new features. Amazing. Check it out here.
BONUS: All DaVinci Resolve iPad Masterclass Students get the Transition Pack & the 8K Film Grain Pack for FREE!
You can either get the Transition Pack separate here: Seamless Transition Pack for DaVinci Resolve iPad. Or the 8K Film Grain Pack here: 8K Film Grain Bundle. but all of our DaVinci Resolve iPad Packs are a FREE Bonus for the DaVinci Resolve iPad Masterclass Students.
Check It Out here DaVinci Resolve iPad MasterClass: From Beginner To Pro.
Read Next
• How COPY Color Grade to MULTIPLE Clips in DaVinci Resolve iPad
• DO THIS to make DaVinci Resolve FASTER! (Instead of rage smashing your iPad)
• How To Delete Cache Files in DaVinci Resolve iPad
• How To Color Correct iPhone Footage in DaVinci Resolve iPad
• Easy Sync Audio & Video in DaVinci Resolve iPad