How to UNLOCK Photo Page in DaVinci Resolve iPad
DaVinci Resolve for iPad has a Photo Page, and in this article I show you how to unlock it, how to organize and filter your photos, and how to edit and export them directly inside DaVinci Resolve. The Photo Page is not officially launched yet, but it works just like the desktop version.
Pro Tip: Make your Videos Cinematic (and save a tone of time) with our Seamless Transition Pack for DaVinci Resolve iPad.

Contents
- [Video] How to Open the Photo Page in DaVinci Resolve for iPad
- 1. How to Unlock the Photo Page in DaVinci Resolve for iPad
- 2. How to Organize Photos in the Photo Page
- 3. How to Filter and Rate Photos in DaVinci Resolve iPad
- 4. How to Edit Photos in the Photo Page
- 5. How to Export Photos from DaVinci Resolve iPad
- 5. Switching Between Your Timeline and Photo Albums
- If you want to host your own Online Course use CC360
- BONUS: All DaVinci Resolve iPad Masterclass Students get the Transition Pack & the 8K Film Grain Pack for FREE!
[Video] How to Open the Photo Page in DaVinci Resolve for iPad
1. How to Unlock the Photo Page in DaVinci Resolve for iPad
Method 1: Easy Way
After i published my Video about the Photo Page someone in the Comments pointed out, that you can also open the Photo Page via the Menu Bar and going to Workspace and Show Page. There next to the 3 official launched pages (Cut, Color, Deliver) you also find the Photo Page. To see the Menu Bar you have to be on iPadOS 26 and make sure that your iPad Settings under Multitasking & Gestures is set to “Windowed Apps”. Only than the Menu Bars will show up.
Info: If you want to open any of the other 4 Pages (Media, Edit, Fusion or Fairlight) you still need the Method 2 where i show you how you can open all of the Pages via the Keyboard Shortcuts.
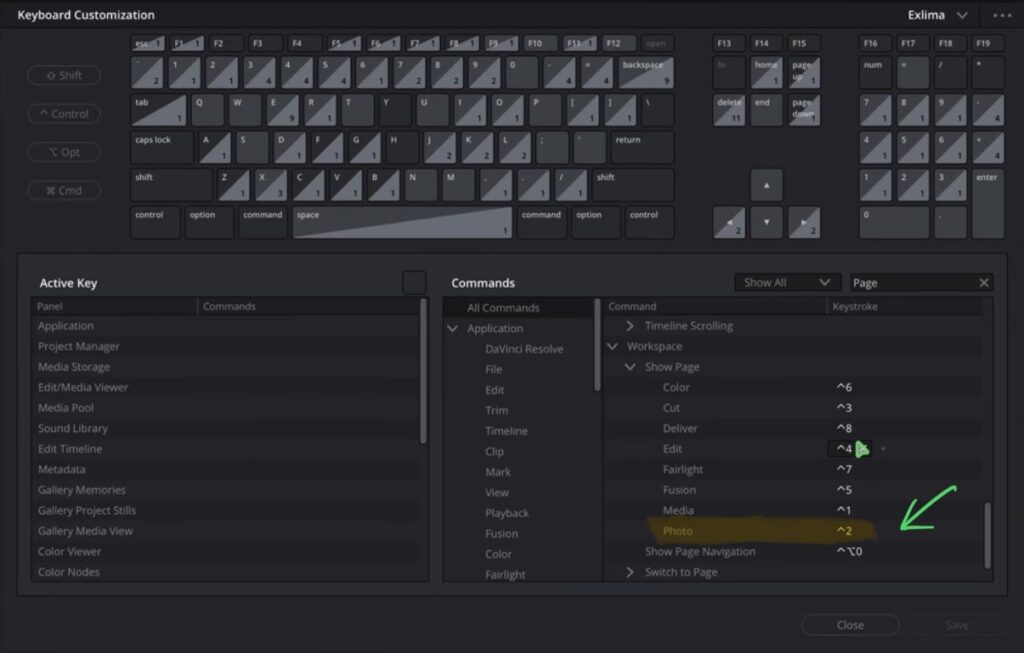
Method 2: Open via Shortcuts
Another way to open the Photo Page and all the other Pages in DaVinci Resolve for iPad. you need to assign a keyboard shortcut to it. Go to the DaVinci Resolve menu and choose Keyboard Customization, or use the shortcut Option + Command + K. Once inside, scroll down to Workspace and look for Show Pages. From there you will find all the pages including the Photo Page, and you can assign any shortcut you want.
If you don’t have a Bluetooth keyboard and still want to unlock the Photo Page, there is a separate video on the channel called “Full Function, No Keyboard Needed” that shows you how to use your smartphone (Android or iPhone) to unlock all pages. You only have to do it once and the pages stay open.
2. How to Organize Photos in the Photo Page
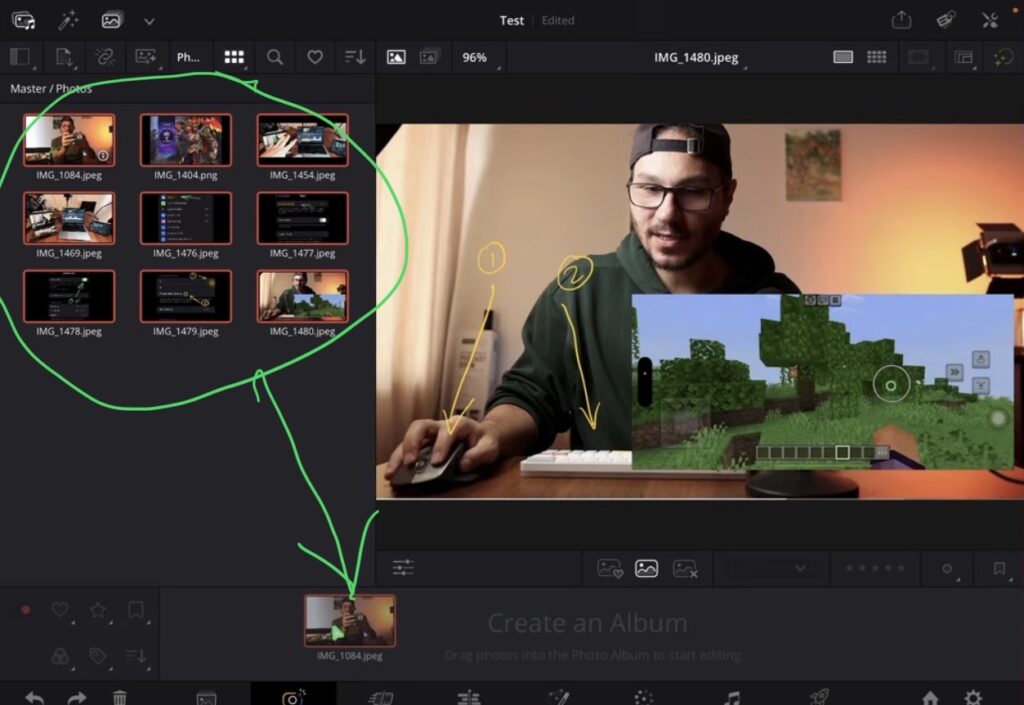
The Photo Page works in three main areas. The first icon is your gallery, where you see all your folders. You can import photos from your Photos app and then use the third icon to create an album. Drag and drop your photos into the album, and once you have your photos in there you can close the media panel to get more screen space. Open the Inspector on the right side to access all the editing tools.
3. How to Filter and Rate Photos in DaVinci Resolve iPad
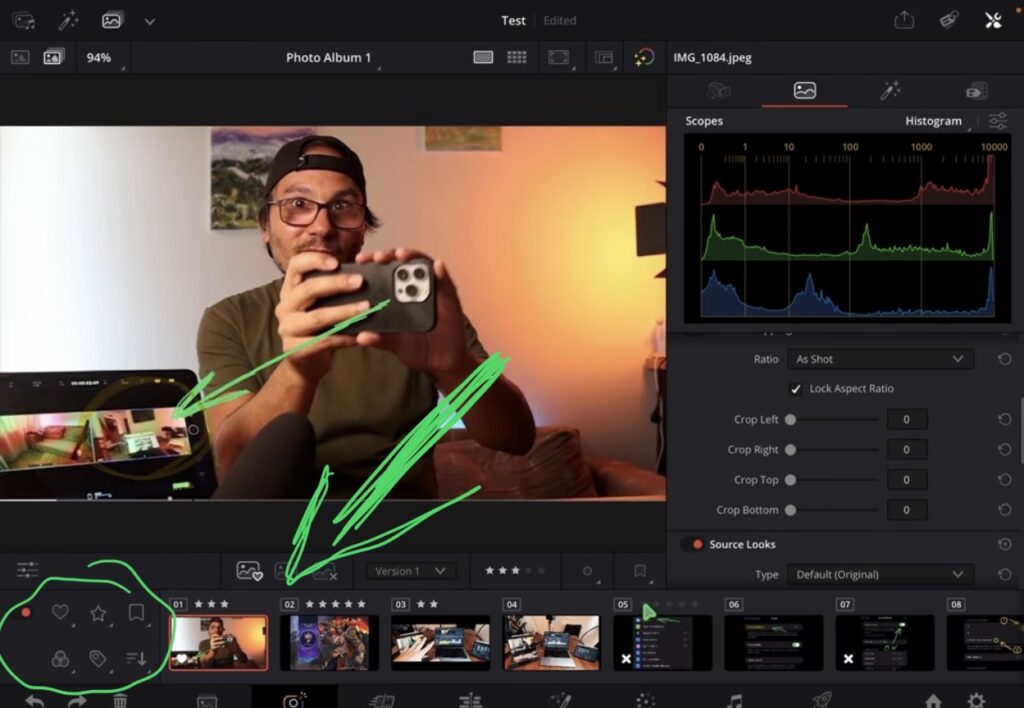
You can rate and filter your photos in several ways. Use the flag icon to mark photos as liked or rejected. You can also give each photo a star rating from one to five, then use the filter to show only photos with a specific star rating. On top of that, you can assign color labels to photos and filter by color. And if you select multiple photos at once and add a keyword in the Inspector under Attributes, all selected photos get that keyword at the same time, which you can then use to filter.
4. How to Edit Photos in the Photo Page
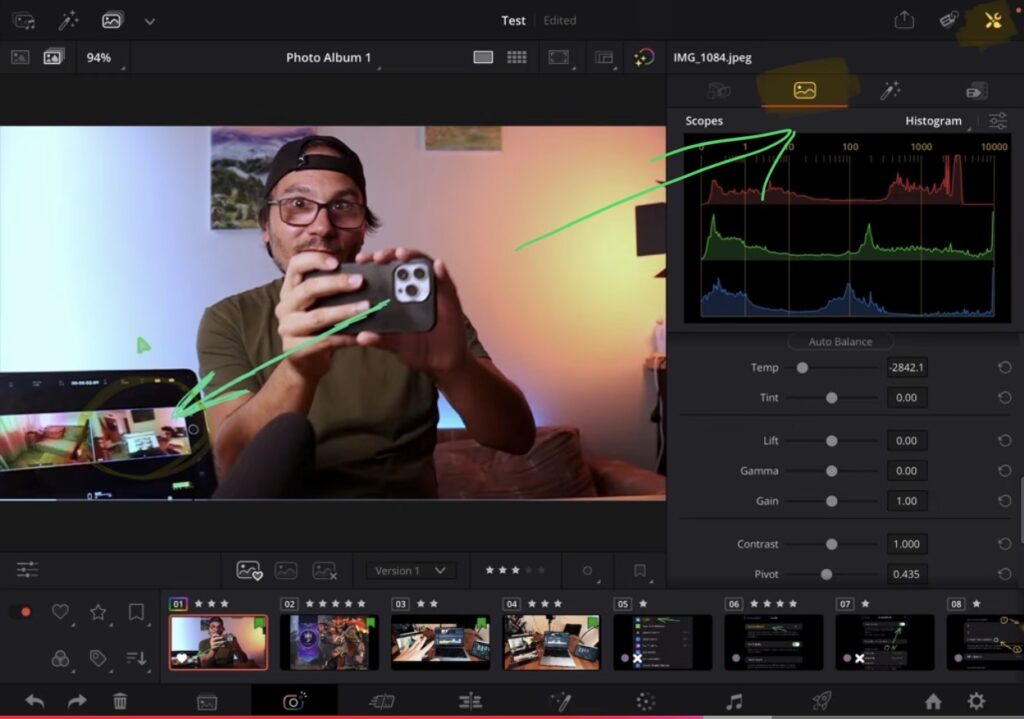
To edit a photo, open the Inspector (the second icon) and you will see all the adjustment sliders. The sliders are connected to the Color Page, so any changes you make here also show up there. You can switch to the Color Page at any time and work with nodes, just like you would for video. The Photo Page also has scopes (waveform, parade, vectorscope, histogram, and CIE chromaticity) which you can toggle from the top.

Pro Tip: You can also add effects to your photos directly in the Photo Page. Open the Effects panel and drag any DaVinci Resolve effect onto your photo. For example, you can drag the Film Look Creator onto an image and adjust all its settings right there in the Effects tab.
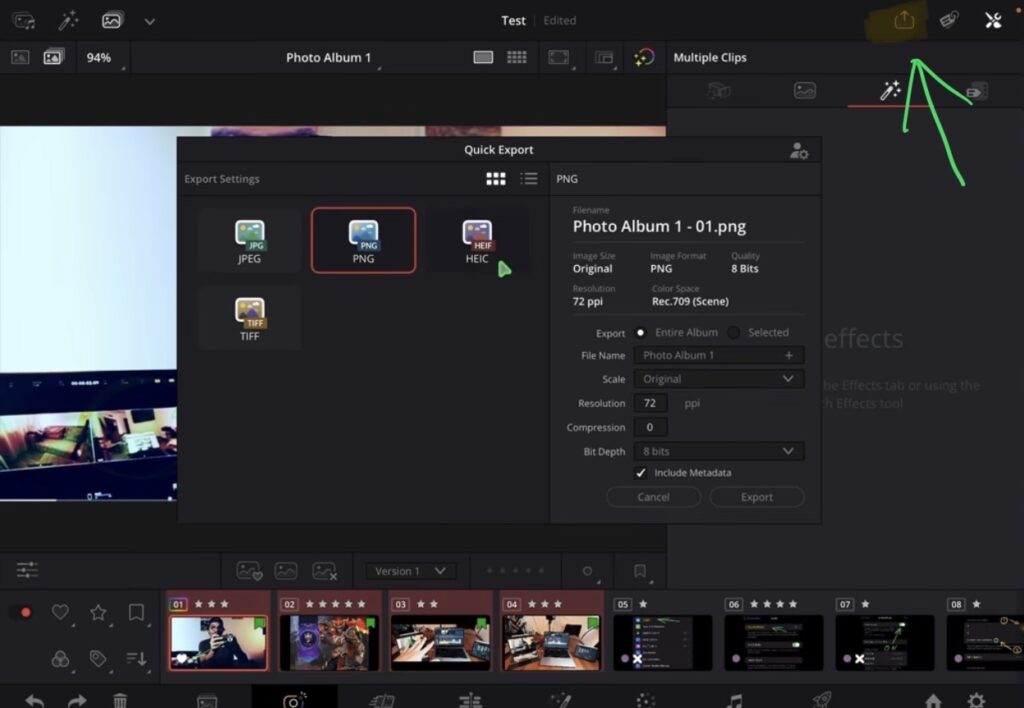
5. How to Export Photos from DaVinci Resolve iPad
Select the photos you want to export, then tap the export icon at the top. You can export as JPEG, PNG, HEIC, or TIFF. Set your quality, give the album a name, tap Export, and choose where to save in your Files browser. DaVinci Resolve will export all selected photos to that folder.
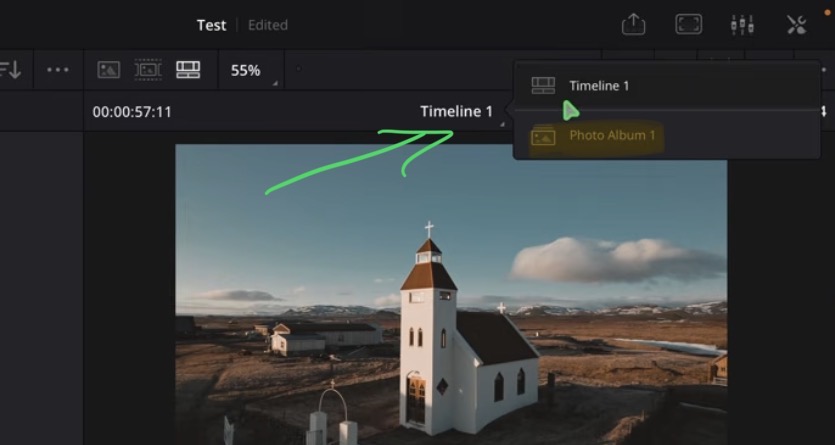
5. Switching Between Your Timeline and Photo Albums
When you are in the Photo Page, the playhead turns gray because you are working with photos, not video. To get back to your video timeline, go back to the Master bin and double-click your timeline. You can also switch between your timeline and photo albums using the navigation at the top of the Photo Page.
If you want to host your own Online Course use CC360
I really believe, that CC360 is the best Platform to host your own Online Course currently on the market. And each week they introduce new features. Amazing. Check it out here.
BONUS: All DaVinci Resolve iPad Masterclass Students get the Transition Pack & the 8K Film Grain Pack for FREE!
You can either get the Transition Pack separate here: Seamless Transition Pack for DaVinci Resolve iPad. Or the 8K Film Grain Pack here: 8K Film Grain Bundle. but all of our DaVinci Resolve iPad Packs are a FREE Bonus for the DaVinci Resolve iPad Masterclass Students.
Check It Out here DaVinci Resolve iPad MasterClass: From Beginner To Pro.
Read Next
• How COPY Color Grade to MULTIPLE Clips in DaVinci Resolve iPad
• DO THIS to make DaVinci Resolve FASTER! (Instead of rage smashing your iPad)
• How To Delete Cache Files in DaVinci Resolve iPad
• How To Color Correct iPhone Footage in DaVinci Resolve iPad
• Easy Sync Audio & Video in DaVinci Resolve iPad