How To Add KEYFRAMES & Dynamic Zoom in DaVinci Resolve iPad (Beginners Guide)
Today i will show you the basic concept of Keyframes in DaVinci Resolve on the iPad. Also we will talk about Dynamic Zoom. A way how you can avoid Keyframes and get the same result with the Dynamic Zoom Function.
Contents
[Video] How To Add KEYFRAMES & Dynamic Zoom in DaVinci Resolve iPad
Example 1: Basic Keyframes
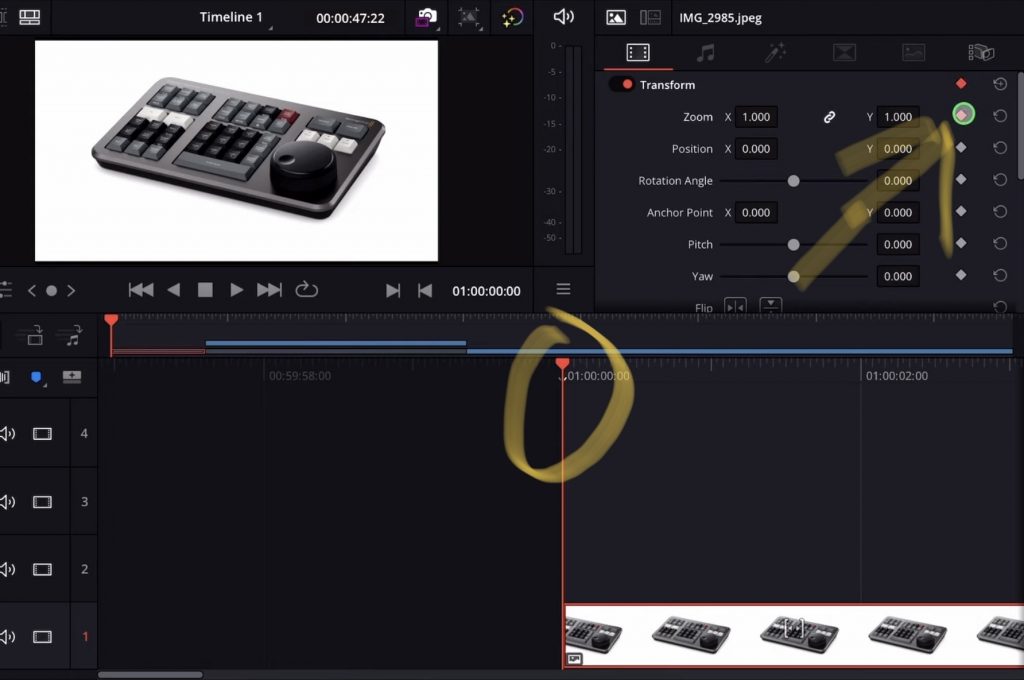
To create Keyframes select your clip and open the Inspector. On the left side of all your values like the Transform Values you will find those little DOTS that you can click. It will save the current settings on that position where your playhead sits on the Timeline.
So in Order to create a simple Zoom In Animation in a still image go to the beginning of your clips and press the Keyframe Dot next to the Zoom Value.
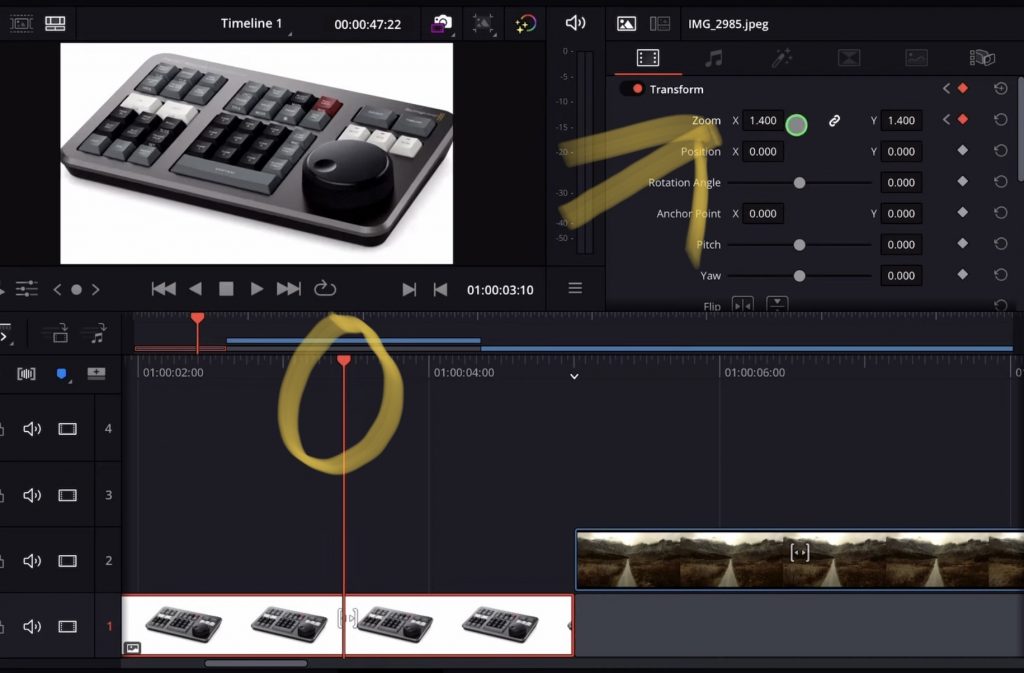
Place the Playhead on the second position (For example the end of your Clip) and change the Zoom value. Zoom into the image. It will automatically create the second keyframe on that position. When you now play your Timeline you will see your first animation.
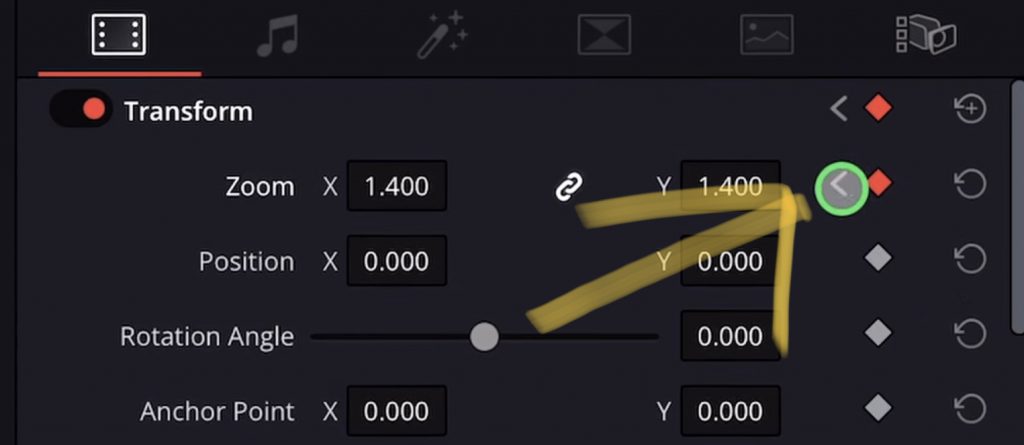
Tip: You Can always toggle between the positions of your Keyframes using the little Arrows next to the Keyframes Dot Icon
Example 2: Keyframes on Drone Footage
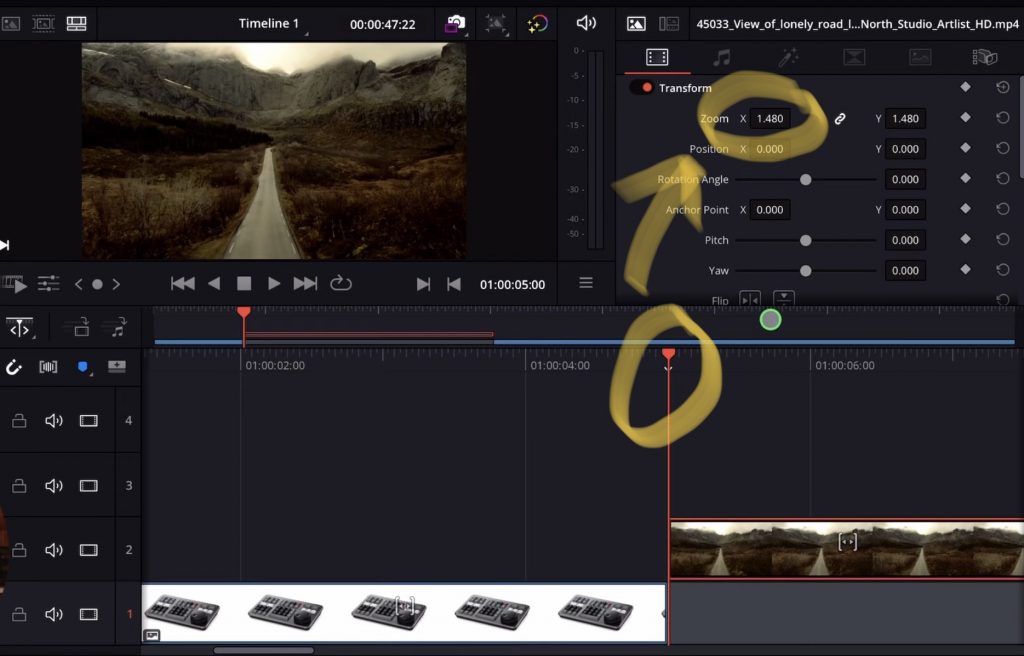
Next let’s use a Drone Clips where the Drone is moving forward. So in this case we start already cropped in and zoom out while the Drone moves forward. This effect is also called “Vertigo Zoom Effect”. And again you just need 2 simple keyframes to create this effect.
Start at the beginning of your clip and create a keyframe. This time we start with the Zoom value of 1.4. Click the Dot next to the Zoom Value to create the first keyframe.
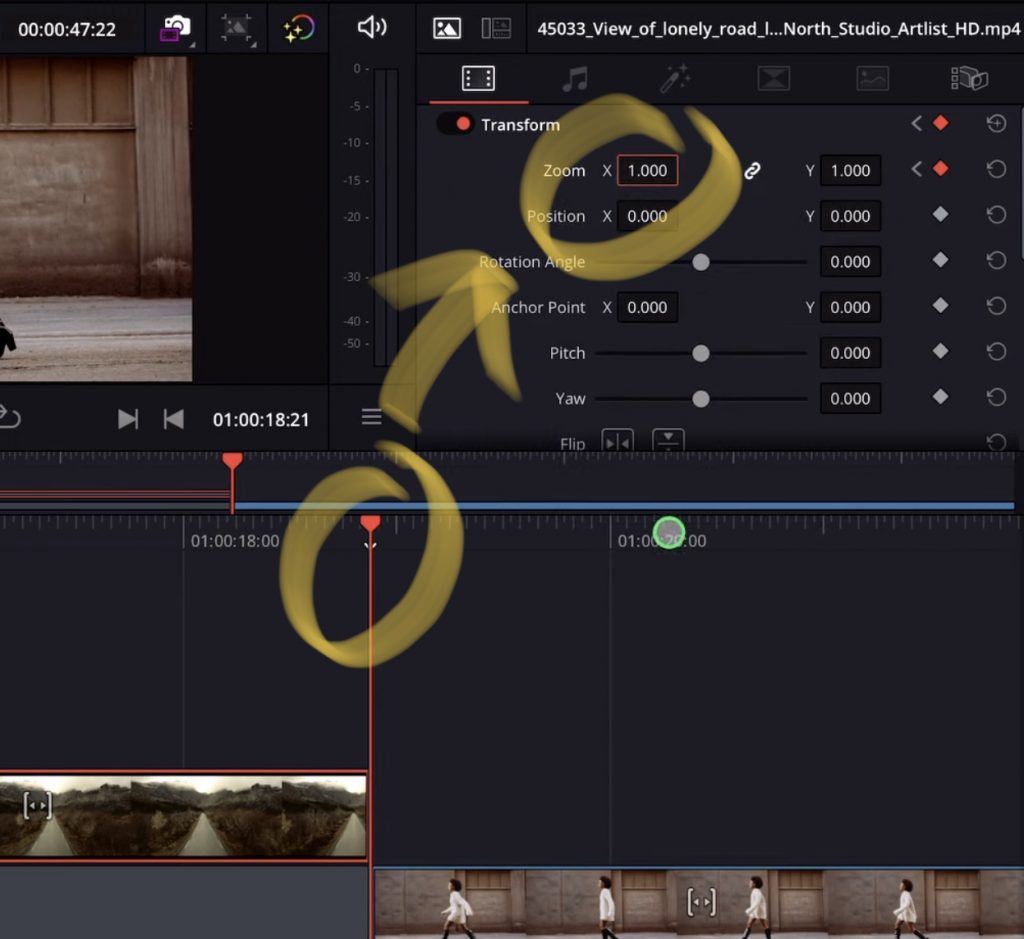
Bring your playhead to the End of your Clip and change the Zoom Value back to 1. And now you already have the Vertigo Zoom Animation. Easy.
Example 3: Dynamic Zoom Effect
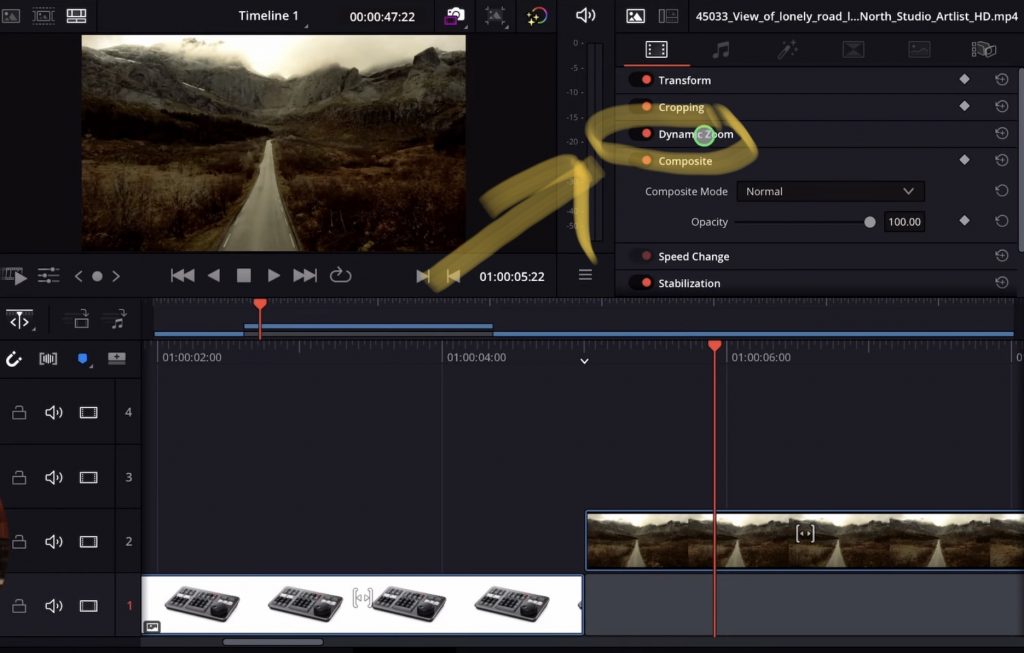
If you create Zoom in and Zoom out Animations there is a faster and easier way to create the same effect inside of DaVinci Resolve for the iPad. And it’s called Dynamic Zoom. You can find the Dynamic Zoom Settings in the Inspector. Activate it by turning the Dynamic Zoom on.
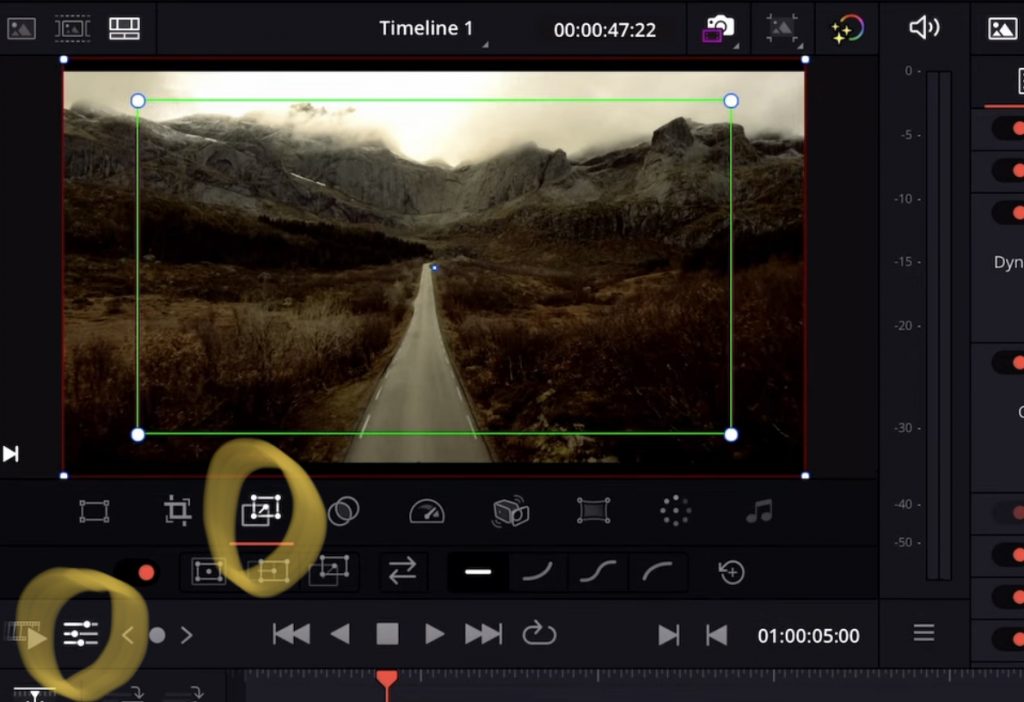
To see the Dynamic Zoom Windows (Green & Red Quadrants) in the Viewer you have to change your Viewer Settings. Click the Settings Icon and then go to the third Icon from the left. This is the Dynamic Zoom Viewer Settings. Now you see the two colored boxes.
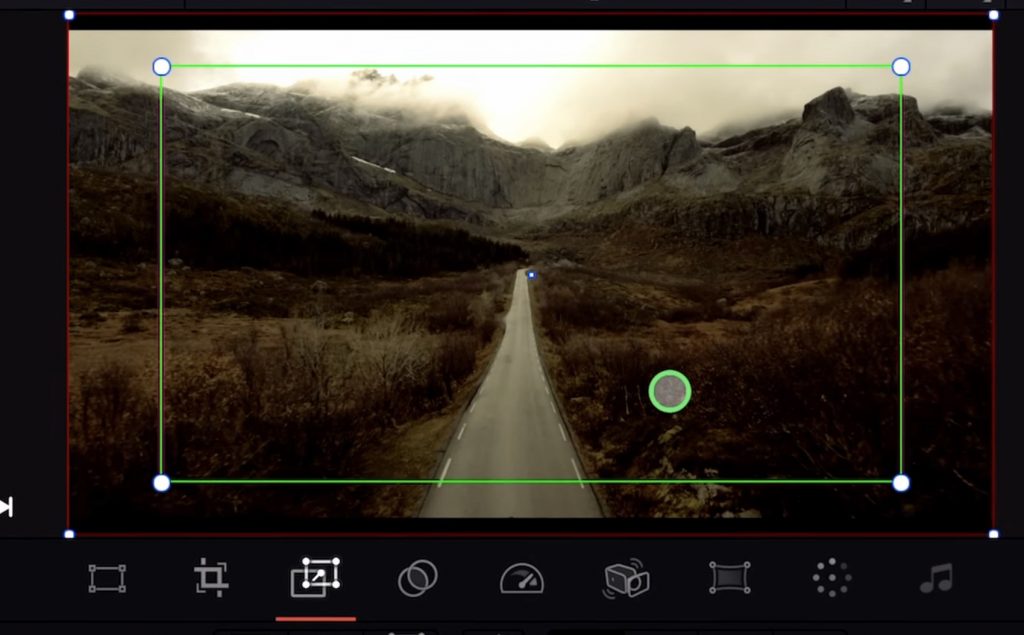
The Green Box is your Start Position and the Red Box is your End Position. Without creating any Keyframes you can tell with those to Boxes where your animation should go.
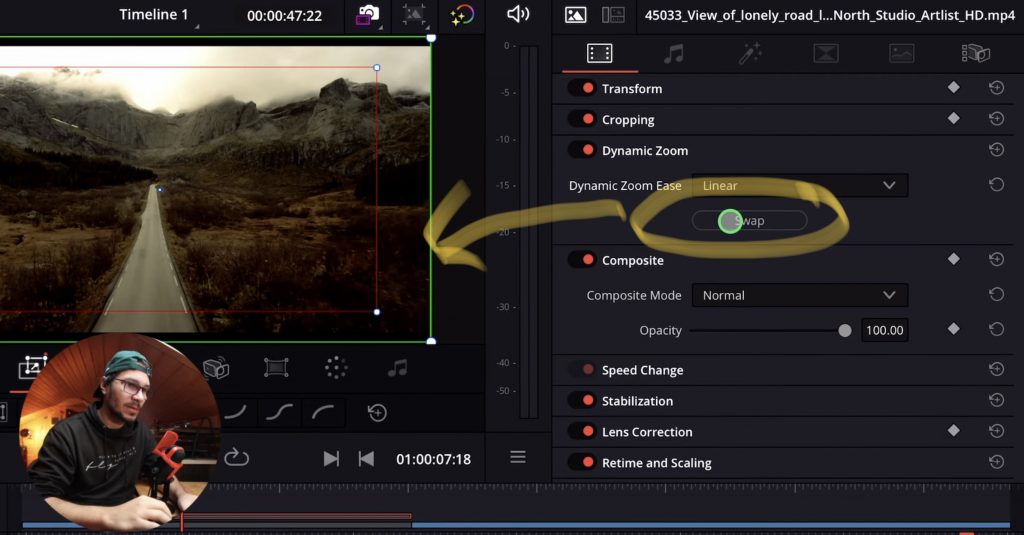
You can also Reverse the two Boxes by simply clicking the Swap Button in the Inspector.
Example 4: Moving Animation with Keyframes
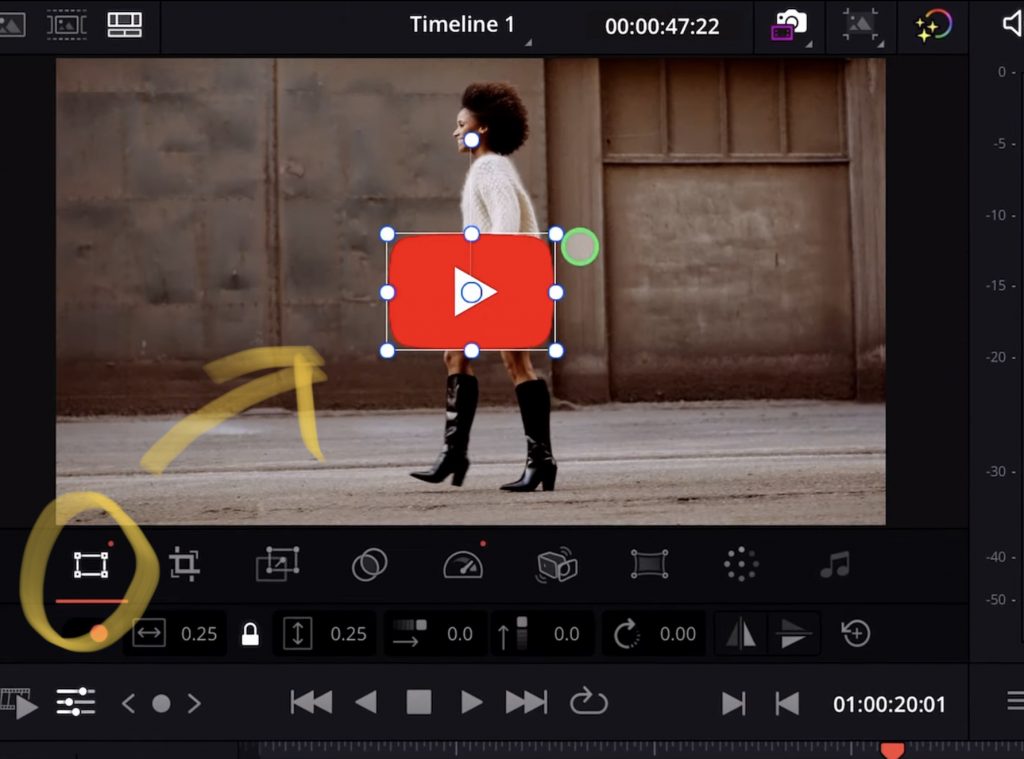
Click an Element in the Timeline and open the Inspector. You can also change the Transform settings via the Handles in the Viewer. For that open the Viewer Settings Icon and go to the first Settings Icon called Transform Settings. When this is selected you will see the Handles with the white lines and dots in the Viewer. You can change the position, rotation and scale by simple using the handles.
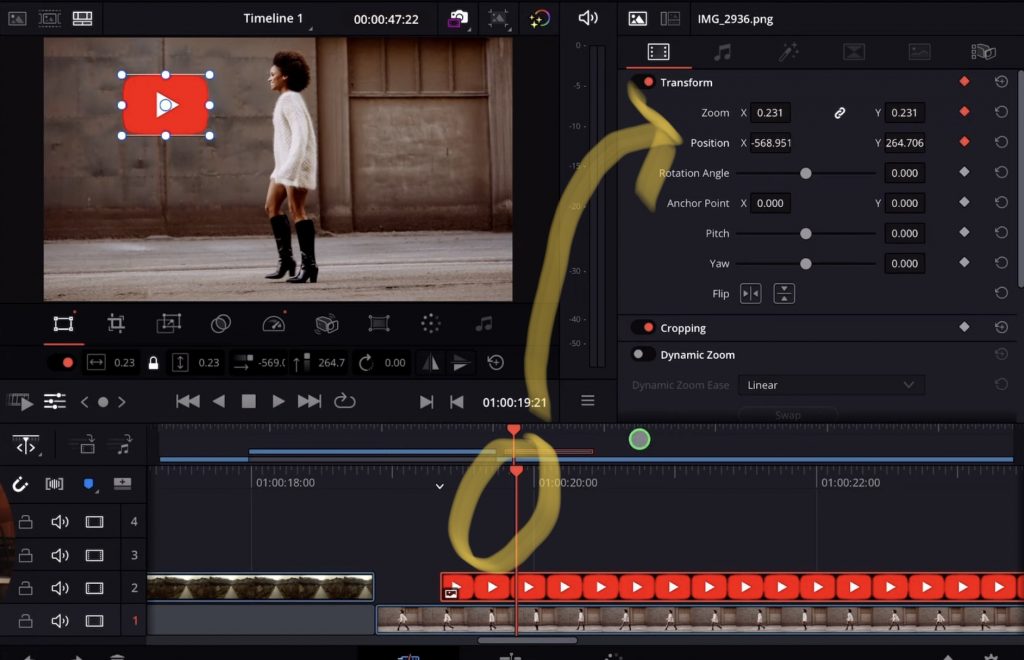
In this Example we want that the YouTube Logo comes in to the frame from the left. Moves to the right and than out of the frame. We beginn with the first position in the Frame. Bring your Playhead to that position where the YouTube Logo should be visible on the left side of the frame. Create Keyframes for Position and Zoom.
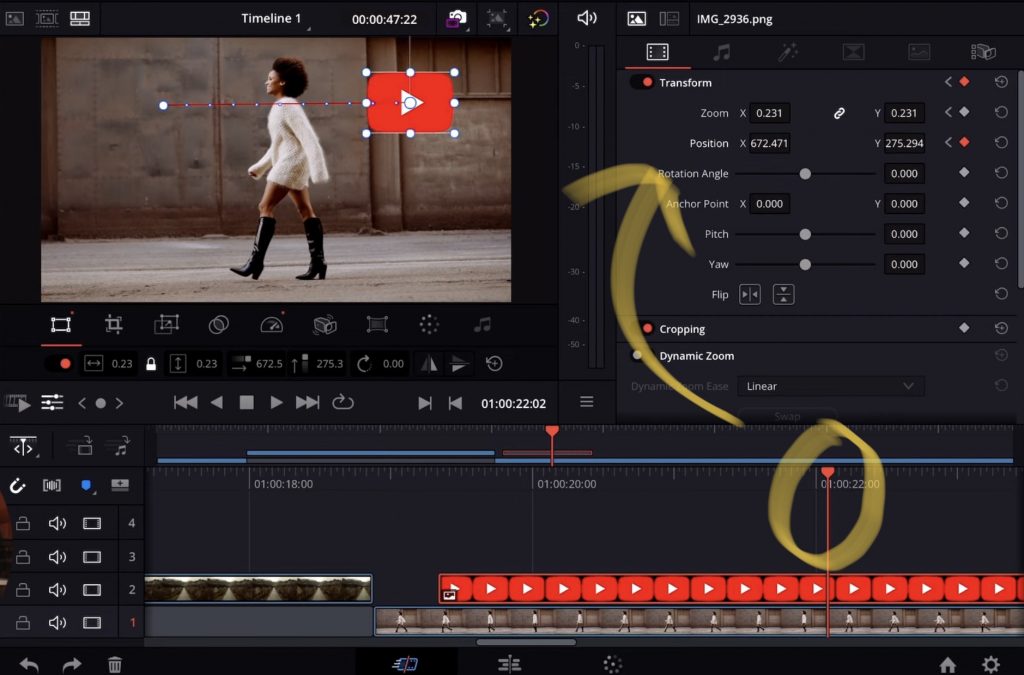
Let’s bring the Playhead to the third position where the YouTube Logo will be located on the right side of the frame. Just before it moves out of the frame. Use the pencil and the handle in the Viewer to drag and drop the YouTube Loge on the right side of the frame. It will automatically create new keyframes for that position.
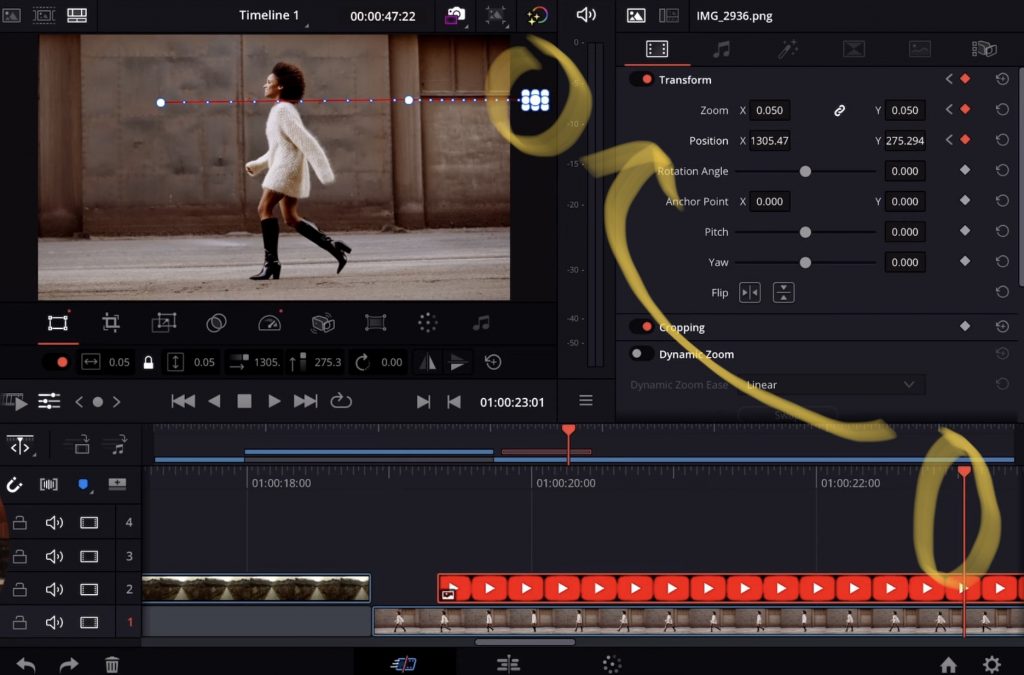
For the next position bring the playhead there where the YouTube Logo is outside of the Frame. Now change the size of the Logo using the handles and drag and drop the logo in the Viewer outside of the frame. Again it will create these Keyframes automatically for you.
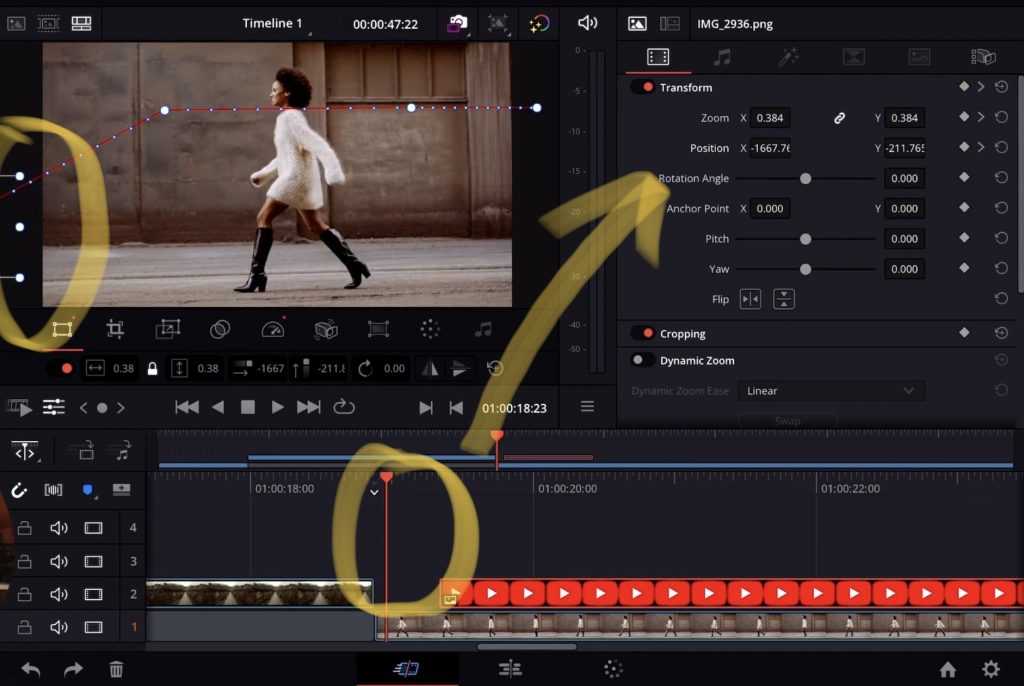
We still have to create the keyframes for the starting position. So bring your Playhead to the beginning of your clip. Change the size and the position from the YouTube Logo and move it outside of the left side of the frame. Done. Now you created an animation using 4 different keyframes.


Ciao Daniel 🙂
Follow Me on YouTube, Facebook, and Instagram.
If you find this helpful: Share It with your friends!
May 13, 2024 @ 4:33 am
Most impressed with your work Daniel, You never cease to amaze me!
I Love your work & the manner in which you communicate & commit to that which you clearly are passionate about!!! ✅😊
May 17, 2024 @ 5:53 am
Hi Jon, thank you so much for your kind words! Are you already part of the DaVinci iPad Community on FB or Discord?