How To Add Cinematic BLACK BARS in DaVinci Resolve iPad
In this article i will show you two ways how you can create cinematic black bars in DaVinci Resolve for the iPad. Solution Number One is to create a different aspect ratio. Like they do in Hollywood. Solution Number two will keep the standard 16:9 aspect ratio but we create the black bars effect.
Contents
[Video] How To Add Cinematic BLACK BARS in DaVinci Resolve iPad
Solution One: Change the Aspect Ratio (like they do in Hollywood)
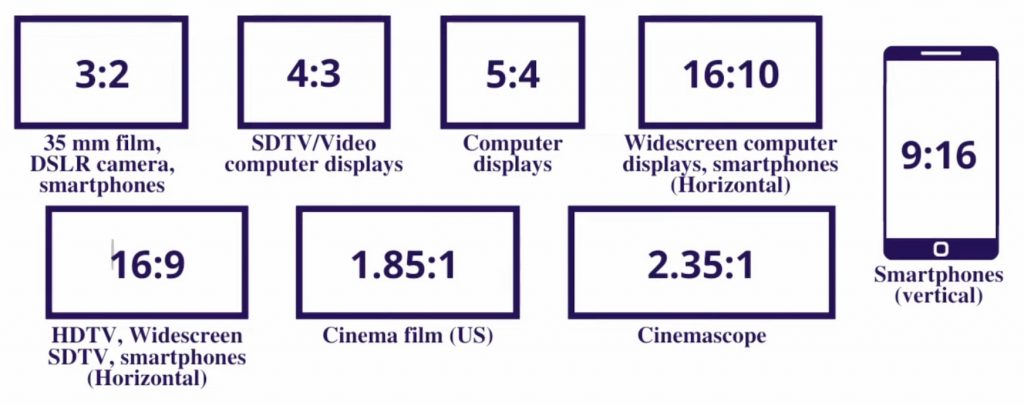
First of all the reason why we have original black bars is when we watch a video with a aspect ratio on a screen that has a different viewing aspect ration. For example you watch a Hollywood Movie in 1.85:1 on a 16:9 TV Screen. Naturally you will have black bars on the top and the bottom of your screen.
Before we fake Black Bars (which we will do in Solution Number Two) ask yourself why you want black bars? Are you creating a short film and you want that the whole movie is in a Cinema Aspect Ratio? Then i would change the Timeline Settings to a different aspect ration.
Because if you create Black Bars in your Video they will be baked into the Movie. So that means if you wanted to create a short film in 1.85:1 Aspect ratio. But you are using solution number two, even if your short movie would be shown in a cinema it would look weird because it will change how your video will be shown. You would get even more black bars.
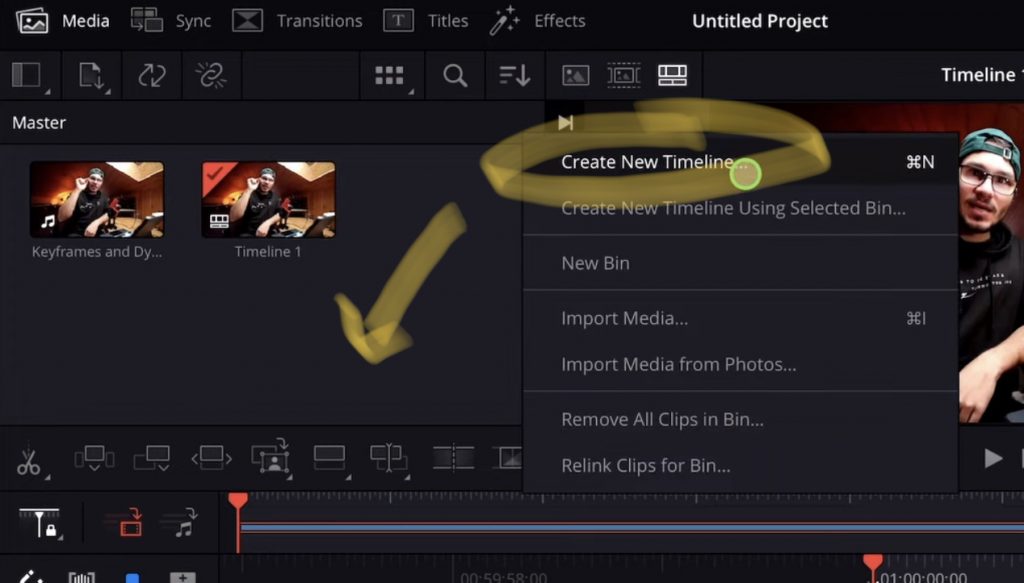
To change the Timeline Aspect Ratio, create a new Timeline by right click (longer press with finger or pencil) in the Media Bin and select “Create New Timeline”.
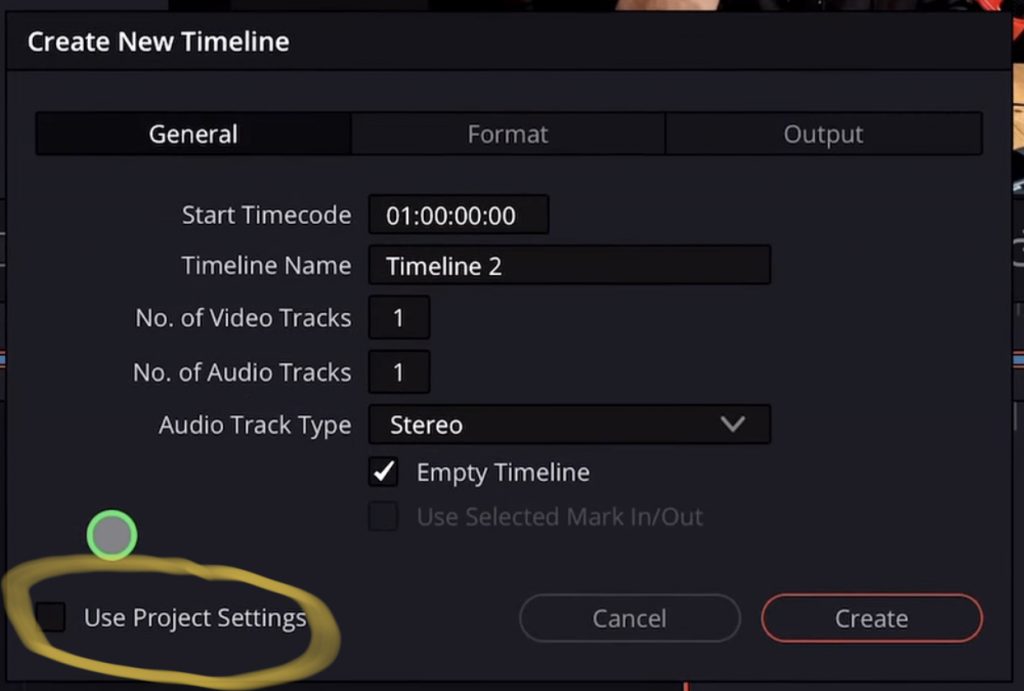
By default the Timeline Settings will keep the project settings. To change that you have to take off the check mark under “Use Project Settings”.
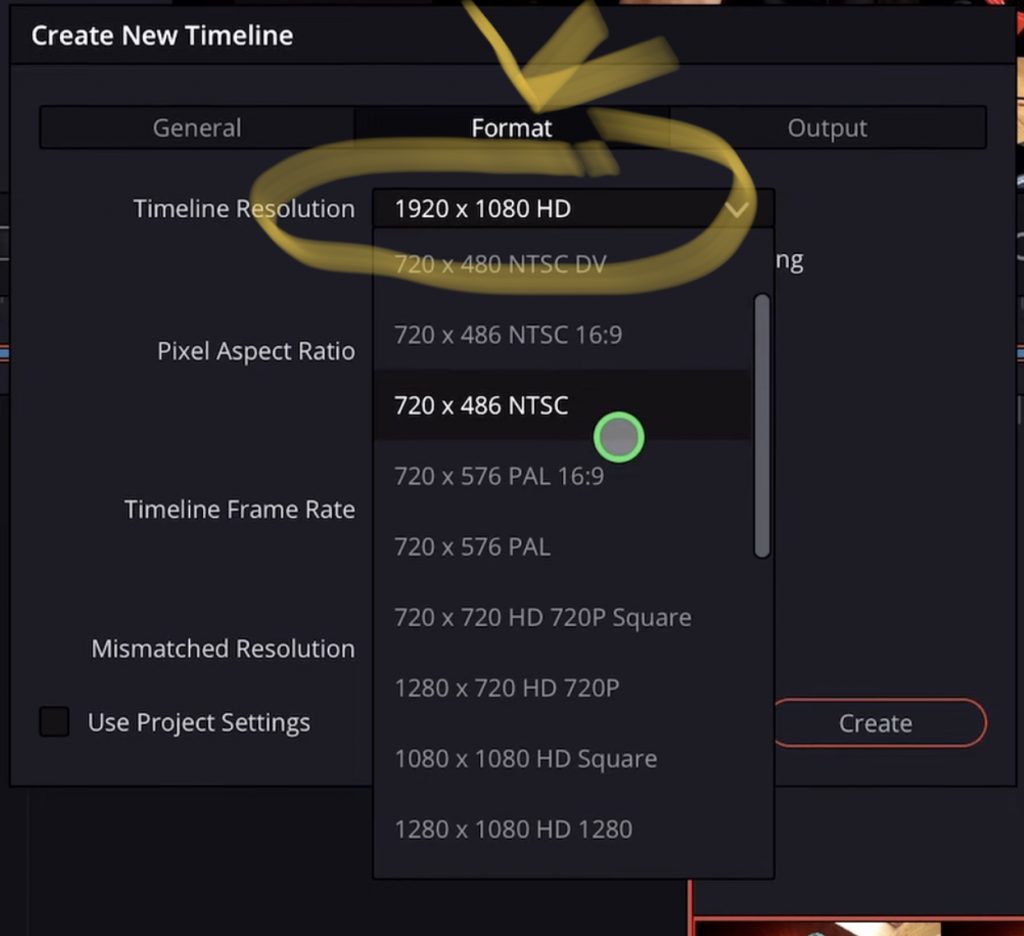
Under Format you can change the Timeline Resolution to what ever you want.
Solution Two: How to create Black Bars Effect in your Video
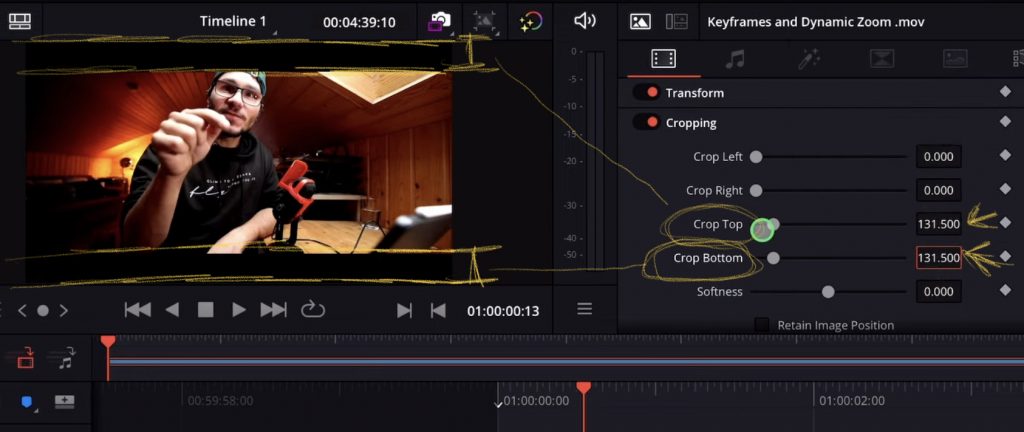
In Order to create Black Bars in a 16:9 Timeline you can use the Inspector and the Cropping Settings from the Top and the Bottom to create Black Bars. These values will represent your current Timeline Resolution. For Example in a 16:9 Aspect Ratio with 1920:1080 the max value you can crop from the top to the bottom is 1080 pixels. So all the number values you use are in pixel.
If you want to create Black Bars that reconstruct a aspect ratio for example like a 2:35:1 (Cinemascope) we have to first calculate how many pixel we have to crop from the Top and the Bottom.
Calculation Example
Step 1: 1920:2.35 = 817
Step 2: 1080-817 = 263
Step 3: 263:2 = 131.5
Like you saw in the Image in the Top we crop 131.5 from the Top and 131.5 from the Bottom. Done.
How to Animate you Black Bars like Peter McKinnon
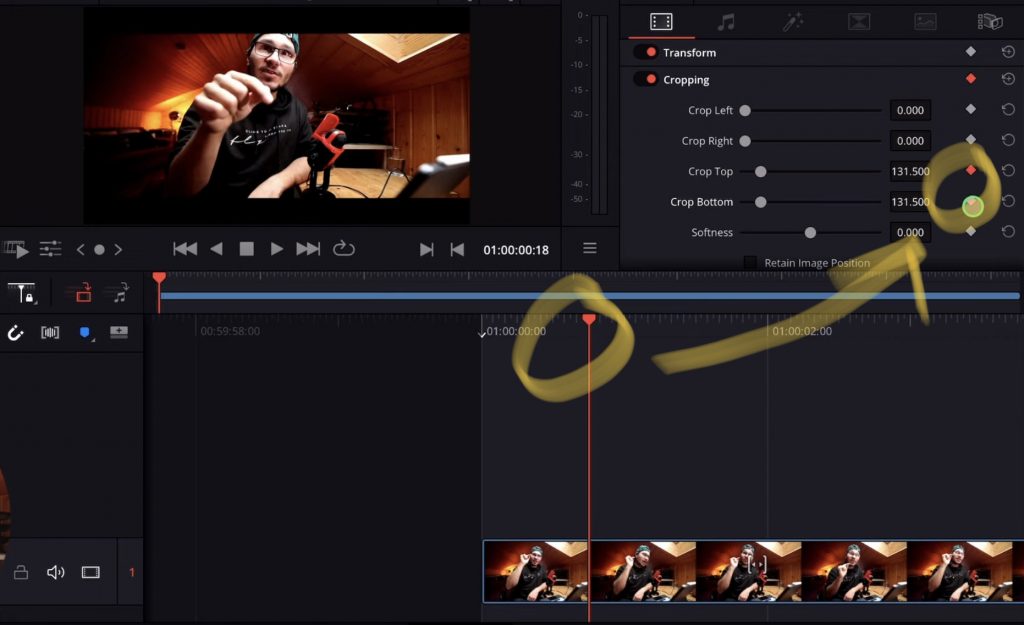
To Animate your Black Bars so that they move in from 16:9 to your Aspect Ratio we have to create Keyframes. Place the Playhead on the Timeline where the Black Bars will reach the final position (max Cropping) and create two keyframes. One for the Cropping Top value and one for the Cropping Bottom value. Just by clicking the Dot icon next to these values. When the Keyframes are created the dot will turn red.
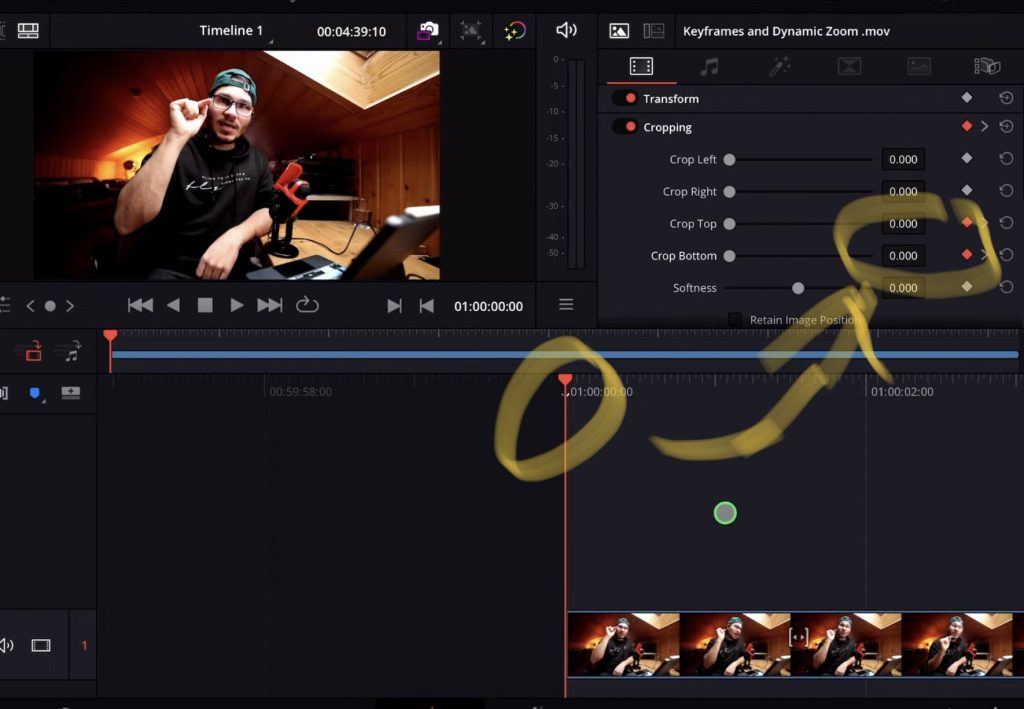
Bring your Playhead to the start position where the animation should start. In my example its the beginning of the clip. Change both Cropping values to 0. Done. Now you have a animation.


Ciao Daniel 🙂
Follow Me on YouTube, Facebook, and Instagram.
If you find this helpful: Share It with your friends!


