How to Use the Faster Speed Warp Option? (DVR iPad)
In this article/video i will show you how Speed Warp works in DaVinci Resolve for the iPad and the new faster option for Speed Warp that uses less resources. This is great if you want to create slow motion from footage that was not recorded in high frame rates.
Pro Tip: Make your Videos Cinematic (and save a tone of time) with our Seamless Transition Pack for DaVinci Resolve iPad.

Contents
- [Video] Speed Warp on DaVinci Resolve iPad – The NEW Faster Option
- How to use Speed Warp in DaVinci Resolve for iPad
- Where to find the Speed Warp setting on iPad
- Speed Warp Better vs. Speed Warp Faster
- If you want to host your own Online Course use CC360
- BONUS: All DaVinci Resolve iPad Masterclass Students get the Transition Pack & the 8K Film Grain Pack for FREE!
[Video] Speed Warp on DaVinci Resolve iPad – The NEW Faster Option
How to use Speed Warp in DaVinci Resolve for iPad
Let’s say you have a clip that was shot with 24 or 30 frames per second, so not in slow motion. If you right click on the clip and choose “Change Clip Speed” you can set it to something like 40%. The problem is that because the clip was not recorded in a high frame rate, the slow motion will look choppy.
Where to find the Speed Warp setting on iPad
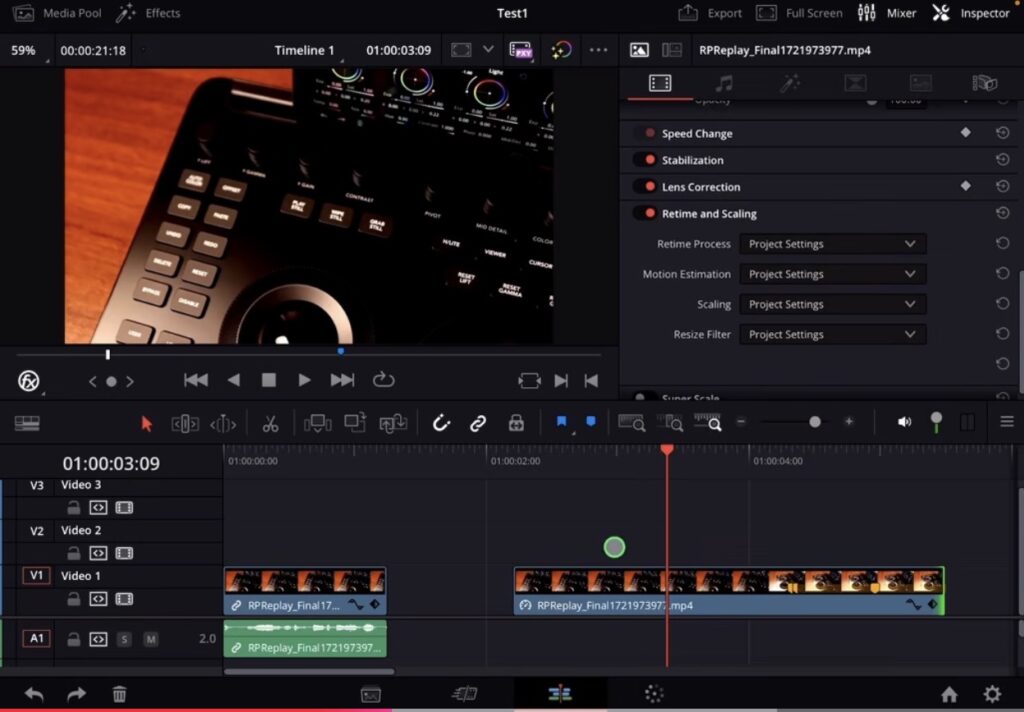
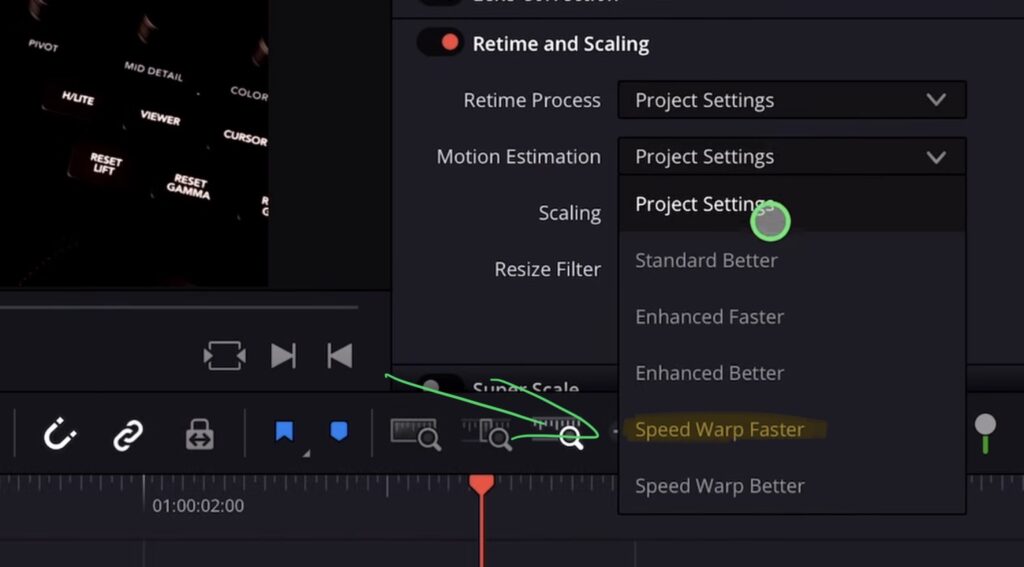
To fix the choppiness you can right click on the clip, open the Inspector and go to “Retime and Scaling”. Here you can change the motion estimation. Change it to “Speed Warp” and DaVinci Resolve will use AI to create frames in between so your slow motion looks smoother.
Speed Warp Better vs. Speed Warp Faster
Speed Warp is a very intensive process that uses a lot of your iPad’s resources to generate the in-between frames. In the past, we only had “Speed Warp Better” which gives you the best result but can really slow down your machine. Now there is a new “Faster” option that does not use as much processing power.
The “Better” option gives you the best quality but takes more resources and you might even have to render it out to see the result. The “Faster” option is quicker and lighter on your iPad but the quality might not be as good. So it depends on your project and what you need.
Tip: The best way to do slow motion is to record your footage with 120 frames per second on your iPhone. That gives you proper slow motion without needing Speed Warp at all. But if you end up with a shot where you don’t have that, Speed Warp is a great option to try.
Tip: If you don’t know how to get the other pages (FUSION, FAIRLIGHT, EDIT) on the iPad read this article first: How to UNLOCK ALL PAGES in DaVinci Resolve for iPad Pro
If you want to host your own Online Course use CC360
I really believe, that CC360 is the best Platform to host your own Online Course currently on the market. And each week they introduce new features. Amazing. Check it out here.
BONUS: All DaVinci Resolve iPad Masterclass Students get the Transition Pack & the 8K Film Grain Pack for FREE!
You can either get the Transition Pack separate here: Seamless Transition Pack for DaVinci Resolve iPad. Or the 8K Film Grain Pack here: 8K Film Grain Bundle. but all of our DaVinci Resolve iPad Packs are a FREE Bonus for the DaVinci Resolve iPad Masterclass Students.
Check It Out here DaVinci Resolve iPad MasterClass: From Beginner To Pro.
Read Next
• How COPY Color Grade to MULTIPLE Clips in DaVinci Resolve iPad
• DO THIS to make DaVinci Resolve FASTER! (Instead of rage smashing your iPad)
• How To Delete Cache Files in DaVinci Resolve iPad
• How To Color Correct iPhone Footage in DaVinci Resolve iPad
• Easy Sync Audio & Video in DaVinci Resolve iPad