AI Blemish Removal in DaVinci Resolve for iPad (Full Tutorial)
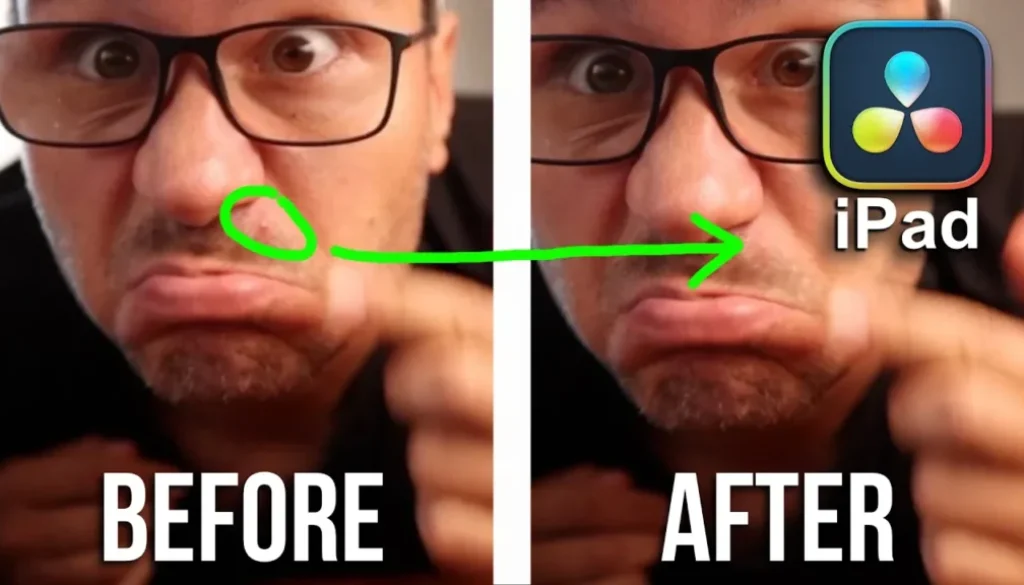
If you have a little pimple or something on your skin that you want to get rid of, you don’t have to do it manually anymore. DaVinci Resolve has an AI Blemish Removal tool now, it is a Studio feature and it works on the iPad. In this article i will show you the two ways to use it and a pro tip for slower iPads.
Pro Tip: Make your Videos Cinematic (and save a tone of time) with our Seamless Transition Pack for DaVinci Resolve iPad.

Contents
- [Video] AI Blemish Removal in DaVinci Resolve for iPad (Full Tutorial)
- How to add AI Blemish Removal in the Color Page
- There is only ONE slider you have to touch
- Use Shift + F if you have a smaller iPad
- The second way: add it as an effect to the clip
- Pro Tip: render out only the AI part if your iPad is slower
- Did you miss the big DaVinci Resolve 21 Update?
- If you want to host your own Online Course use CC360
- BONUS: All DaVinci Resolve iPad Masterclass Students get the Transition Pack & the 8K Film Grain Pack for FREE!
[Video] AI Blemish Removal in DaVinci Resolve for iPad (Full Tutorial)
How to add AI Blemish Removal in the Color Page
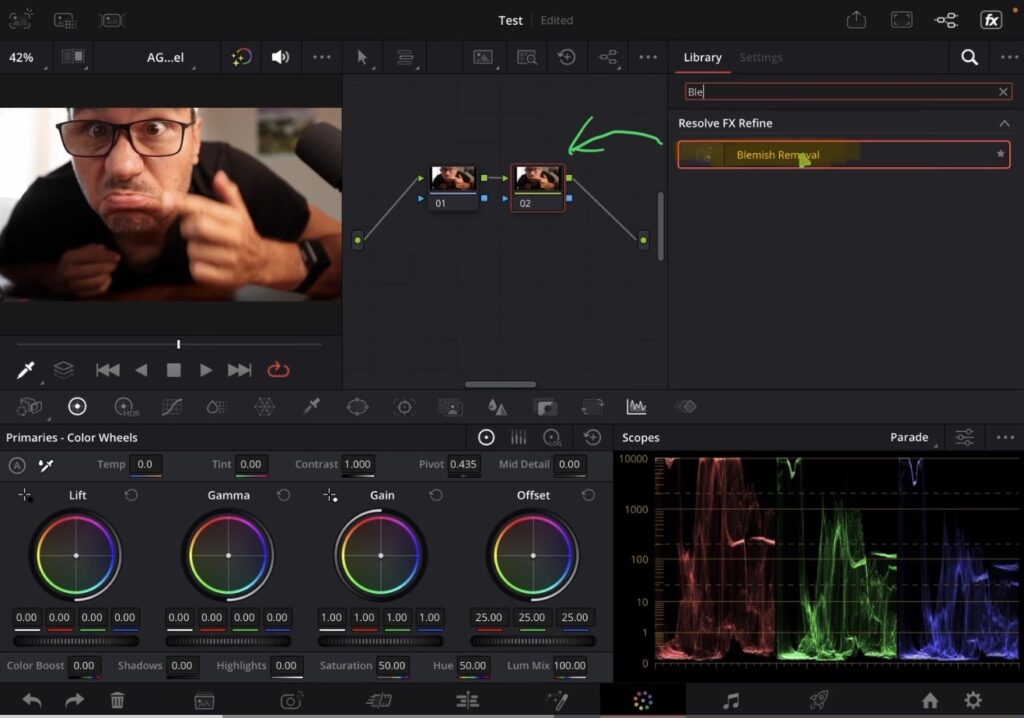
This is the easy way and the way i would do it. Go to the Color Page with your clip selected and add a new node (Serial 01). Then open the Effects, search for “blemish” and drag and drop the AI Blemish Removal onto the node. That is the whole setup.
There is only ONE slider you have to touch
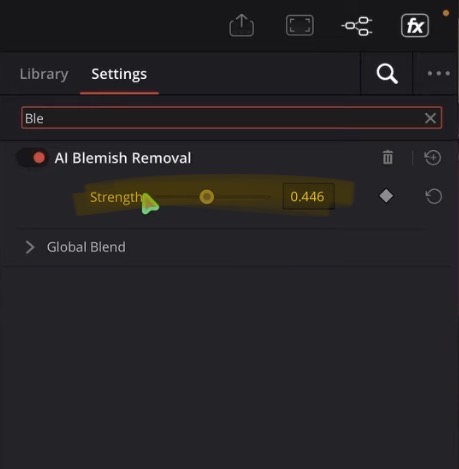
This tool is really straightforward. At 0 it does nothing at all. The higher you go, the more the AI does the processing. Push it all the way up to 1 and the blemish is gone. You don’t have to mask anything anymore and it runs straight on the iPad.
Use Shift + F if you have a smaller iPad
If you are on an 11 inch iPad like me or even on an iPad mini, sometimes you just don’t see enough. You can zoom in with two fingers to check the pimple, but if you have a keyboard there is a better way. Hit Shift + F and the image in the Color Page gets big while you only see the effect controls. Hit Shift + F again and you are back to all of your color tools. Especially with effects that have a lot of sliders this is a good way to work.
Tip: If you don’t know how to get the other pages (FUSION, FAIRLIGHT, EDIT) on the iPad read this article first: How to UNLOCK ALL PAGES in DaVinci Resolve for iPad Pro
The second way: add it as an effect to the clip
You don’t have to go to the Color Page at all. Select your clip, go up to the Effects, search for “blemish” and drag and drop it directly onto the clip. Then open the Inspector, go to Effects and you will find the exact same control there. It works both ways, and it works the same for other effects like the Face Refinement effect.
Pro Tip: render out only the AI part if your iPad is slower
This is a heavy processing AI feature, same as some of the other tools we got with DaVinci Resolve 21. So here is how i work with it. When your video is finished and you want to see the AI part in your preview, set In and Out Points around that section and render out only that part. Then load that file back into your project and drop it into your timeline. Now you can watch it without rendering the entire video every time. If you have to change something, go back, adjust your settings and render it again. That is how you can work with these AI tools even on an iPad that is a bit slower.
Did you miss the big DaVinci Resolve 21 Update?
AI Blemish Removal is just one of the many features that came with the newest version. I made a full video where i go through every single new tool, effect and feature that we can use on the iPad. Check it out here: DaVinci Resolve iPad Version 21 – All Features explained
SALE: Because of the DaVinci Resolve 21 Update i run a discount right now. Use the code DVR21 at the checkout and get 21% off the DaVinci Resolve iPad MasterClass: From Beginner To Pro.
If you want to host your own Online Course use CC360
I really believe, that CC360 is the best Platform to host your own Online Course currently on the market. And each week they introduce new features. Amazing. Check it out here.
BONUS: All DaVinci Resolve iPad Masterclass Students get the Transition Pack & the 8K Film Grain Pack for FREE!
You can either get the Transition Pack separate here: Seamless Transition Pack for DaVinci Resolve iPad. Or the 8K Film Grain Pack here: 8K Film Grain Bundle. but all of our DaVinci Resolve iPad Packs are a FREE Bonus for the DaVinci Resolve iPad Masterclass Students.
Check It Out here DaVinci Resolve iPad MasterClass: From Beginner To Pro.
Read Next
• How COPY Color Grade to MULTIPLE Clips in DaVinci Resolve iPad
• DO THIS to make DaVinci Resolve FASTER! (Instead of rage smashing your iPad)
• How To Delete Cache Files in DaVinci Resolve iPad
• How To Color Correct iPhone Footage in DaVinci Resolve iPad
• Easy Sync Audio & Video in DaVinci Resolve iPad