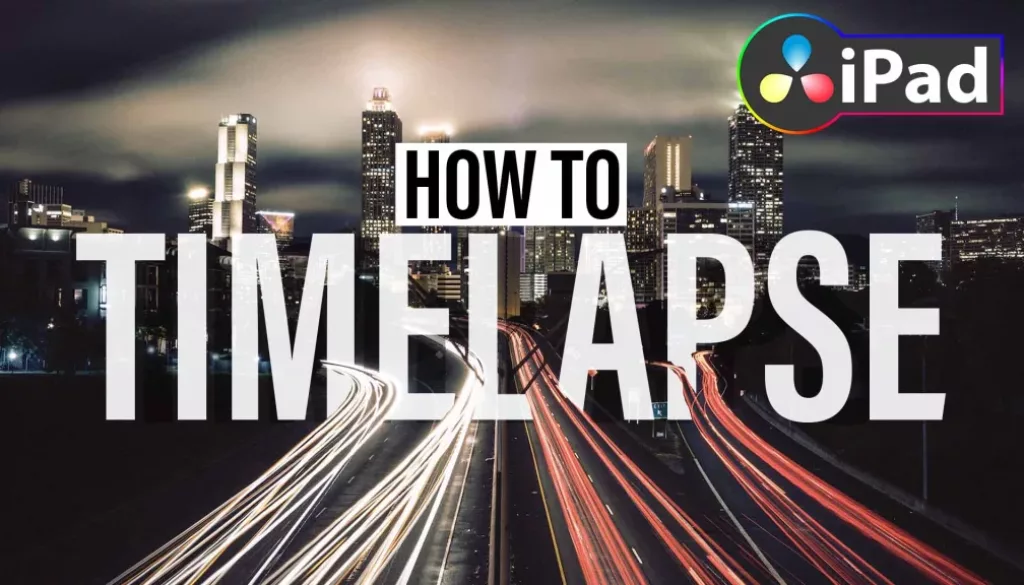
How To TIMELAPSE in DaVinci Resolve iPad
In this article/video i will show you how you can create a Timelapse Video using DaVinci Resolve for the iPad. I will actually show you two ways, how you can achieve this. One method will use the build in sequence feature, and the other method will use the images number feature. Using Timelapse is a great way to enhance your videos. So let’s start using them even on an iPad. Enjoy learning.
Pro Tip: Make your Videos Cinematic (and save a tone of time) with our Seamless Transition Pack for DaVinci Resolve iPad.

Contents
- [Video] How To TIMELAPSE in DaVinci Resolve iPad
- Step 1: Make sure to create a Folder for each Timelapse on the Files App
- Step 2: How to copy images from Photos App to the Files App?
- The Philosophy of creating a Timelapse with DaVinci Resolve iPad
- Methode 1: Create Timelapse using Sequence in DaVinci Resolve iPad
- Methode 2: Create Timelapse using Images in DaVinci Resolve iPad
- If you want to host your own Online Course use CC360
- BONUS: All DaVinci Resolve iPad Masterclass Students get the Transition Pack & the 8K Film Grain Pack for FREE!
[Video] How To TIMELAPSE in DaVinci Resolve iPad
Step 1: Make sure to create a Folder for each Timelapse on the Files App
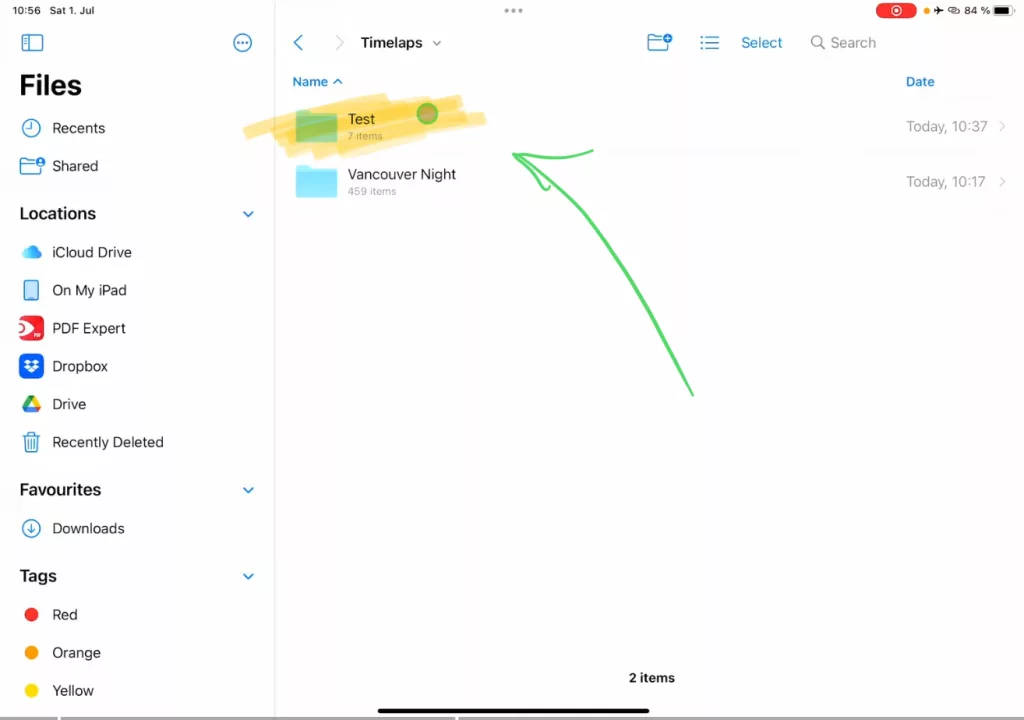
Step 2: How to copy images from Photos App to the Files App?
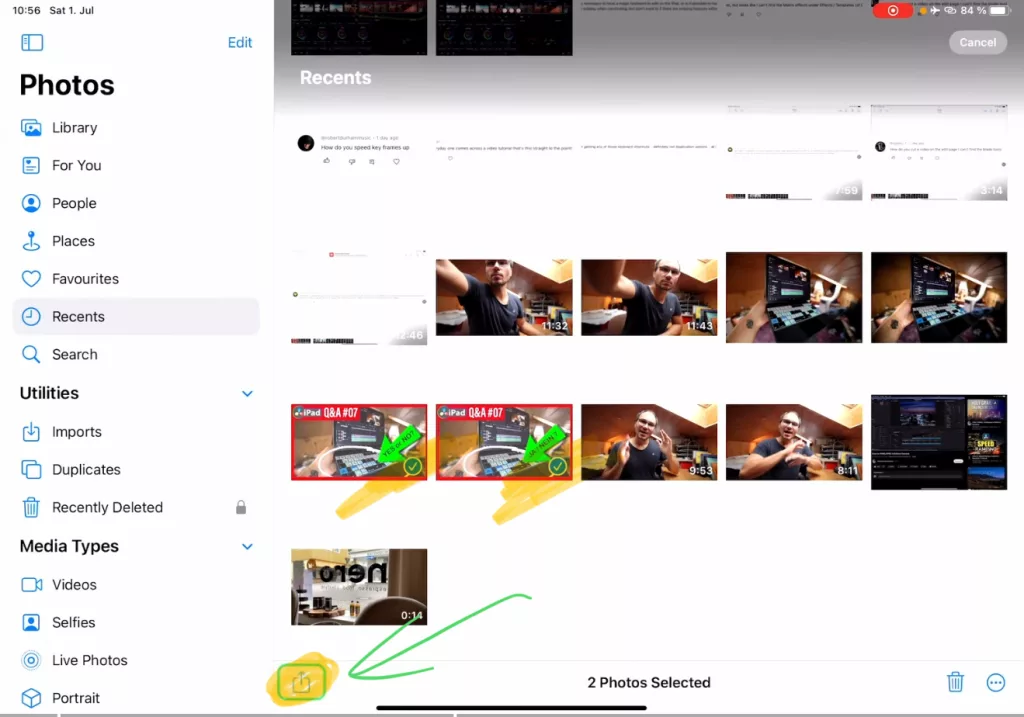
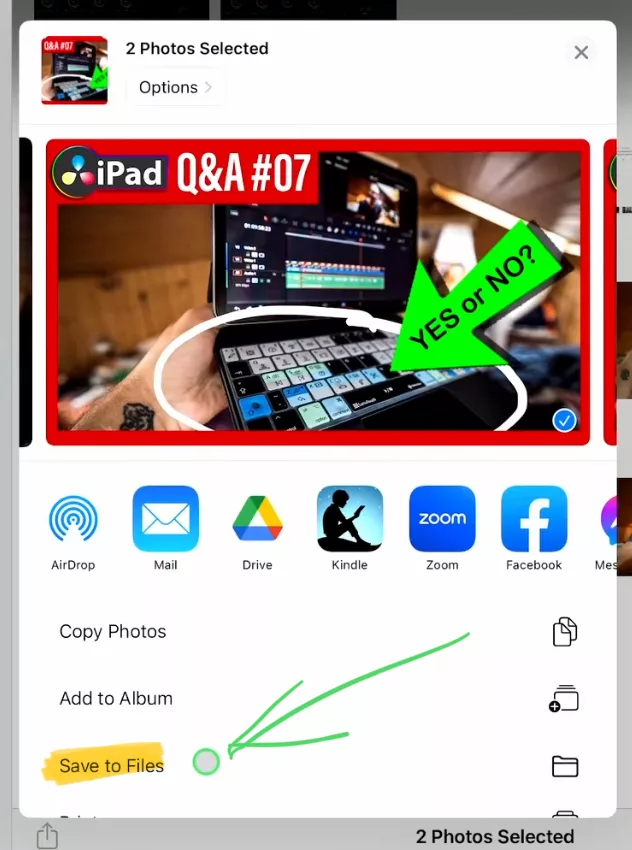
The Philosophy of creating a Timelapse with DaVinci Resolve iPad
In this tutorial i will show you two different methods on how to create a proper Timelapse using DaVinci Resolve. The core idea is, that you created the Timelapse using images. Digital Camera on a tripod that shoots many images over a longer timespan. That way each image has a higher Resolution than if you would just simply record a video.
Because that’s the thing with Timelapse you can always speed up a video and end up having a Timelapse as well. The YouTuber Casey Neistat is known for using that technique in his Vlogs. The advantage of doing it that way, if you record something interesting you can alway go back to normal speed and you have a video. Or in his case, he walks into the shoot and starts talking.
But the advantage of doing it with images is three fold:
- It is much less storage than recording a video. Imagine a video over 10 hours… you would not want that. And most cameras shout of after 30min anyway.
- You can use the perfect settings for each image. Let’s say you create a Timelapse from a city skyline at night. You could make each image with these beautiful stars then only is possible if you longer exposure an image. Btw. That is another advantage, because you can exposure longer. You can have beautiful images where the video would be to dark or to cluttered with noise.
- You end up with a higher resolution image. If the video you create is 4k but you shoot in 12 Megapixel or even 24 Megapixel an above. The image still has enough pixels so you can zoom into the images without losing pixel quality.
Because of that. The idea of both methods i show you today, will focus on creating first a Master Copy Video in the Full Resolution of your images. The only thing we do to that will be the Color Grading. Because with the amazing Color Tools from DaVinci you have the most impact, if you actually color grade the Photos. I will show you what i mean through out the Tutorial.
After that we render a Video in the original Resolution. And then bring this video into our edit. This has a couple of advantages. First it’s not so resources intensive and you can do all the speed up and change of zoom later without any lag. But you still have all the resolution to zoom in, without losing pixel quality. So let’s start.
Methode 1: Create Timelapse using Sequence in DaVinci Resolve iPad
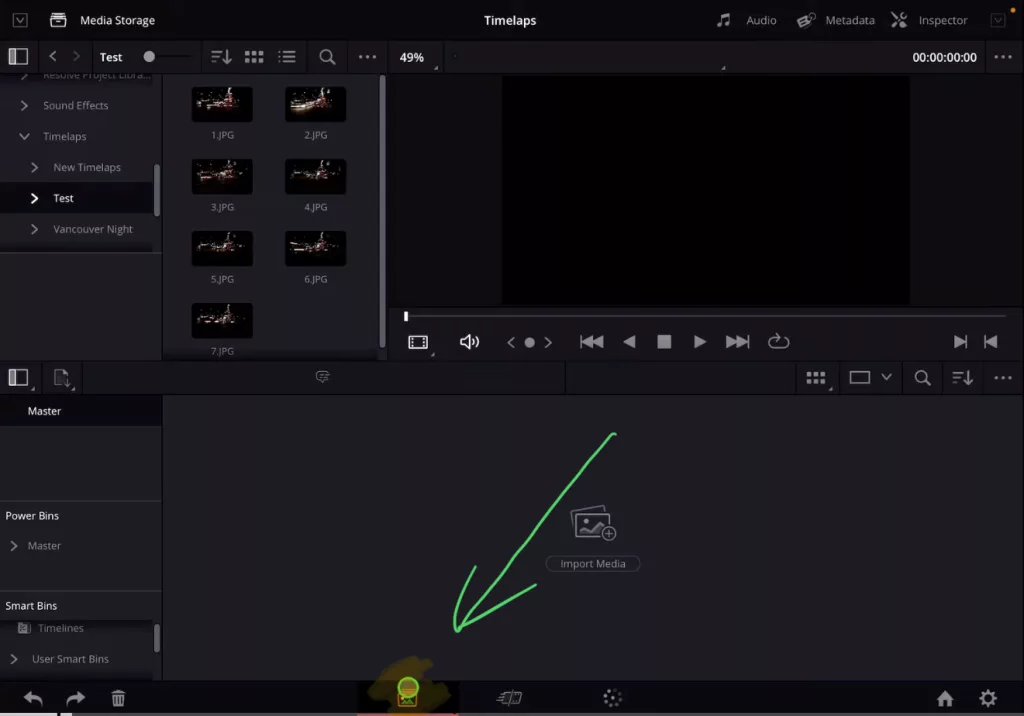
Tip: If you don’t know how to get the other pages on the iPad read this article first: How to UNLOCK ALL PAGES in DaVinci Resolve for iPad Pro
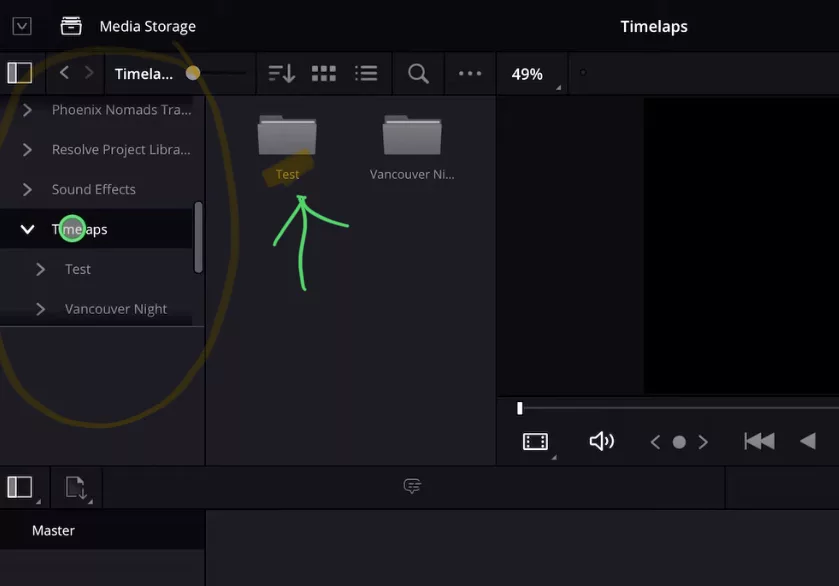
How to toggle on the Sequence Feature in DaVinci Resolve iPad?
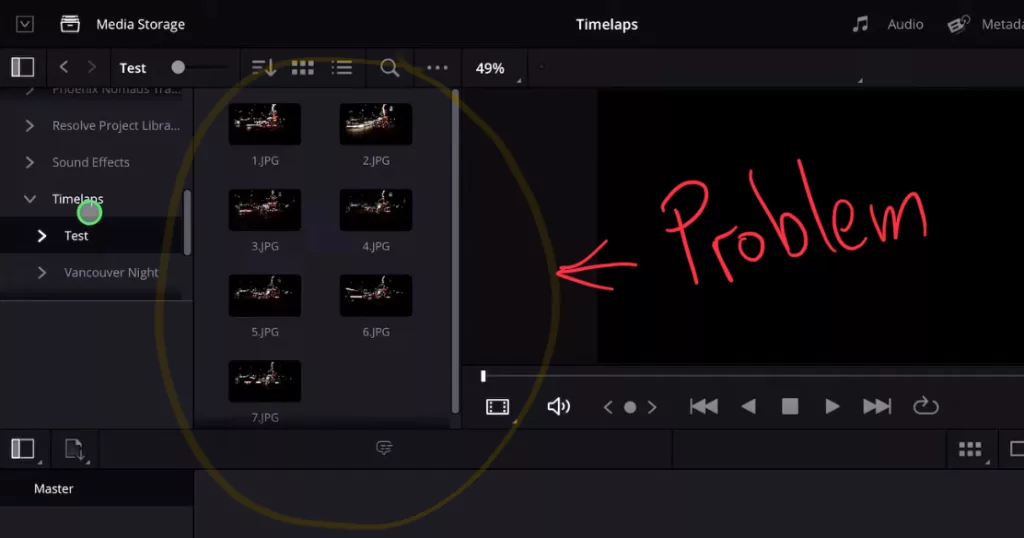
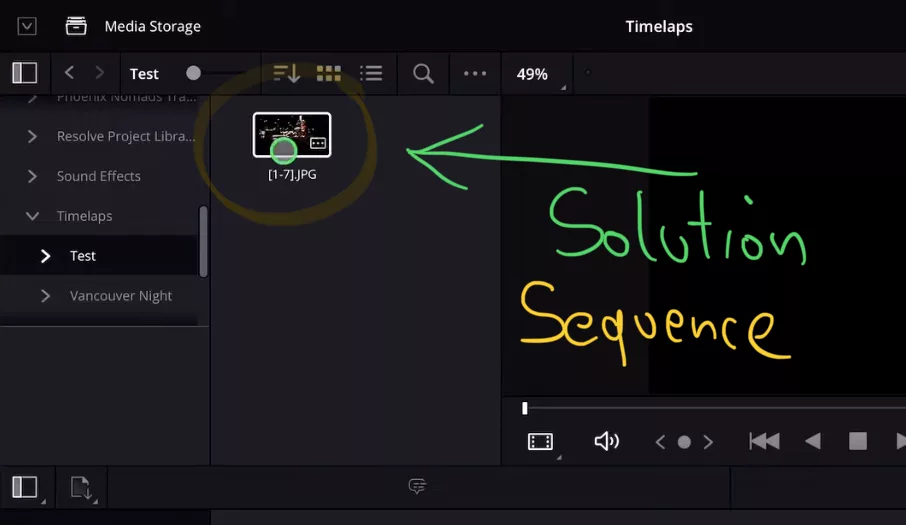
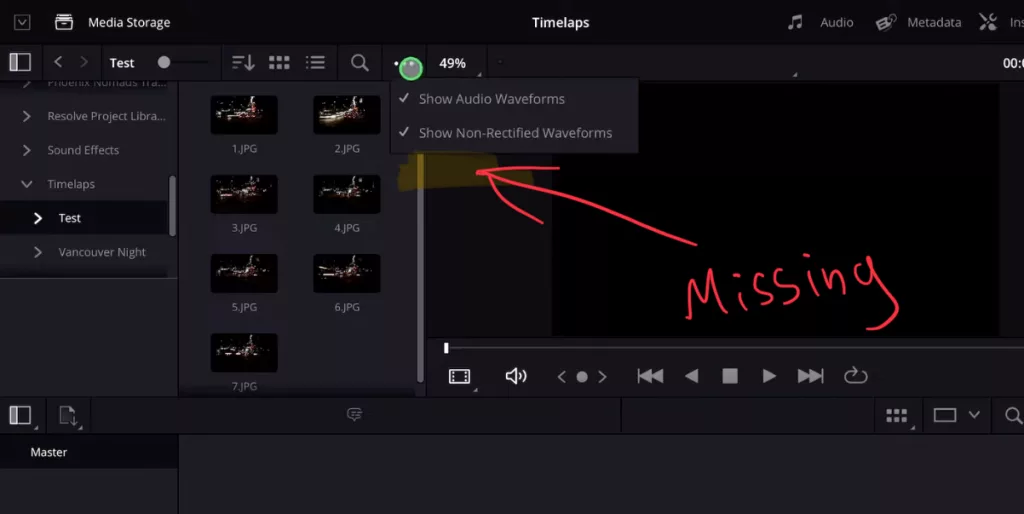
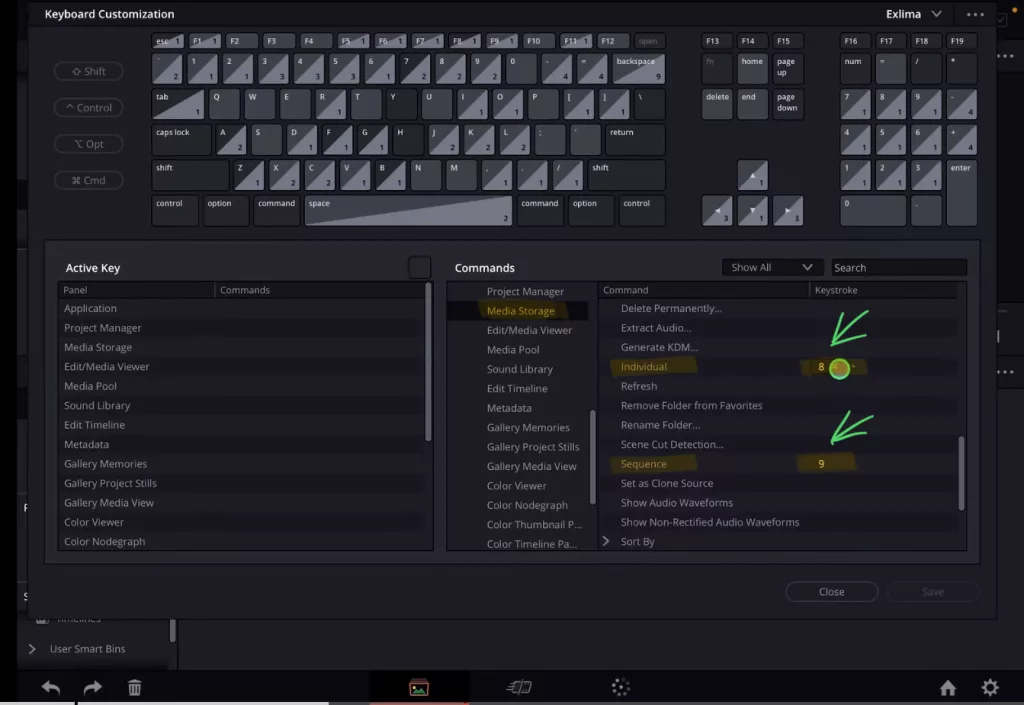
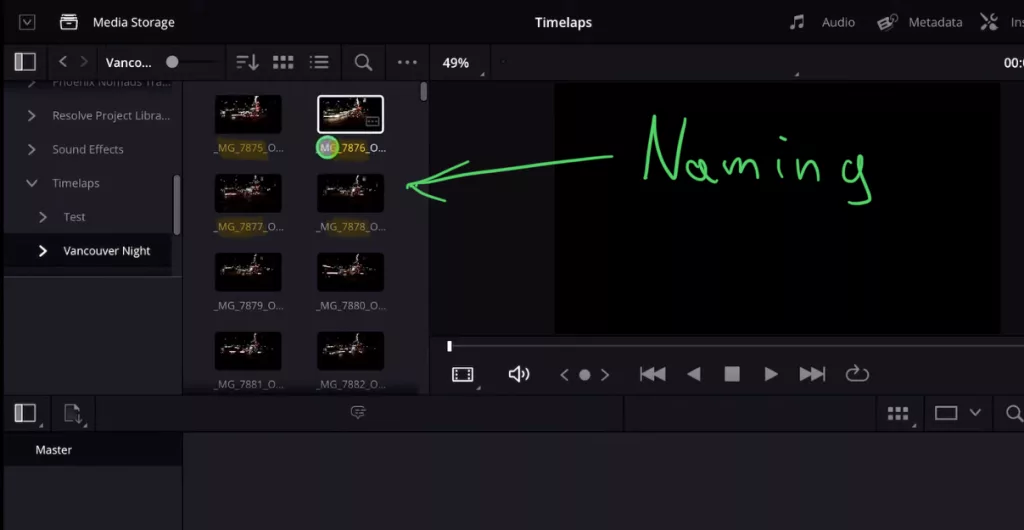
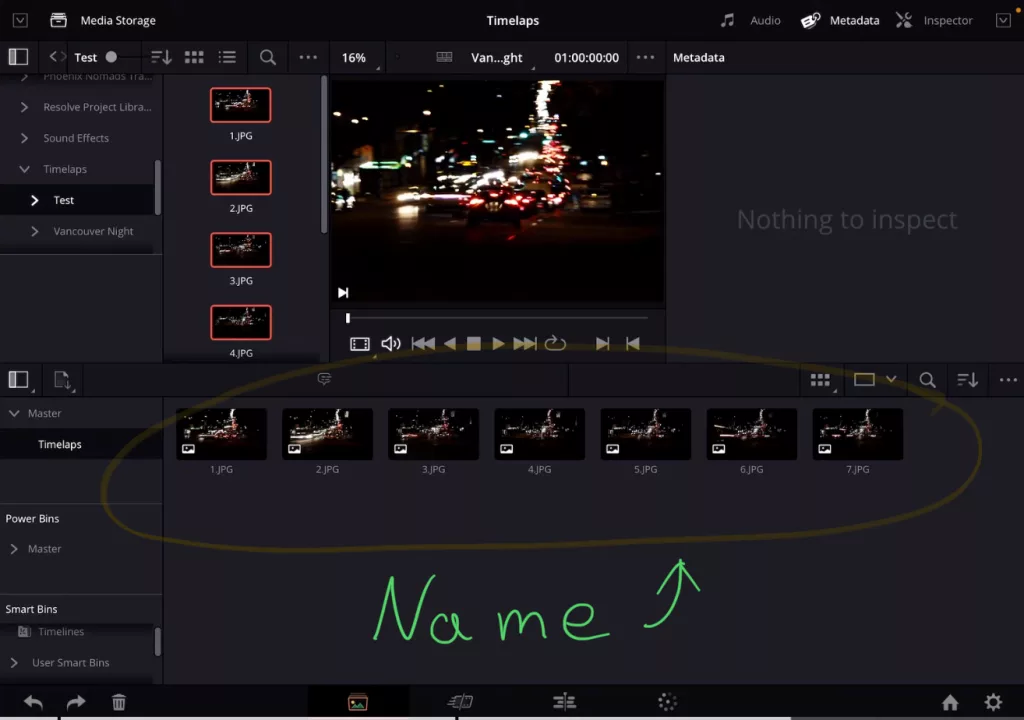
Make sure you are using the Proper Naming Structure for your images.
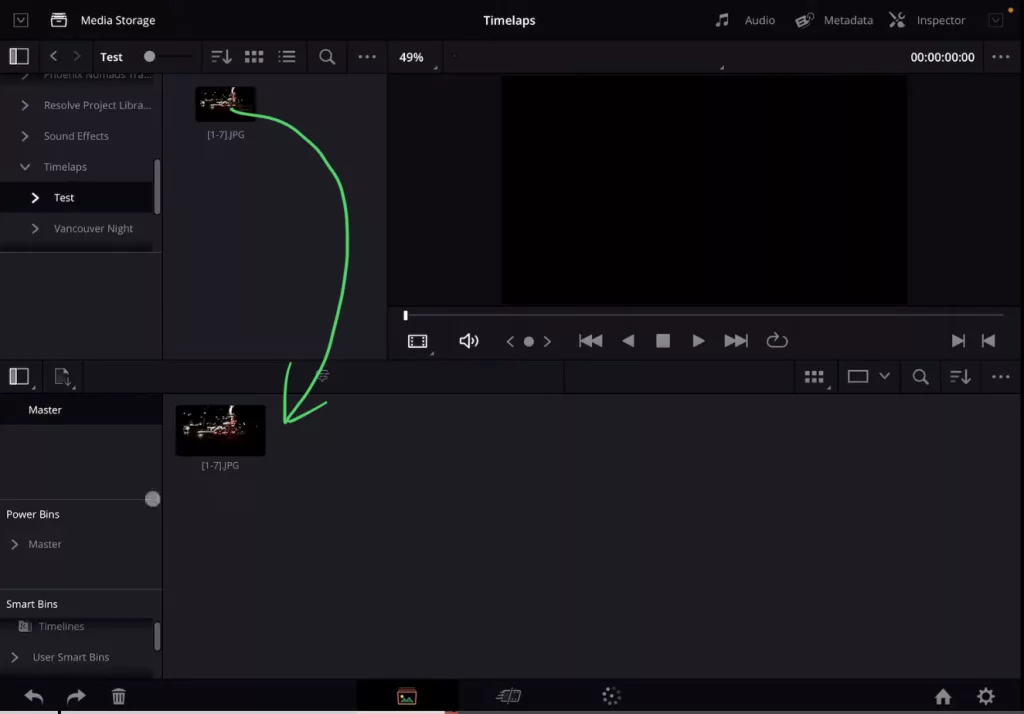
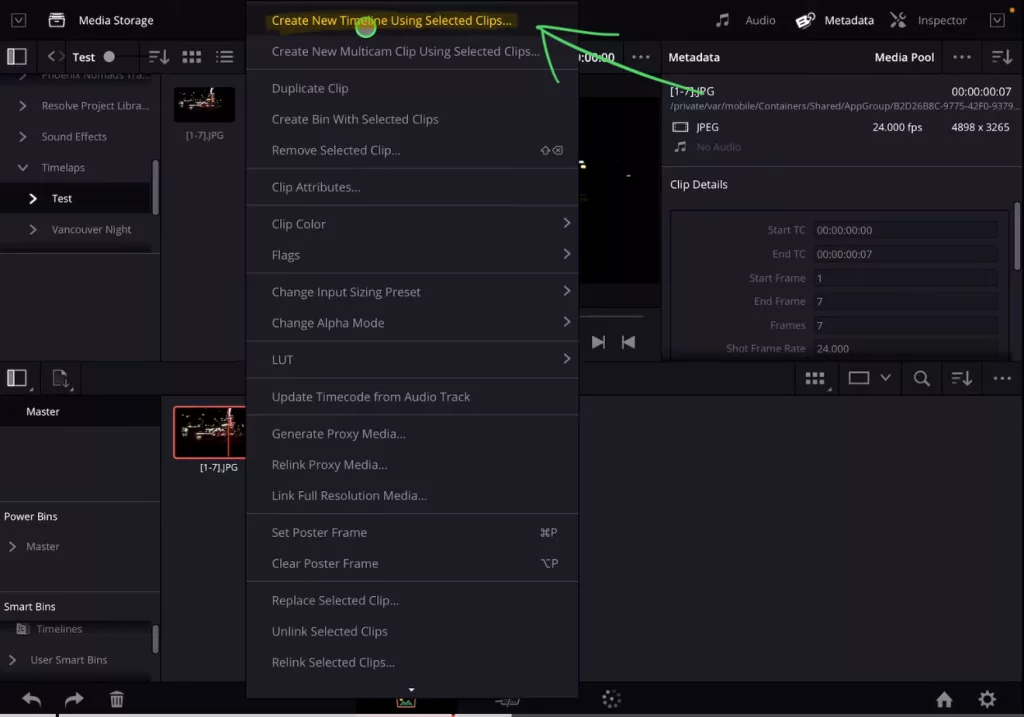
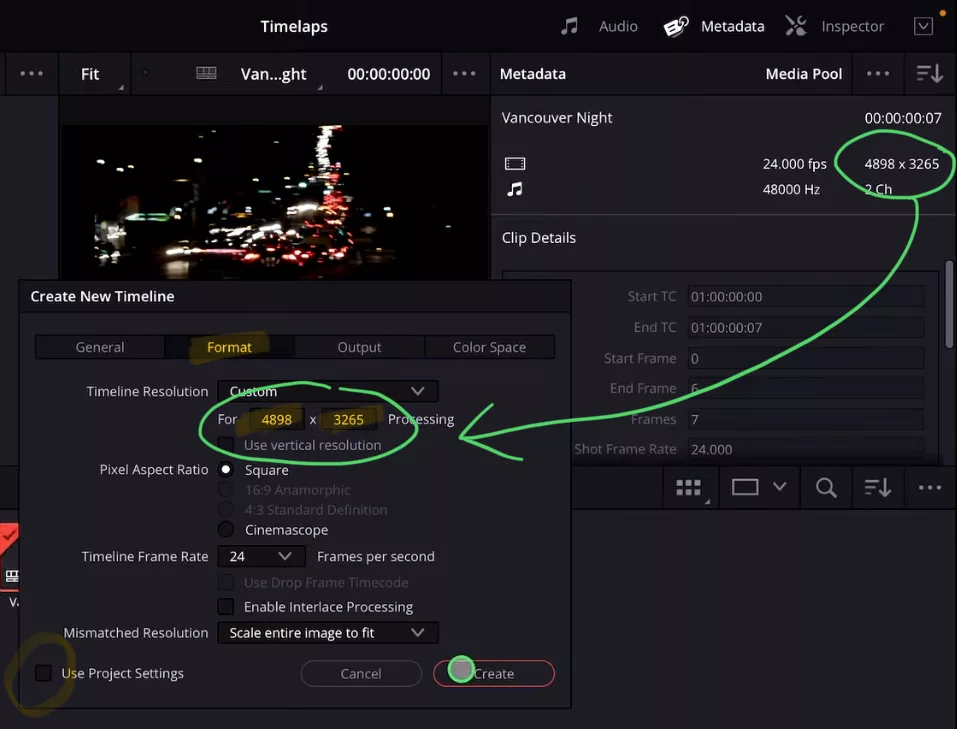
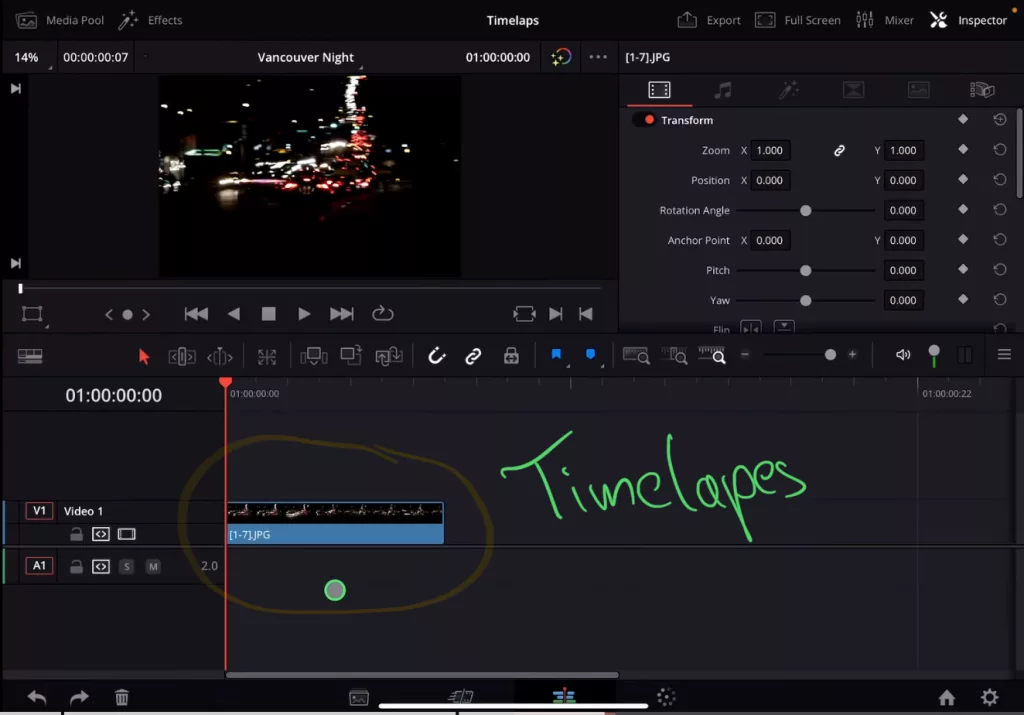
How to create a new Timeline from a Sequence Clip?
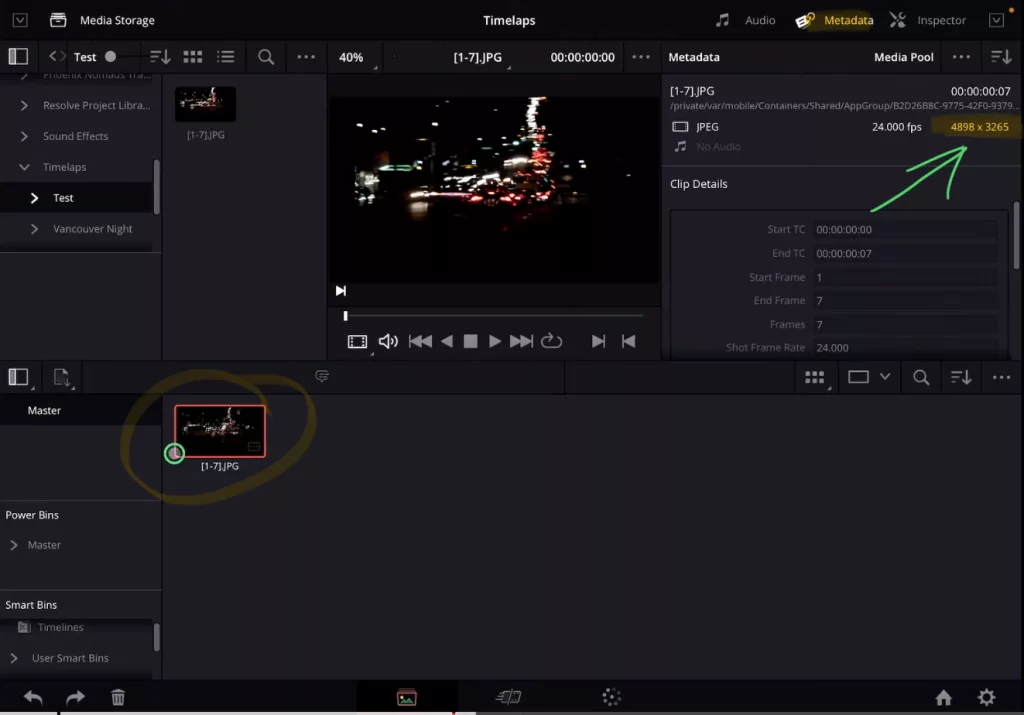
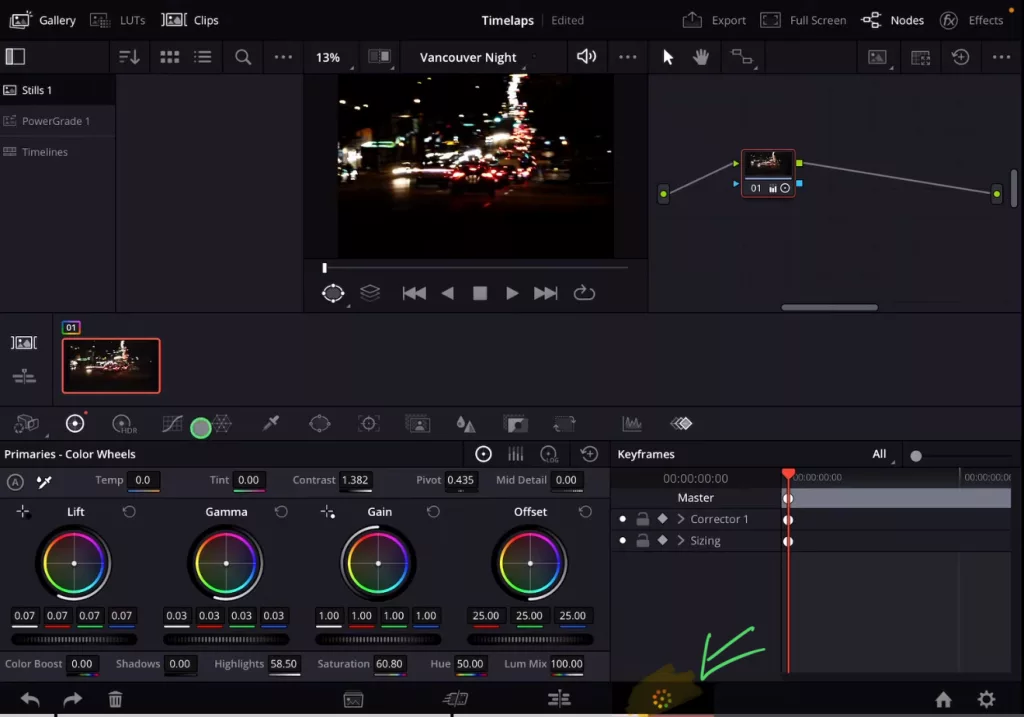
How to Color Grade a Sequence Timeline?
Final Step: Export your Master Copy of your Timelapse
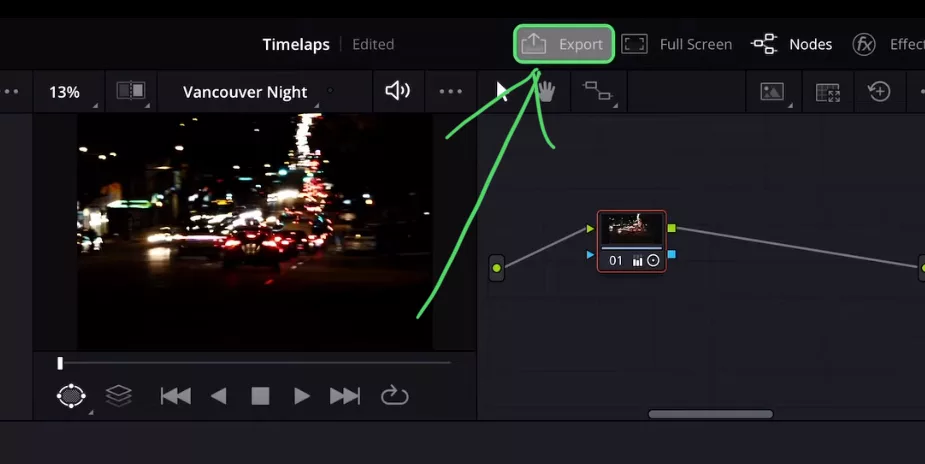
Important: Like i explained before. Besides the color Grading we don’t change anything in this Master Copy. You can if you want, but i would bring in the rendered Video into your Project and do all the other adjustments like “speed up” and “zooming” in the actual project.
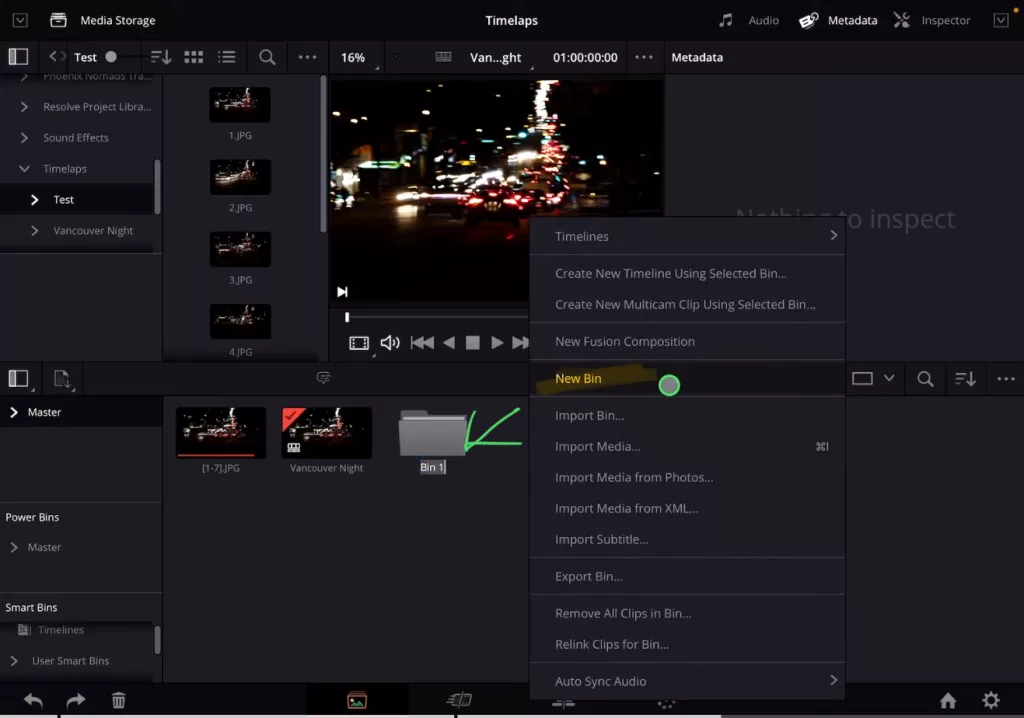
Methode 2: Create Timelapse using Images in DaVinci Resolve iPad
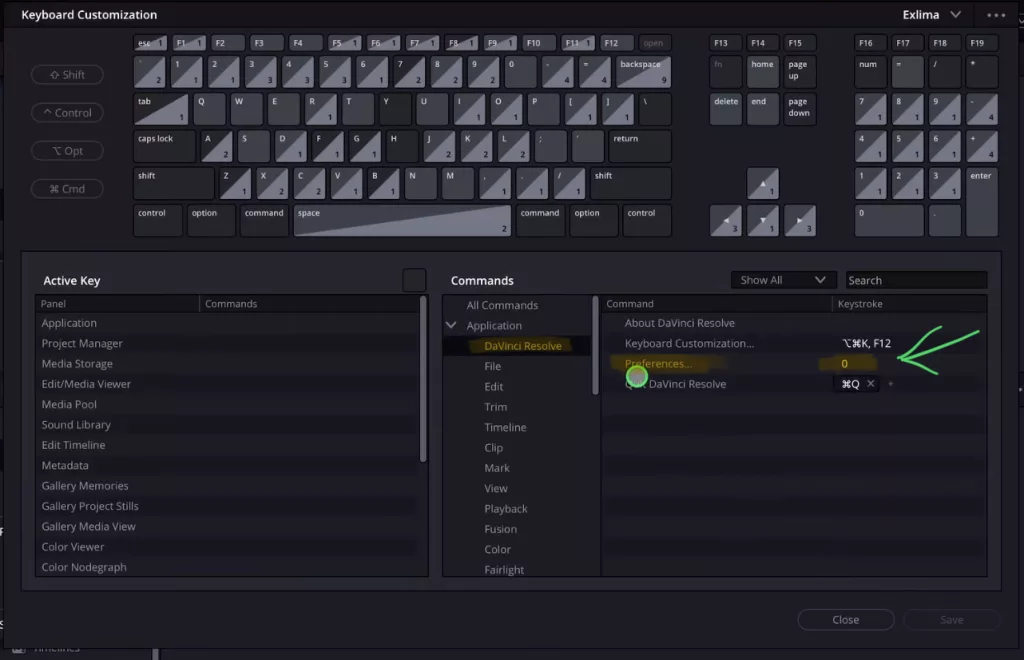
How to open the DaVinci Resolve Preferences Menu on iPad?
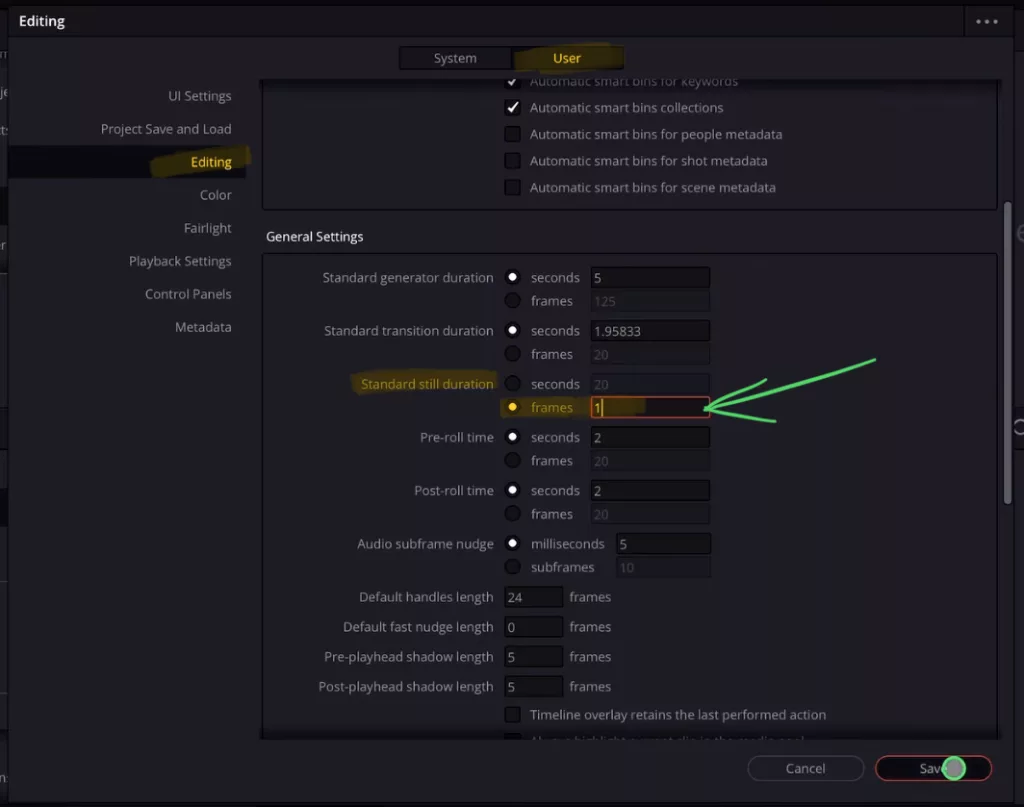
How to change the Standard Still Duration on DaVinci Resolve iPad?
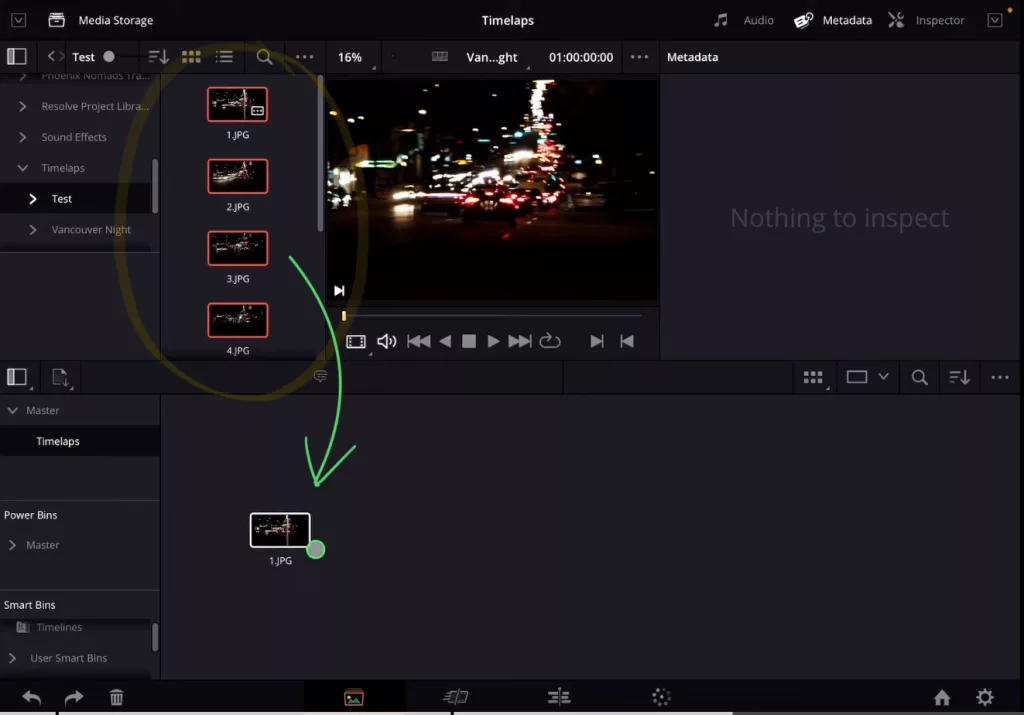
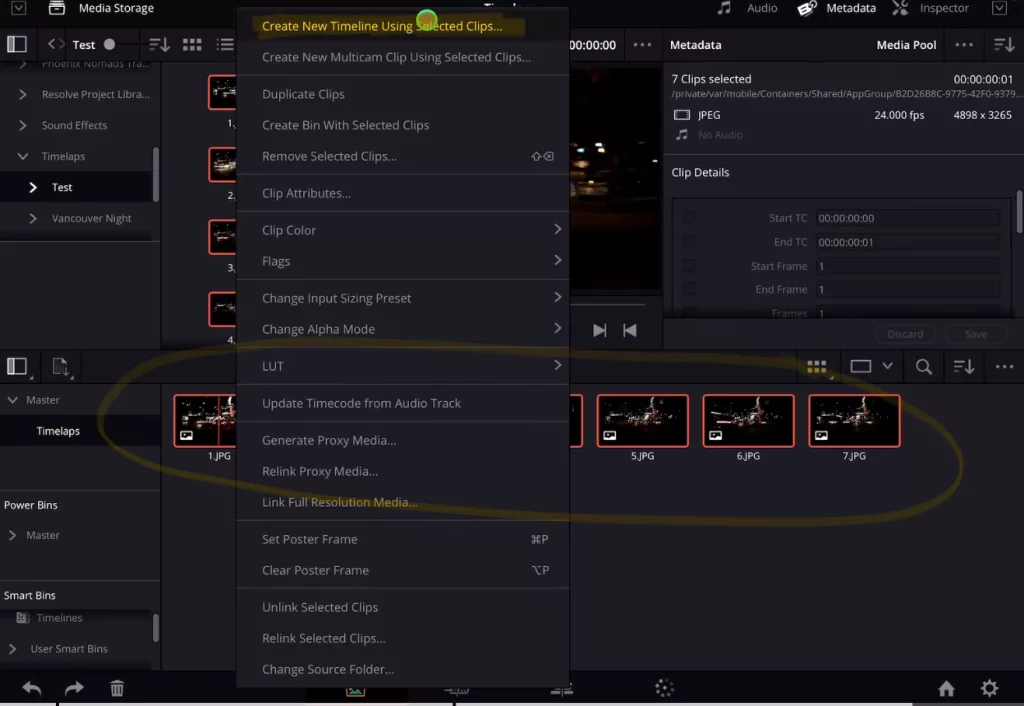
How to create a new Timeline from multiple images?
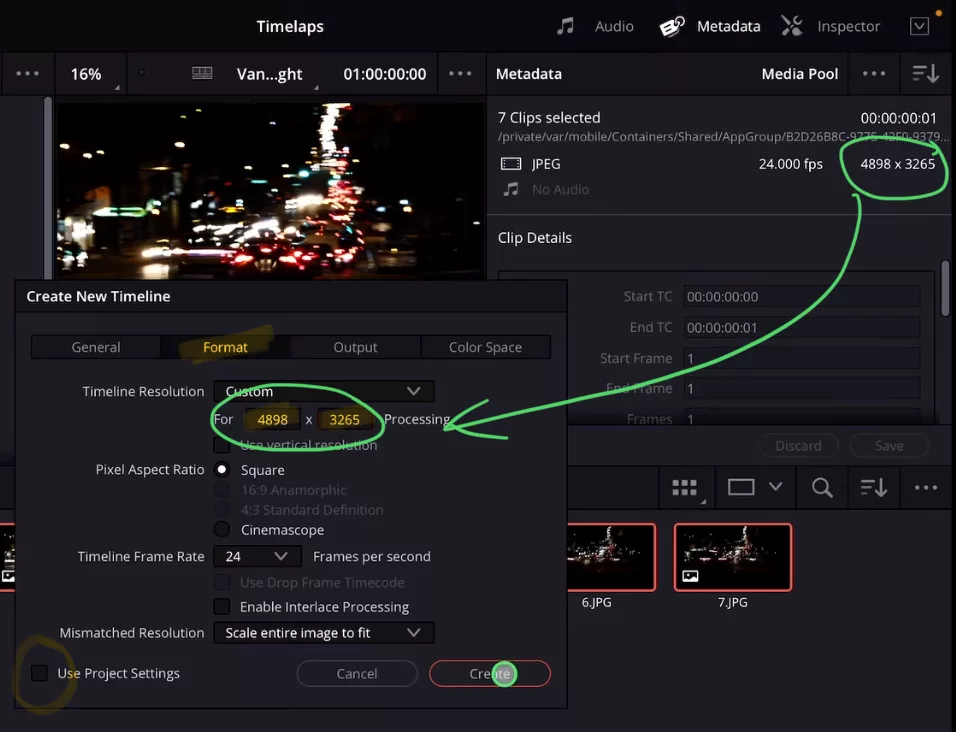
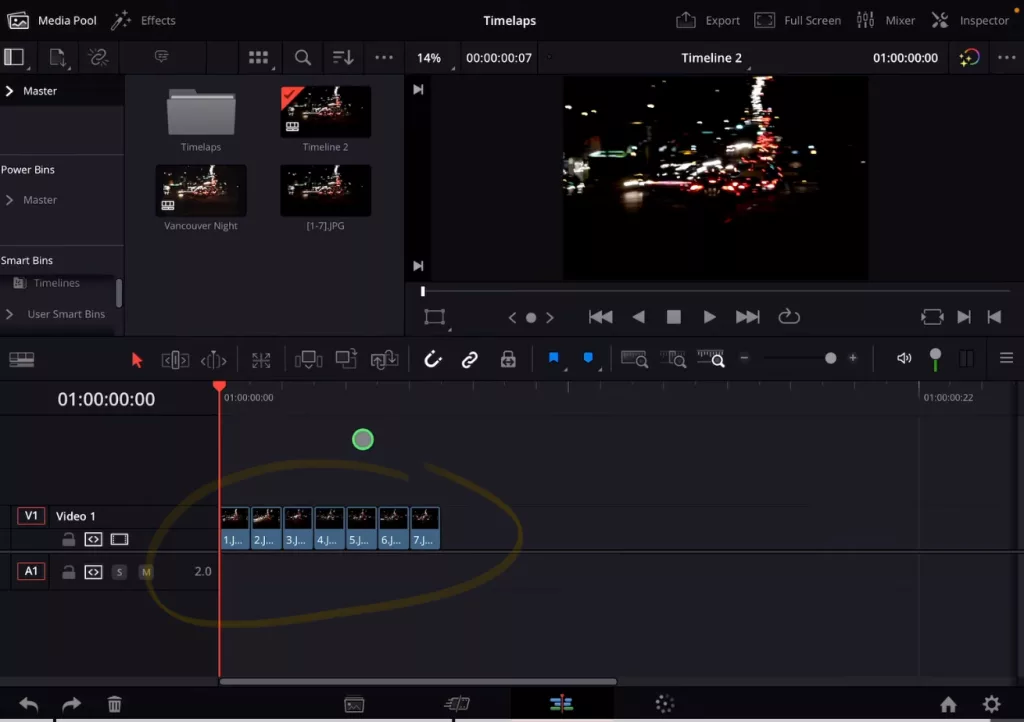
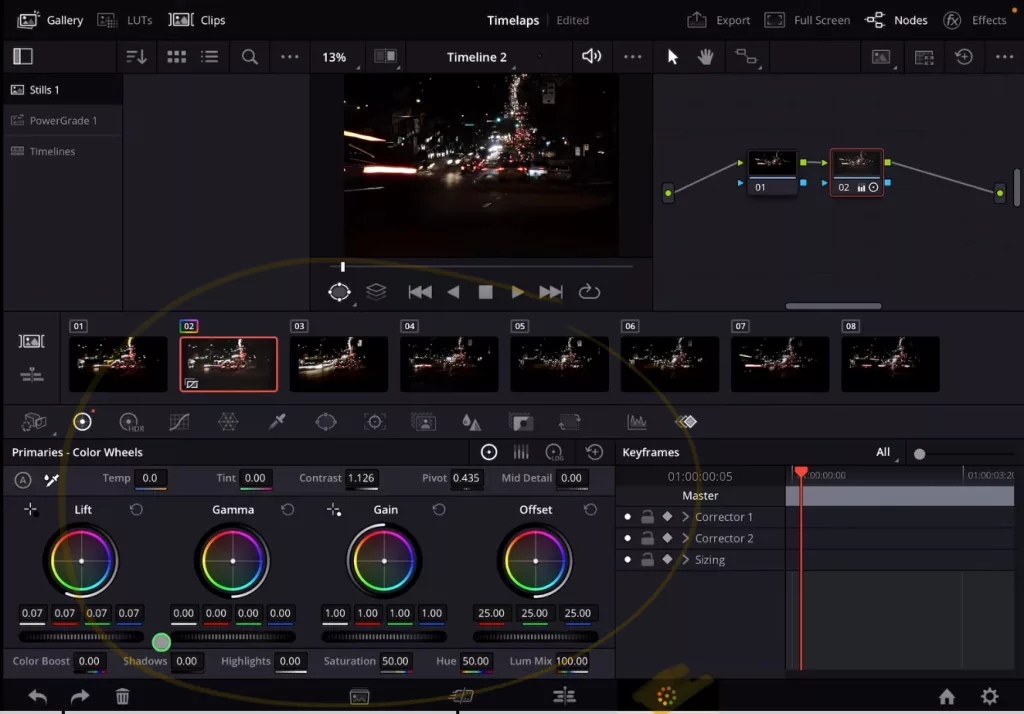
How to Color Grade a Timelapse with multiple images?
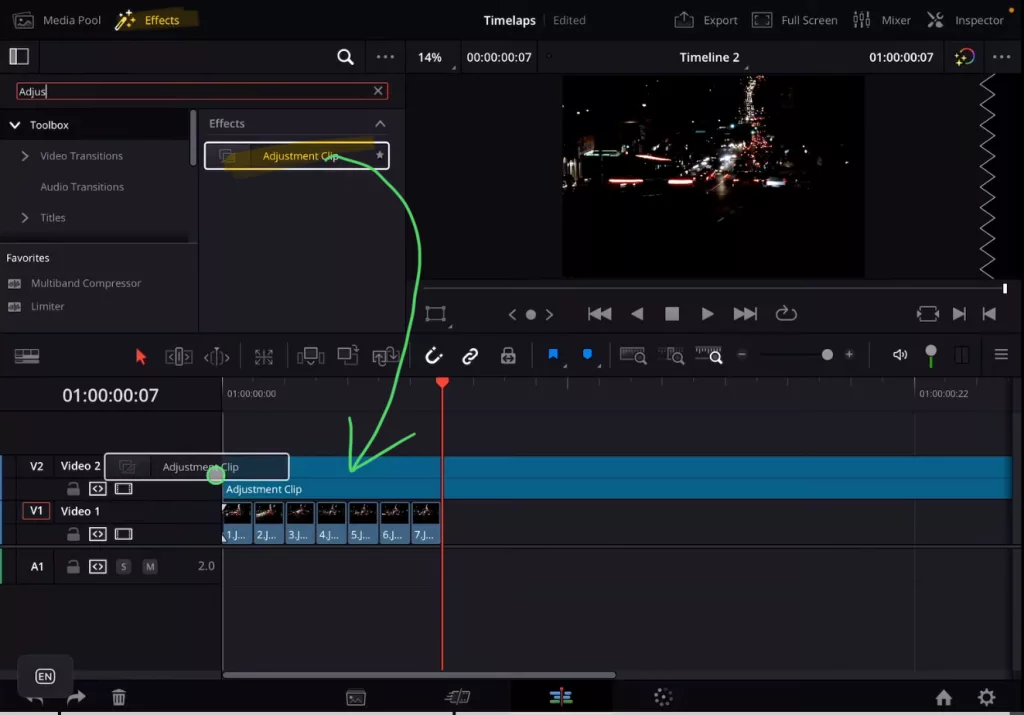
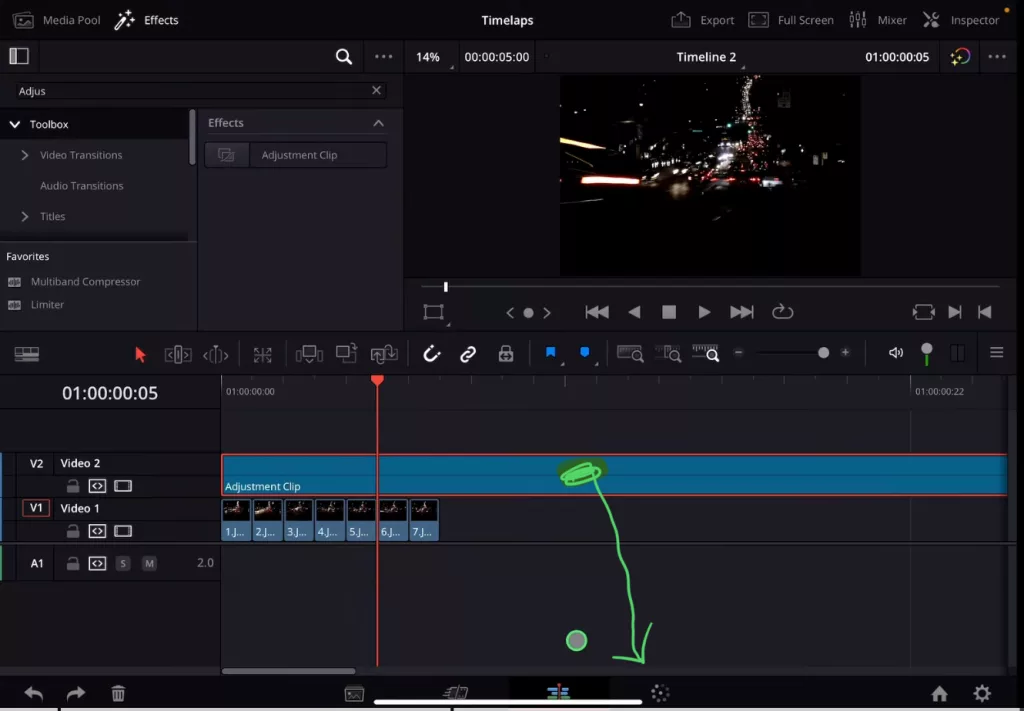
Final Step: Export the Master Copy of your Timelapse
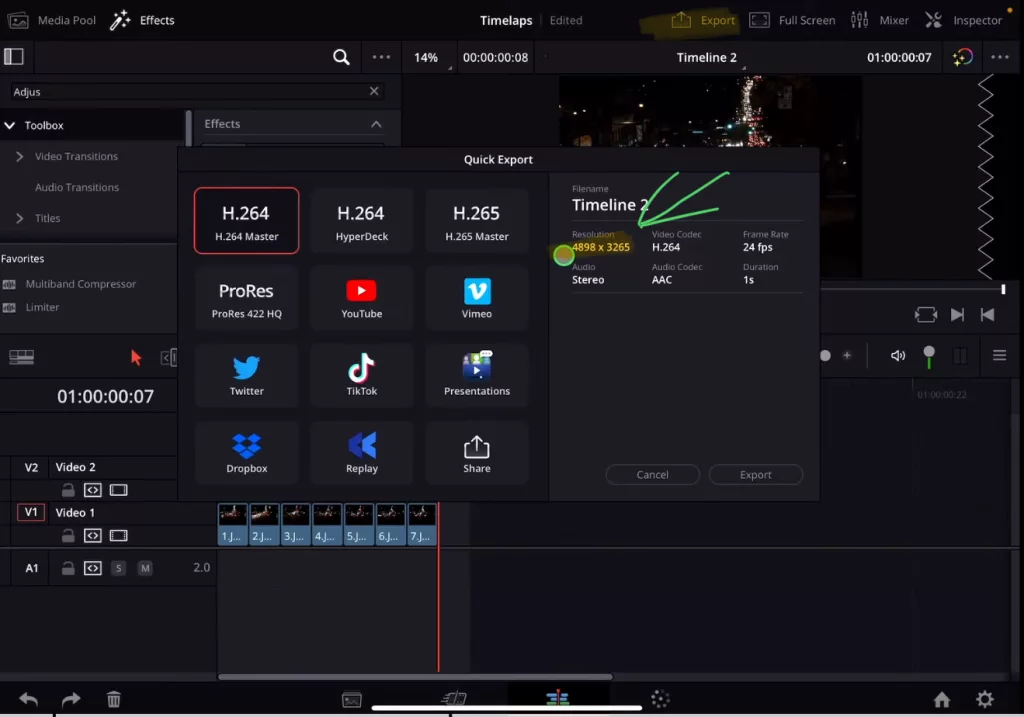
Important: Like i explained before. Besides the color Grading we don’t change anything in this Master Copy. You can if you want, but i would bring in the rendered Video into your Project and do all the other adjustments like “speed up” and “zooming” in the actual project.
If you want to host your own Online Course use CC360
I really believe, that CC360 is the best Platform to host your own Online Course currently on the market. And each week they introduce new features. Amazing. Check it out here.
BONUS: All DaVinci Resolve iPad Masterclass Students get the Transition Pack & the 8K Film Grain Pack for FREE!
You can either get the Transition Pack separate here: Seamless Transition Pack for DaVinci Resolve iPad. Or the 8K Film Grain Pack here: 8K Film Grain Bundle. but all of our DaVinci Resolve iPad Packs are a FREE Bonus for the DaVinci Resolve iPad Masterclass Students.
Check It Out here DaVinci Resolve iPad MasterClass: From Beginner To Pro.

Read Next
• How COPY Color Grade to MULTIPLE Clips in DaVinci Resolve iPad
• DO THIS to make DaVinci Resolve FASTER! (Instead of rage smashing your iPad)
• How To Delete Cache Files in DaVinci Resolve iPad
• How To Color Correct iPhone Footage in DaVinci Resolve iPad
• Easy Sync Audio & Video in DaVinci Resolve iPad
