How To MULTICAM in DaVinci Resolve iPad!
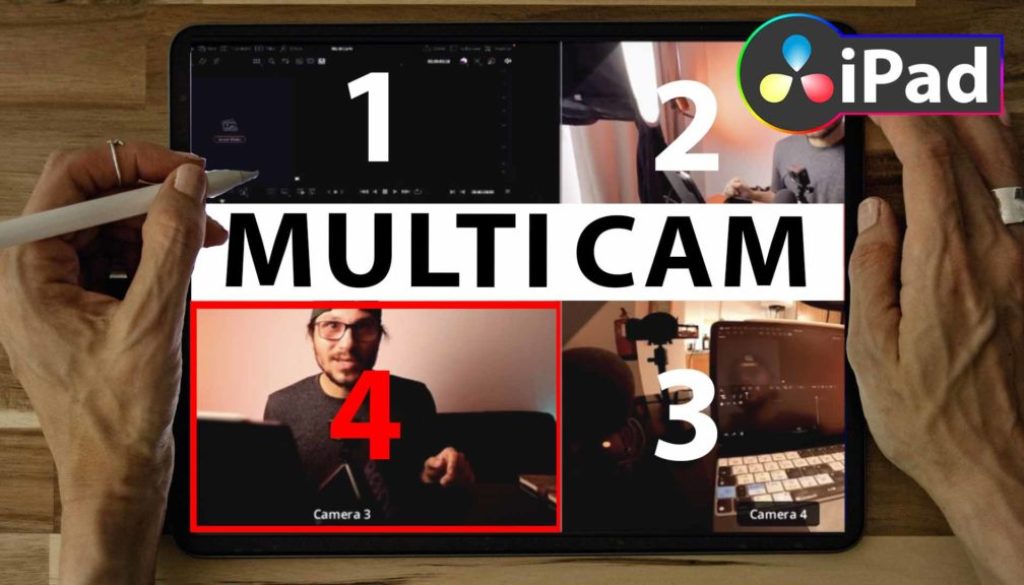
In this article i will show you two ways how to use the Multicam in DaVinci Resolve for the iPad. The first solution will be on the cut page useing the sync icon. The second solution we gone use Multicam Clips. This way is a faster approach to cut between different angles in real time. Enjoy.
Pro Tip: Make your Videos Cinematic (and save a tone of time) with our Seamless Transition Pack for DaVinci Resolve iPad.

Contents
- [Video] How To Use MULTICAM in DaVinci Resolve iPad!
- Solution 1: Multicam with Sync in Cut Page
- How to use the Synced Media in the Cut Page
- Solution 2: How to create a Multicam Clip in DaVinci Resolve for iPad
- How to proper use Multicam Clips in DaVinci Resolve iPad
- BONUS: All DaVinci Resolve iPad Masterclass Students get the Transition Pack for FREE!
[Video] How To Use MULTICAM in DaVinci Resolve iPad!
Solution 1: Multicam with Sync in Cut Page
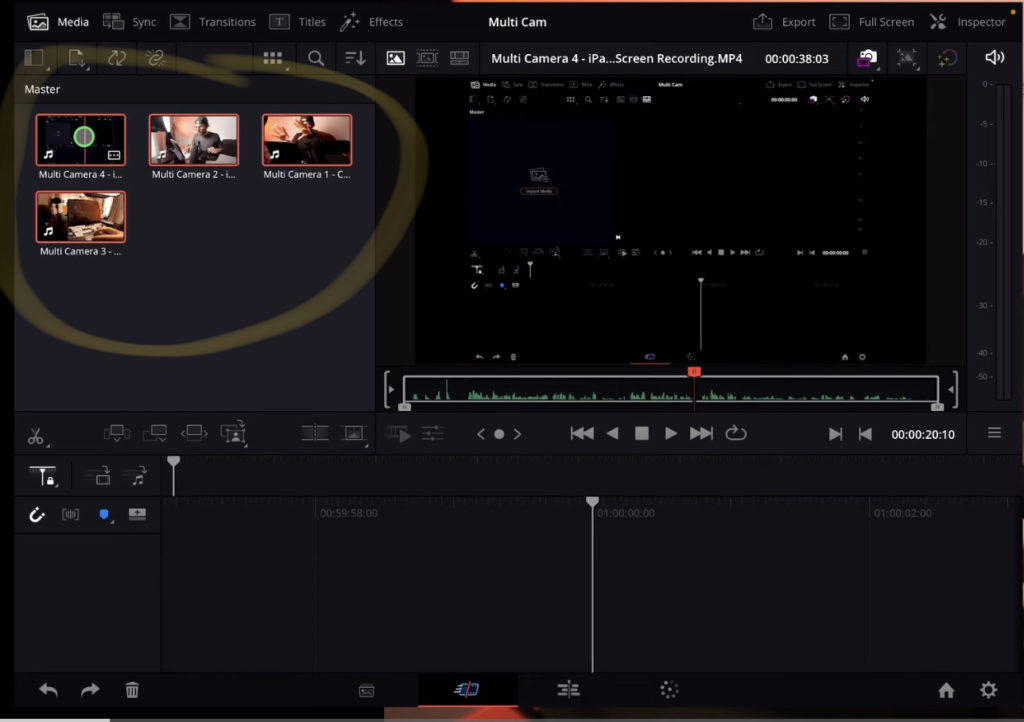
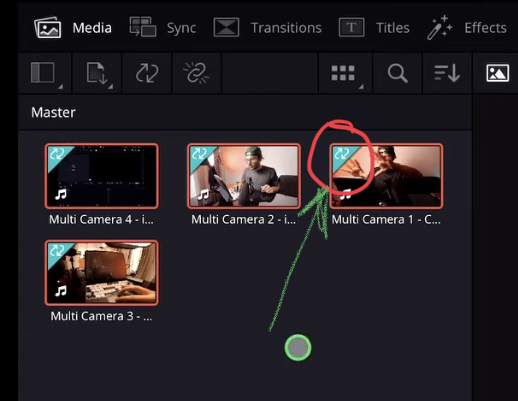
Before you click on the Sync Icon on the top left we first have to select all the clips from our Multicam recording in the media bin. And you first have to click the little link Icon below the Sync Button.
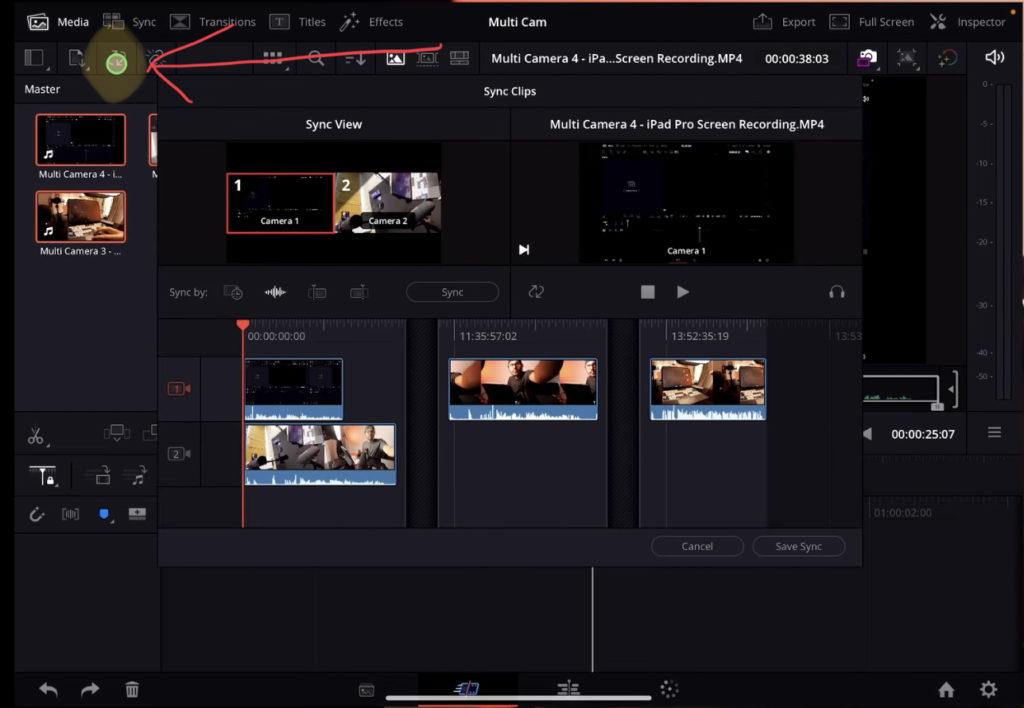
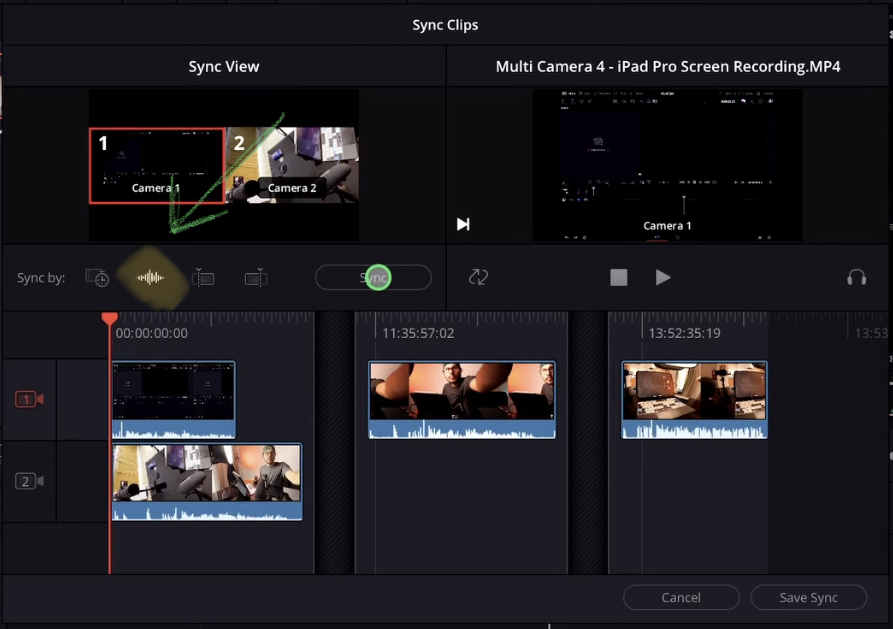
In the next step we have to tell DaVinci how we want to Sync our clips together. You can sync by timecode or waveform. In my example because i did not record my material with the in camera timecode setting i will use the waveform. And then click Sync.
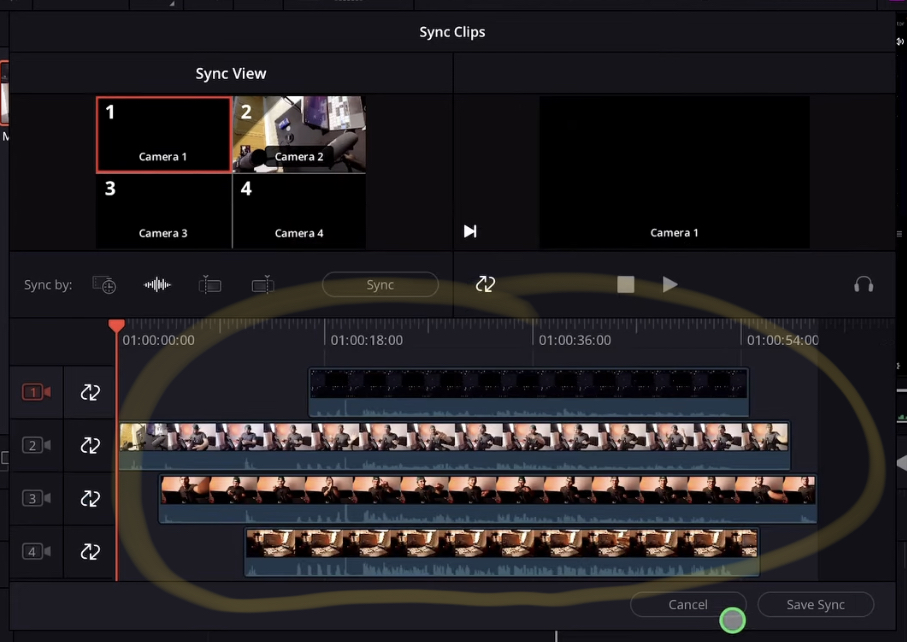
How to use the Synced Media in the Cut Page
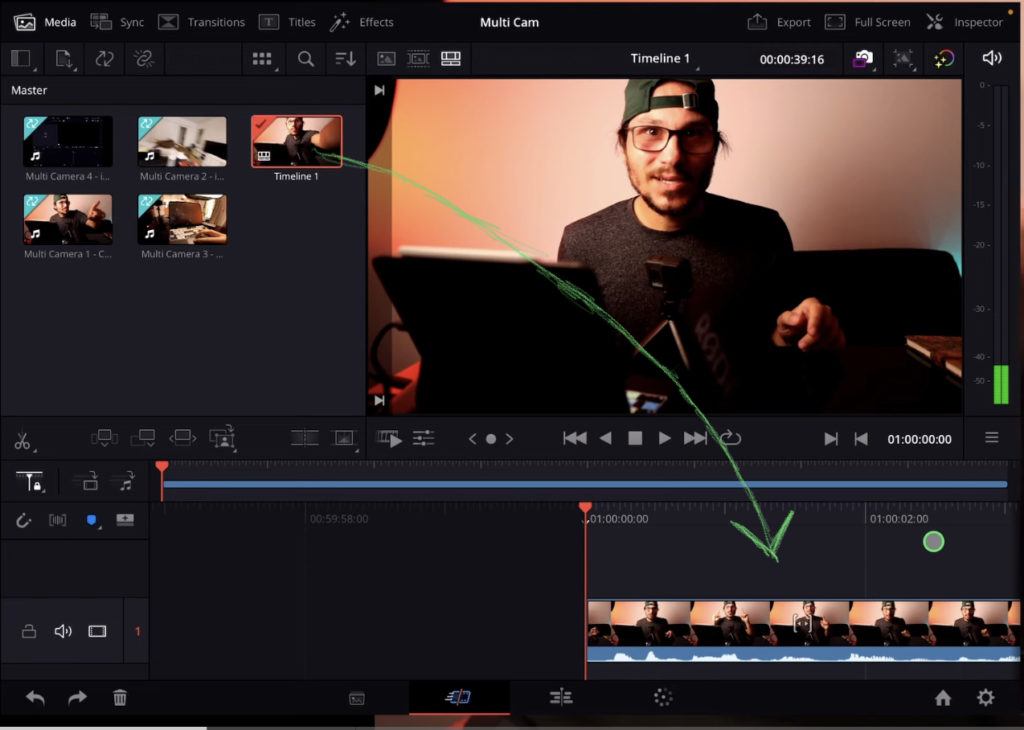
We start editing our Multicam by drag & drop the main camera to the Timeline. In my example this is my talking head angle with my Canon EOS R6. This has the best Audio and is also considered my A-Roll.
After that now is finally the time to click on the Sync Button on the top.
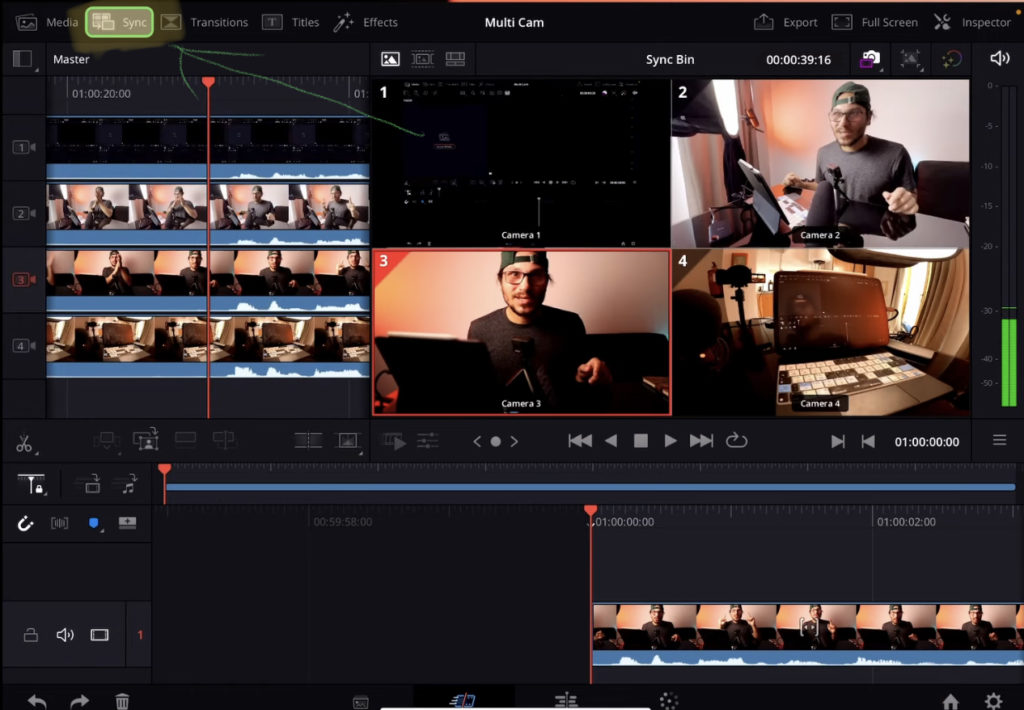
In the Muticam viwer you can even use the keyboard shortcuts 1, 2, 3, 4… the switch between the camera angels. Depending where your Playhead in the Timeline is DaVinci will always show a short segment of that Camera Angle. Which you can simply drag & drop to the timeline.
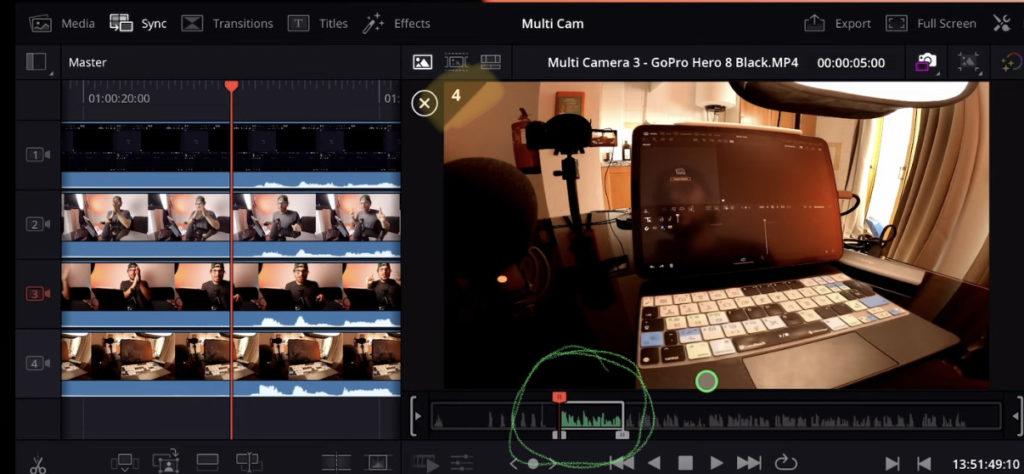
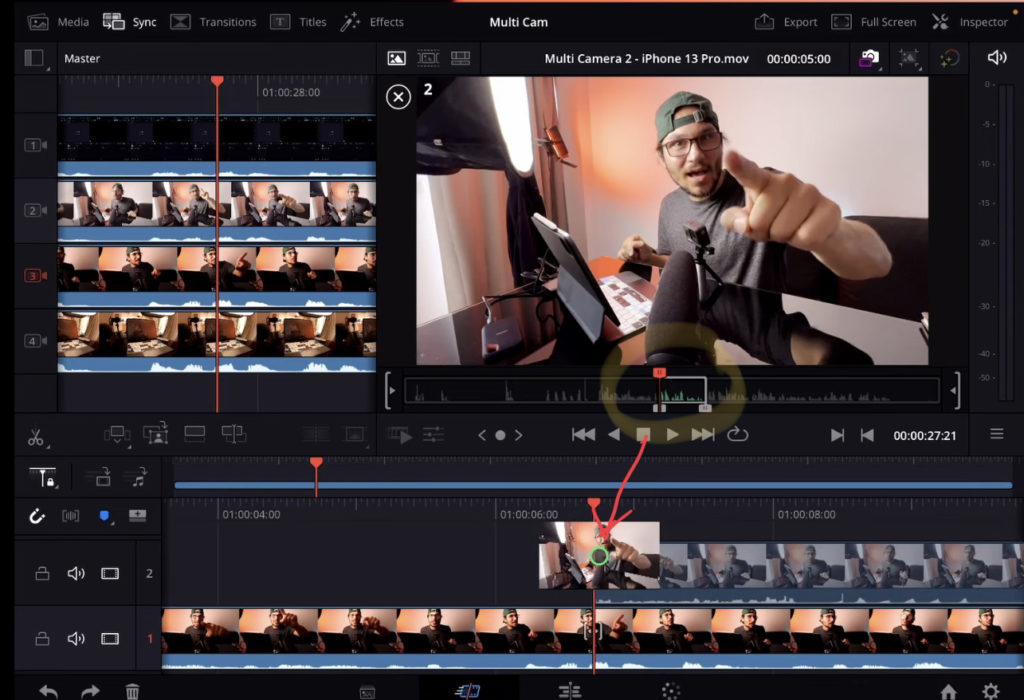
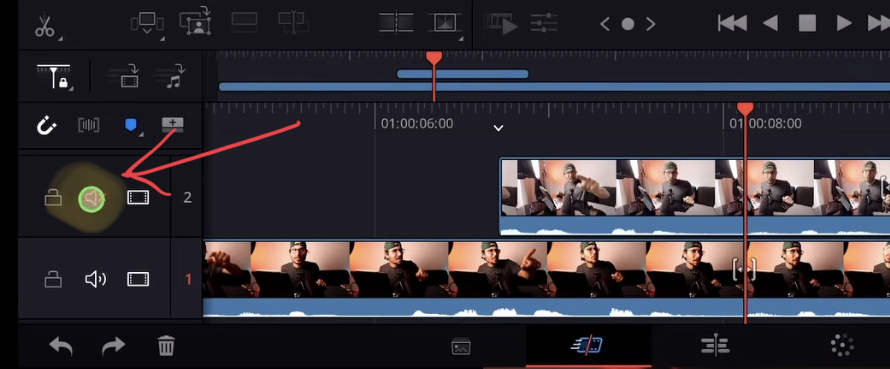
You can alway open and close the Sync Tab. The basic idea is that you watch through your timeline. And on the moment you wish to have a different camera angle you stop the playhead and click on the Multicam camera. Drag & Drop the clip down and adjust the length of the clip.
For many editiors this is already a game changer. But i personally still think that this approach takes alot of time. Is there not way without adjusting each clip length? And yes there is… In Solution 2 i will show you how this works.
Solution 2: How to create a Multicam Clip in DaVinci Resolve for iPad
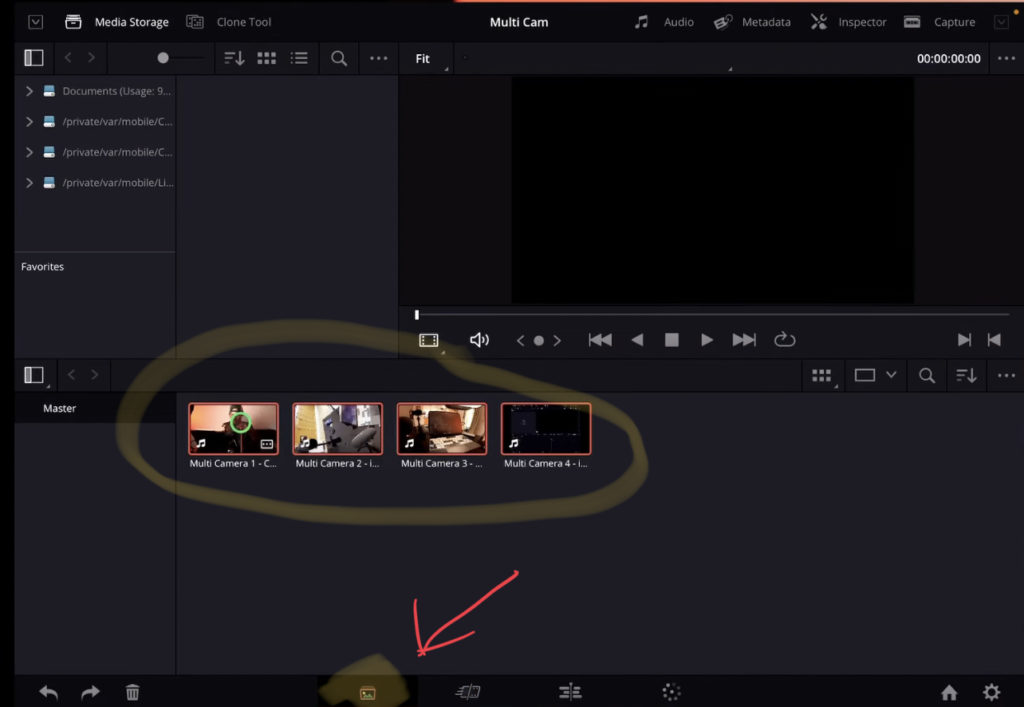
For this we need the media page. If you don’t know how to open all the other pages then read this article here first: “How to UNLOCK ALL PAGES in DaVinci Resolve for iPad Pro”
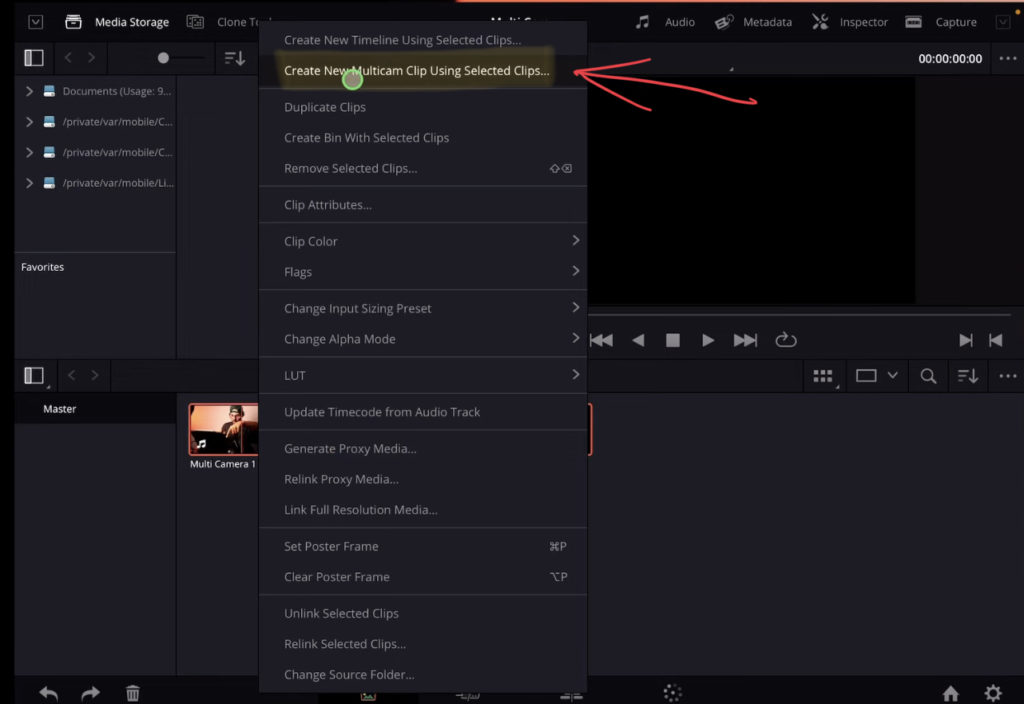
A setting window will open where you can do some adjustments. The most important here is the Angle Sync Methode. Again you could use something like Timecode but in my case i will use the Waveform, because all my cameras recorded Audio from the same take. Change this to Sound to apply the Waveform Sync option.
Also i leave the checkmark on “Move Source Clips to ‘Original Clips’ Bin” on. This will create a separate folder for the source clips used. This will help to be more organised.
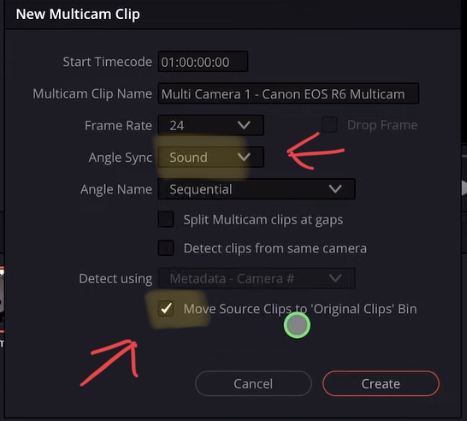
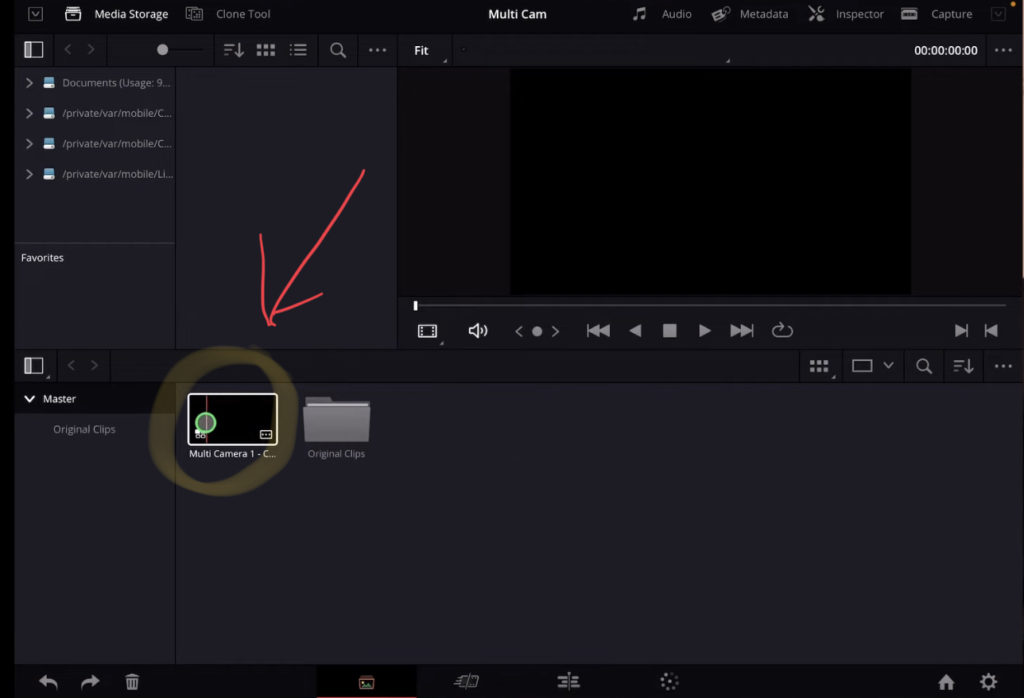
The Multicam Clip will be created and has this little icon in the bottom corner. Also you see the bin with the Source Material. For the next step we are going to the Edit Page.
How to proper use Multicam Clips in DaVinci Resolve iPad
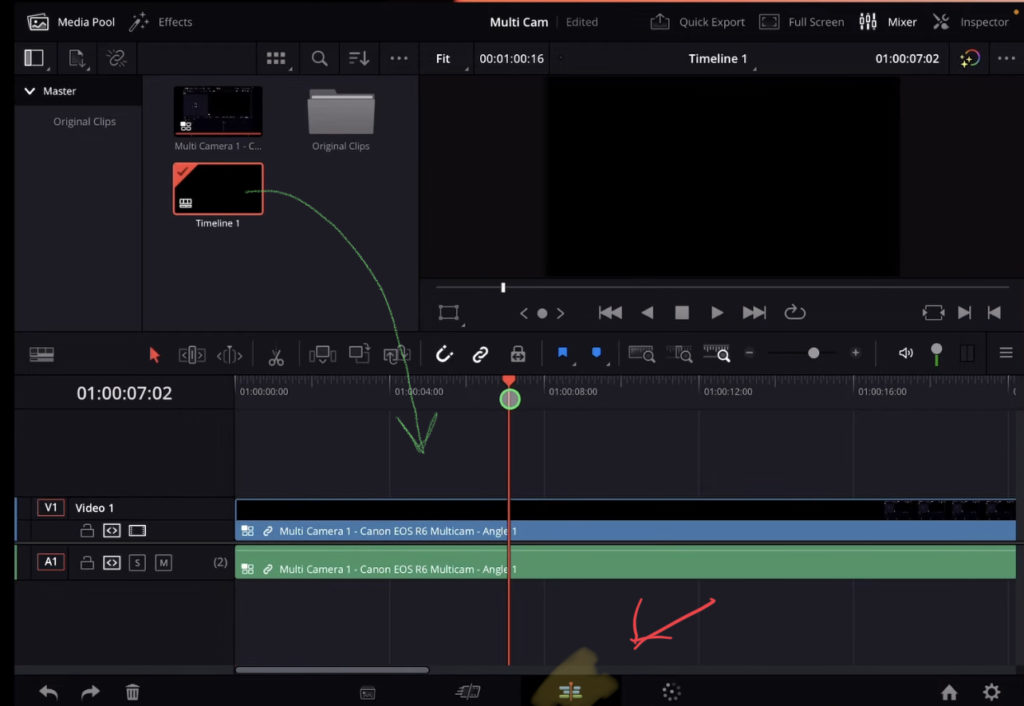
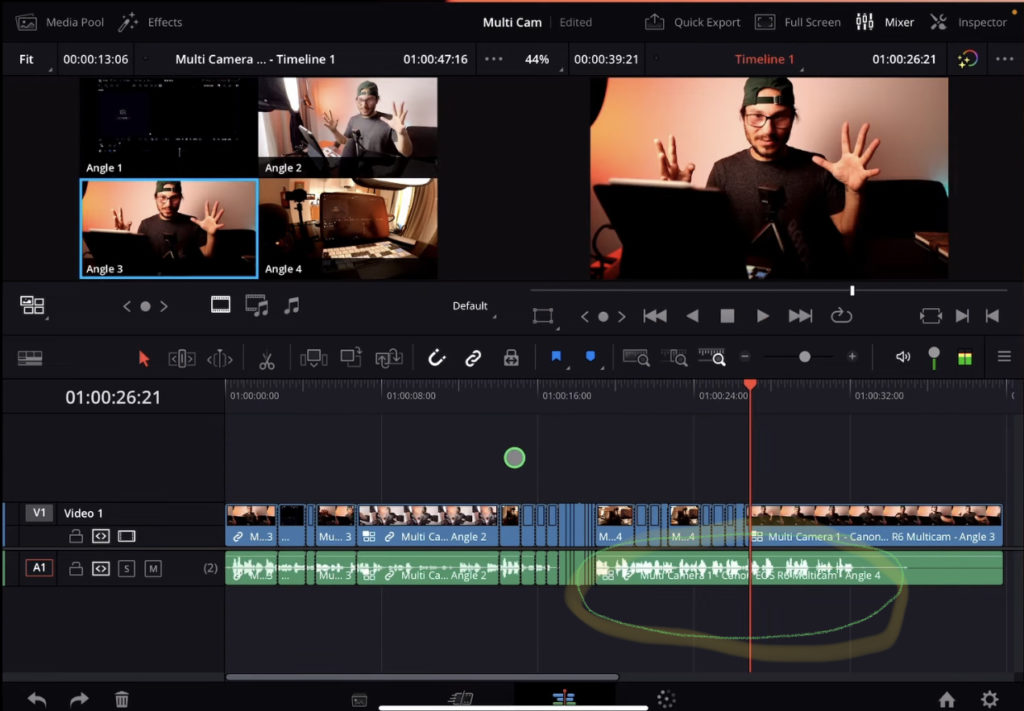
In the Edit Page go and drag & drop the Multicam Clip onto your Timeline and change the viewer mode to Multicam.
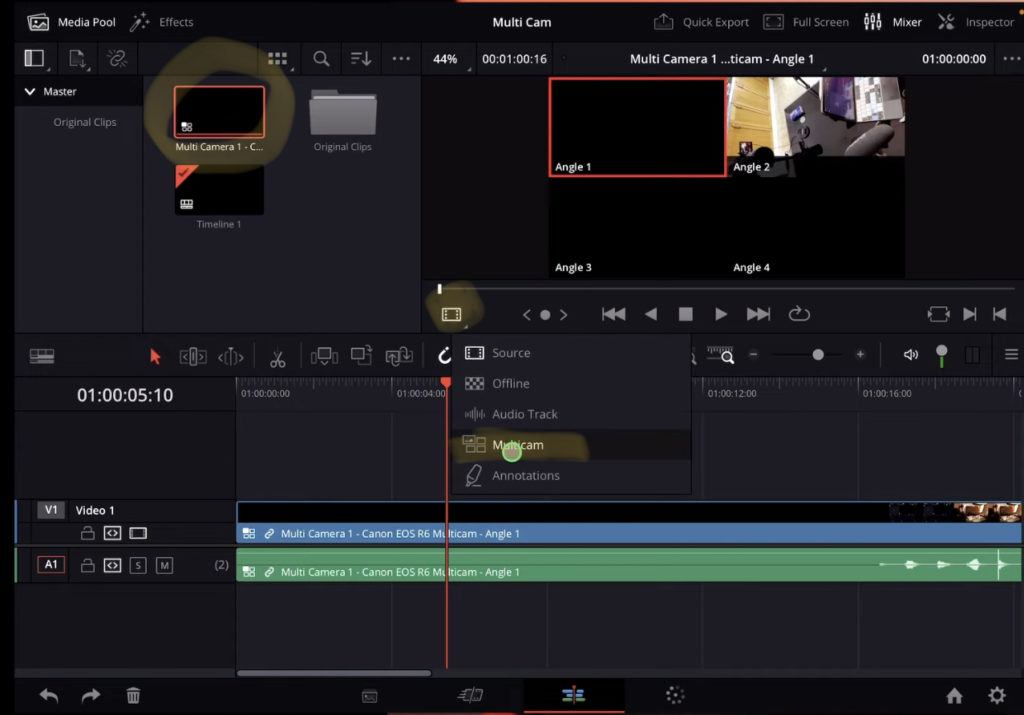
You can always change the video angles by right click on video part of your Multicam clip and go to “Switch Multicam Clip Angle”. Here select from the cameras you have. In my example i can choose between Angle 1, 2, 3 or 4.
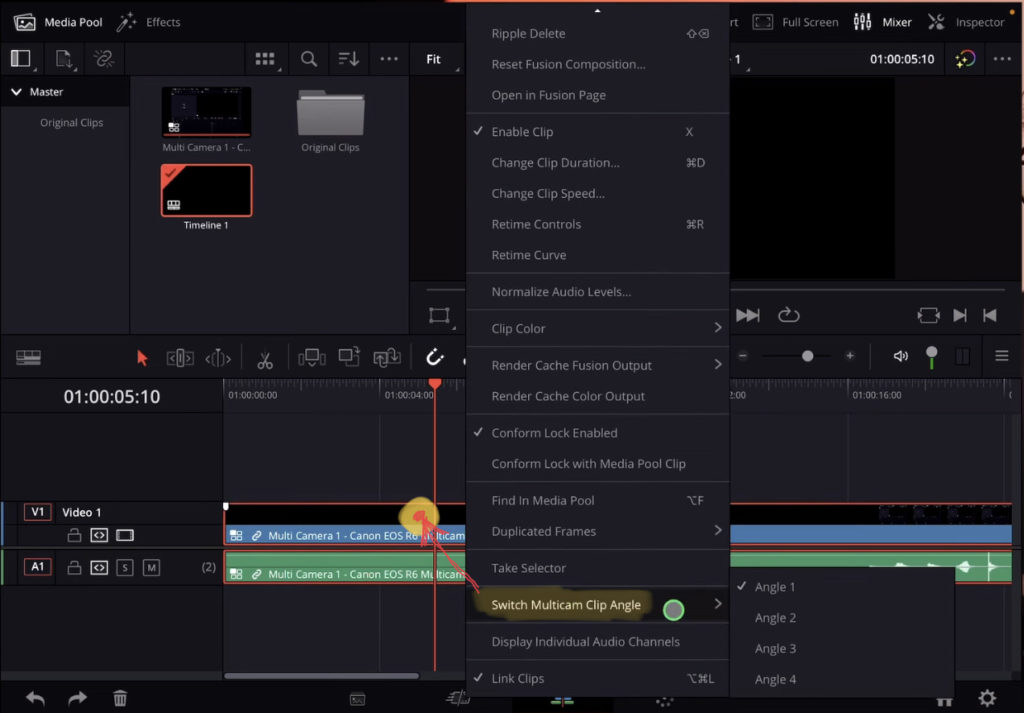
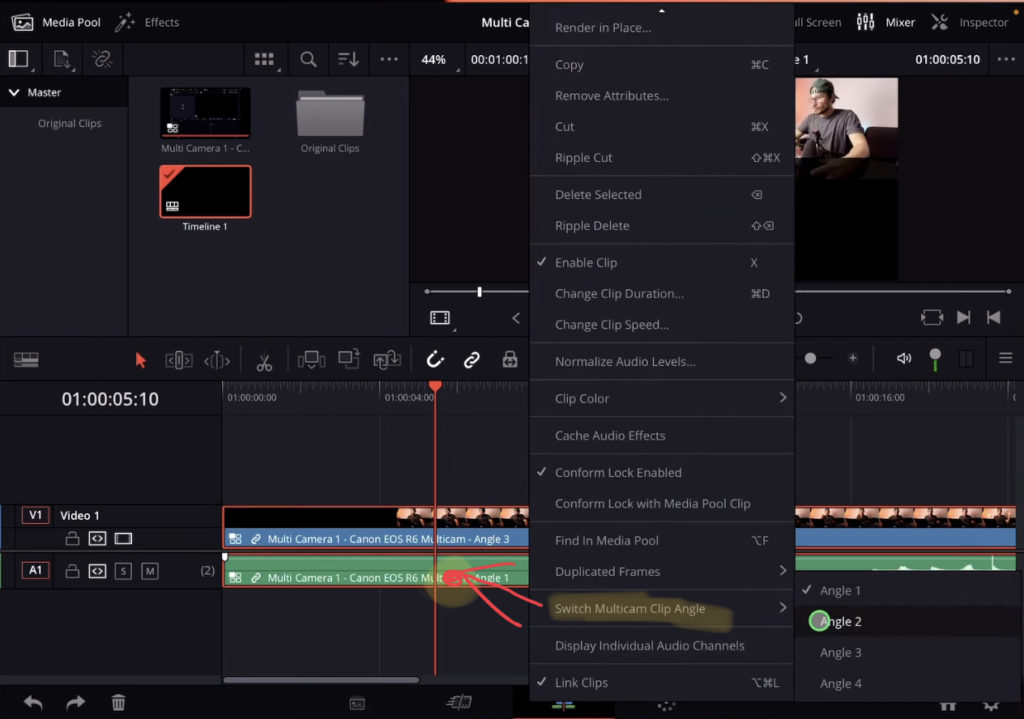
If you do the same but right click on the Audio part of the Multicam Clip and you change the Angle via “Switch Multicam Clip Angle” it will only change the Audio Source.
Pro Tip: Instead of right click and change the angles manually you can use Keyboard Shortcuts.
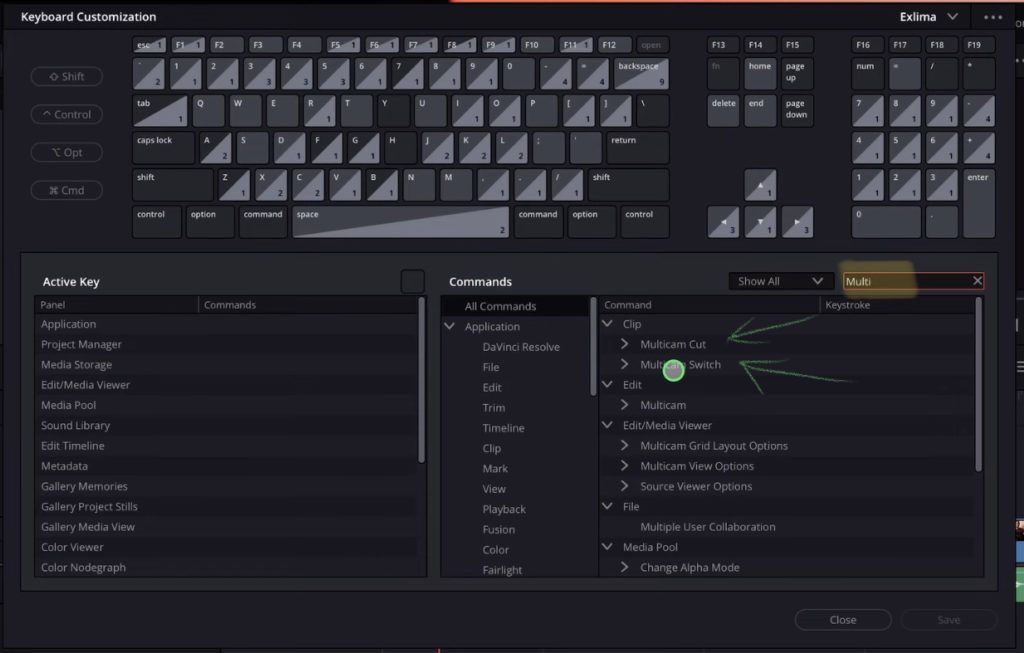
Open the Keyboard Shortcut Menu (Option + Command + K) and search for “Multicam”. You will see two folders. The Multicam Cut and the Multicam Switch. The difference is, with Cut you will also make a cut where the playhead currently is on the timeline and cut to the new camera angle.
With the Multicam Switch Shortcuts you will change the current selected clip to the new camera angle.
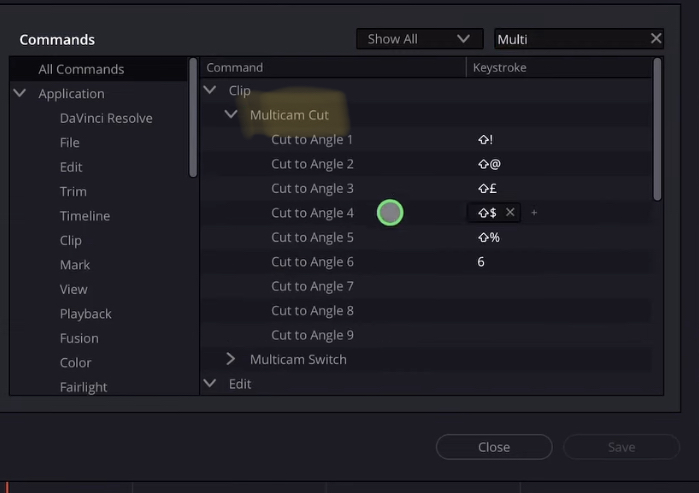
Go ahead and make sure do give the Multicam Cut some Keyboard Shortcuts. This is what will make us super fast in editing Multicam Clips.
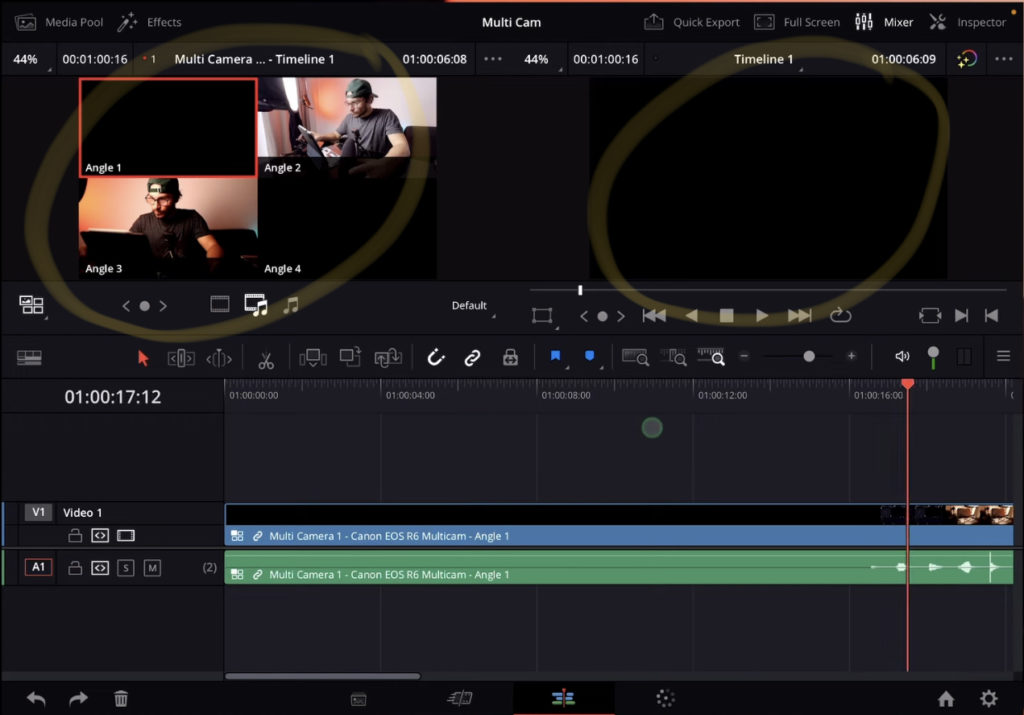
The one thing that is limiting the iPad Version compared to the Desktop Version is that we only have one Viewer Window. Which always changes his content based on what we do at the moment. But for Multicam edits it would be nice, if we can see the Multicam Viewer and the Source Viewer at the same time.
And i found a way how we can do this even on the iPad 🙂
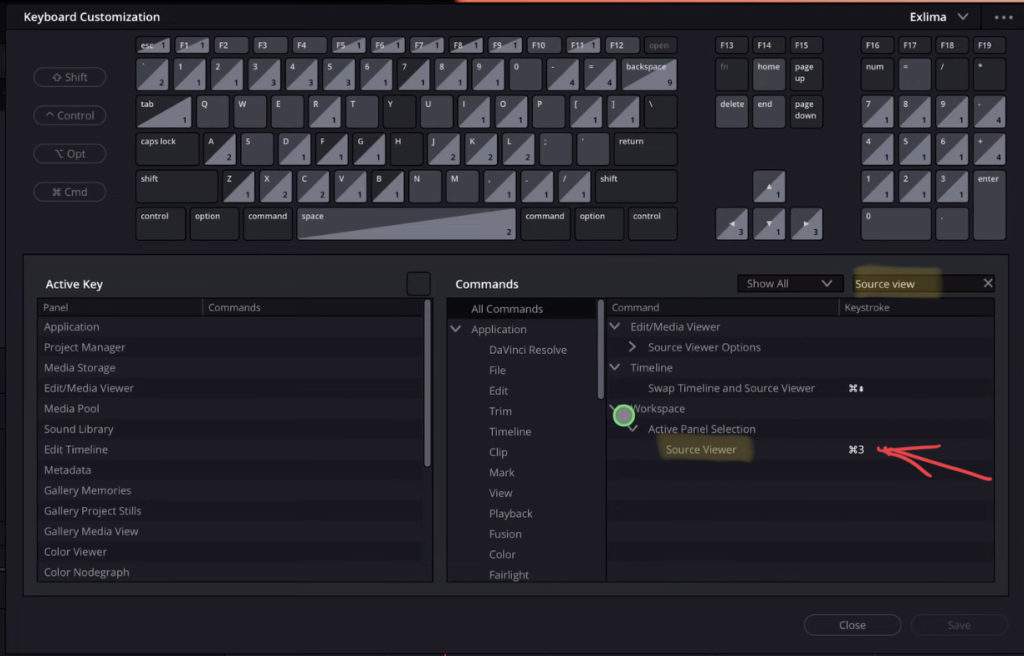
Change the Viewer to the Multicam View and open the Keyboard Shortcuts Menu. Search for Source View and give the Source Viewer a Shortcut.
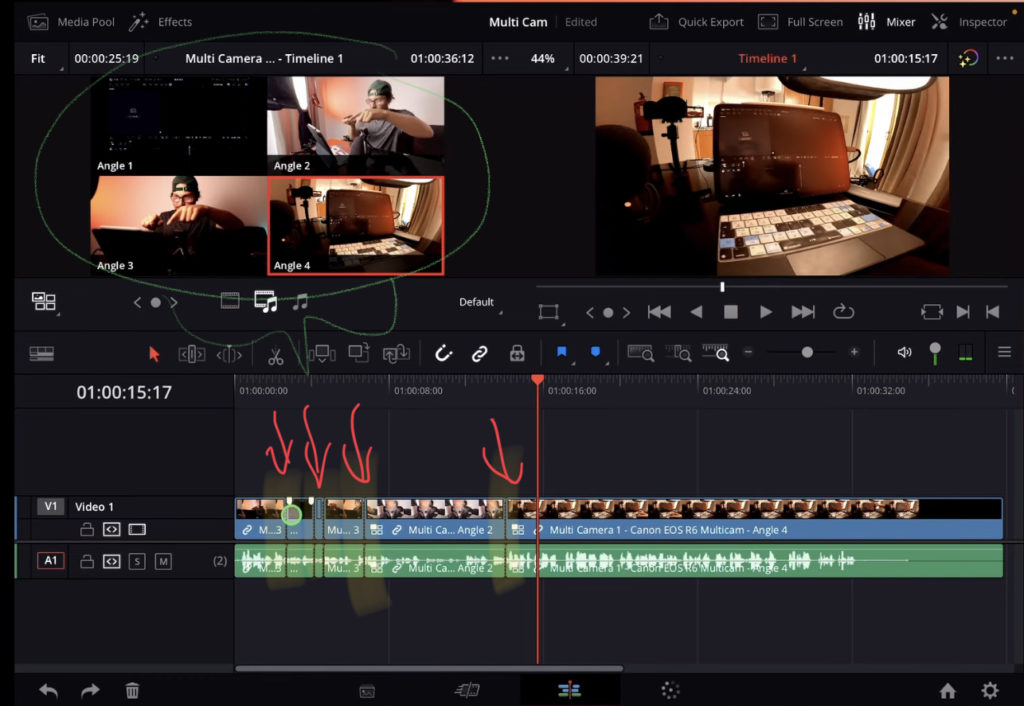
When you hit the Source Viewer Shortcut while the Multicam Viewer is active you will see two windows. And now the Multicam edit can begin. Simply pay watching through your timeline and when you click on one of the camera angels in the Multicam Viewer it will cut to that angle and create a cut on the timeline. Of course you can now use the Shortcuts for the cuts and cut your timeline in realtime.
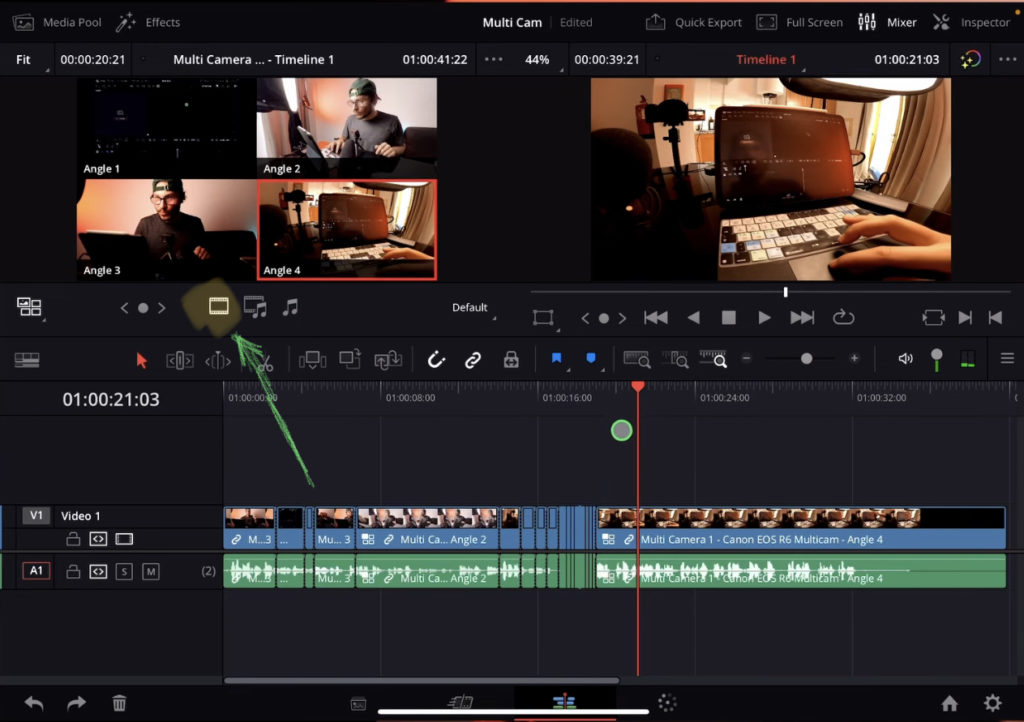
At the moment when we do the cuts it also changes the Audio to the new camera angle. But in my example i would like to keep the Audio from the A-Roll Camera. (It has the best Audio coming from the Rode Video Mic Plus). To do that you have to change the Cut Mode in the Multicam Viewer from Video & Audio to just Video.
After that if you use the Shortcuts or click on the Camera angles it will keep the Audio Source and change only the Video Source. The same of course is possible just for the Audio. In that case change it to the Audio only option.
BONUS: All DaVinci Resolve iPad Masterclass Students get the Transition Pack for FREE!
You can either get the Transition Pack separate here: Seamless Transition Pack for DaVinci Resolve iPad. Or all of our DaVinci Resolve iPad Packs are a FREE Bonus for the DaVinci Resolve iPad Masterclass Students.
Check It Out here DaVinci Resolve iPad MasterClass: From Beginner To Pro.

Read Next
• How COPY Color Grade to MULTIPLE Clips in DaVinci Resolve iPad
• DO THIS to make DaVinci Resolve FASTER! (Instead of rage smashing your iPad)
• How To Delete Cache Files in DaVinci Resolve iPad
• How To Color Correct iPhone Footage in DaVinci Resolve iPad
• Easy Sync Audio & Video in DaVinci Resolve iPad



![Top 10 Features in DaVinci Resolve for iPad You Should Know [Part 2]](https://exlima.net/wp-content/uploads/2025/12/Top-10-Features-in-DaVinci-Resolve-for-iPad-You-Should-Know-Part-2-1024x576-394x330.webp)