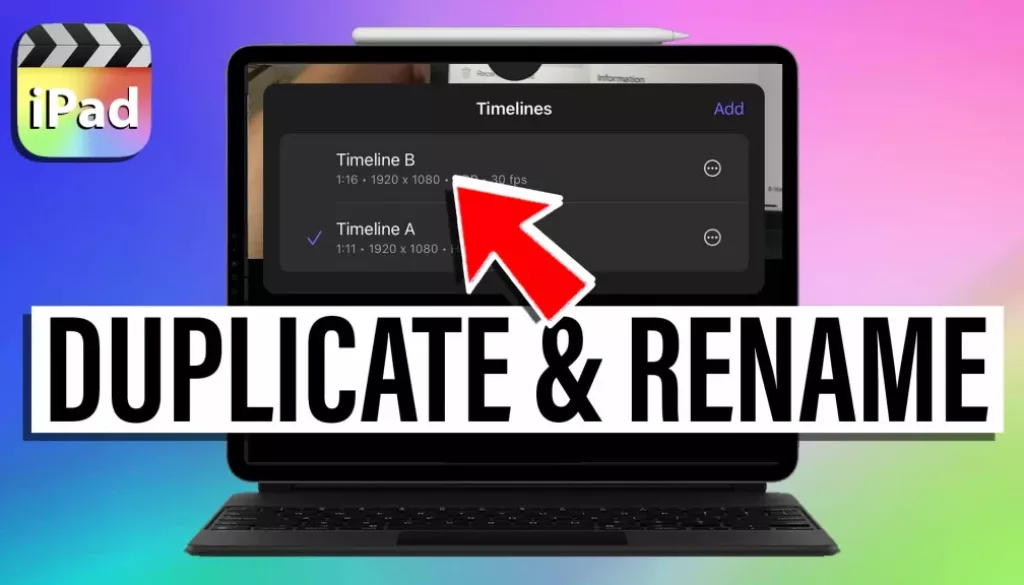
How To DUPLICATE Timeline in Final Cut Pro iPad
In this article/video i show you how you can duplicate your Timeline in Final Cut Pro for the iPad. With this method you can also rename your Timelines and change some of the Timeline Settings. It is best practices especially if you work with clients to create multiple Timelines while create different revisions of your video. The reason is simple: Let’s say you finished a video and send it to your client. He response and ask you to do a couple of changes. You go back into the project do the changes and send him the new version… and he response with: “can you go back to the previous version?” So now you have to do all again. So in that case you would always create a new revision of your timeline. And this is why duplicating an existing Timeline is so important. Have fun learning.
Check Out: Final Cut Pro iPad MasterClass: From Beginner to Pro

Contents
[Video] How To DUPLICATE Timeline in Final Cut Pro iPad
Step 1: Go back to the Project Manager in FCP for iPad
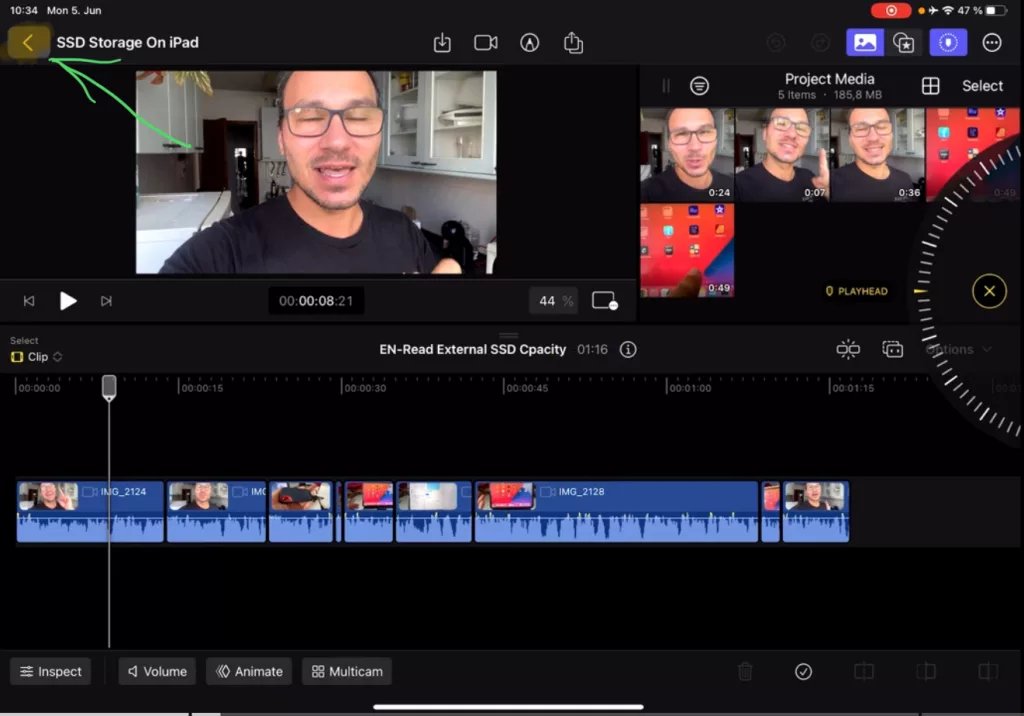
Step 2: Open the Timeline View from your Project
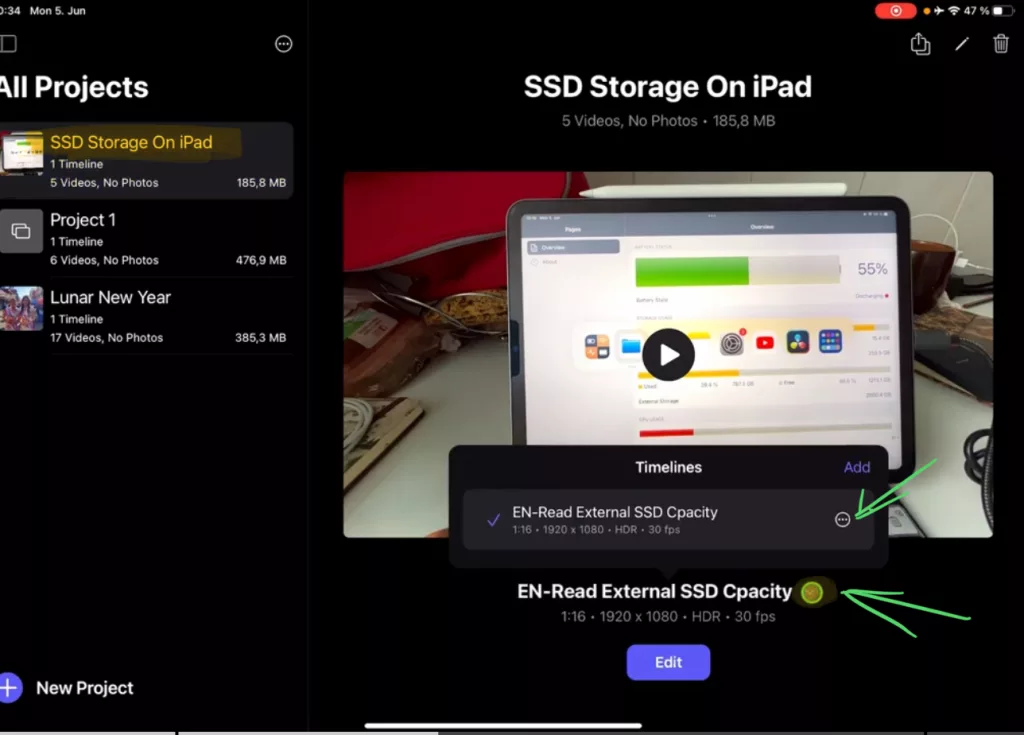
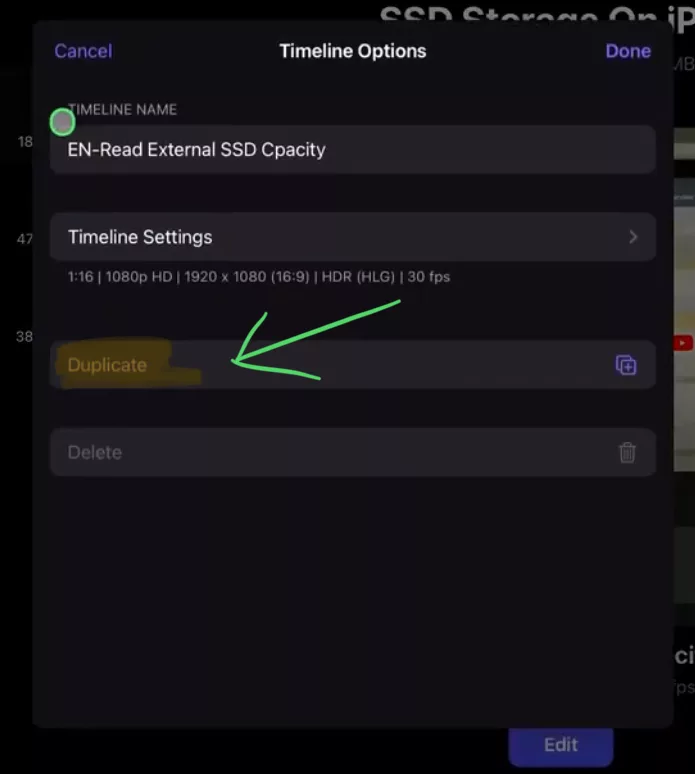
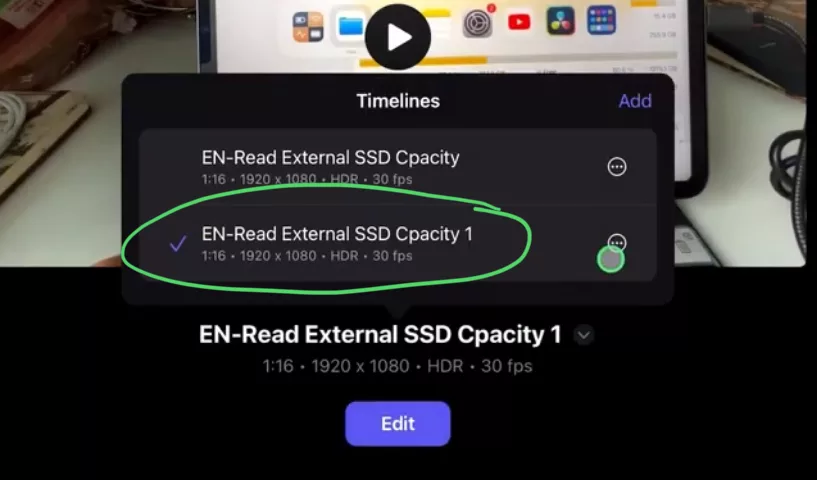
Step 3: Create a Duplicate from the selected Timeline
Check Out: Final Cut Pro iPad MasterClass: From Beginner to Pro

Read Next
• How COPY Color Grade to MULTIPLE Clips in DaVinci Resolve iPad
• DO THIS to make DaVinci Resolve FASTER! (Instead of rage smashing your iPad)
• How To Delete Cache Files in DaVinci Resolve iPad
• How To Color Correct iPhone Footage in DaVinci Resolve iPad
• Easy Sync Audio & Video in DaVinci Resolve iPad
