How To Add Film Grain to DaVinci Resolve iPad 😍
In this article i show you how you can use a Film Grain in DaVinci Resolve for the iPad. Also why would you use it and what is a Film Grain? Btw. We have a 8k Film Grain Bundle that all of our DaVinci Resolve iPad MasterClass Students get as a Bonus.
Pro Tip: Make your Videos Cinematic (and save a tone of time) with our 8K Film Grain Bundle

Contents
- [Video] How To Add Film Grain to DaVinci Resolve iPad 😍
- What is a Film Grain?
- What is the difference between digital and analog Film Grain?
- How To use external Film Grain Packs in DaVinci Resolve iPad
- If you want to host your own Online Course use CC360
- BONUS: All DaVinci Resolve iPad Masterclass Students get the Transition Pack & the 8K Film Grain Pack for FREE!
[Video] How To Add Film Grain to DaVinci Resolve iPad 😍
What is a Film Grain?
Film grain (also called film granularity) is the random optical texture of processed photographic film due to the presence of small particles of a metallic silver, or dye clouds, developed from silver halide that have received enough photons.
Film noise is another term that gets used when talking about analog film grain. However, film noise more accurately defines what you might see at the beginning or end of an actual film reel. This is the quick, sputtering, noticeable specks and hairs that often indicate the reel has ended or is beginning.
What is the difference between digital and analog Film Grain?
Put simple nowadays we can generate any Film Grain also digital. Or add it to the Post production. While back in the days the Grain was a physically process that occurred based on the equipment you used. But today Film Grains still hold his purpose especially if you want to create a specific look in your Movie.
Software like DaVinci Resolve can digital create a Film Grain or you can use Film Grain Packs that you can use as an overlay on your Timeline.
How To use external Film Grain Packs in DaVinci Resolve iPad
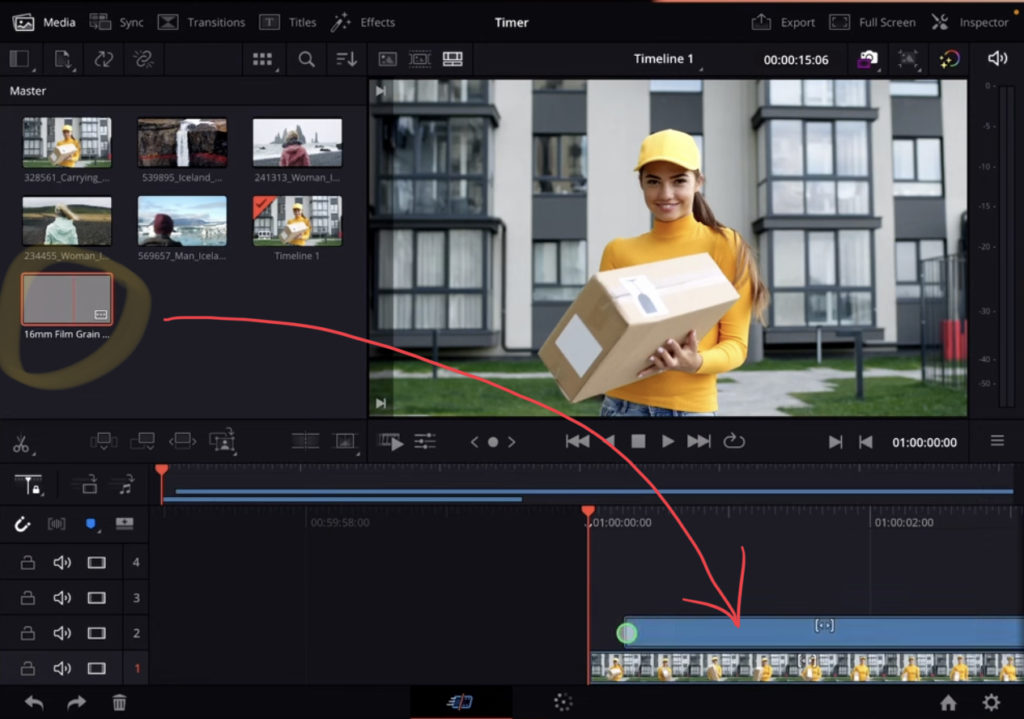
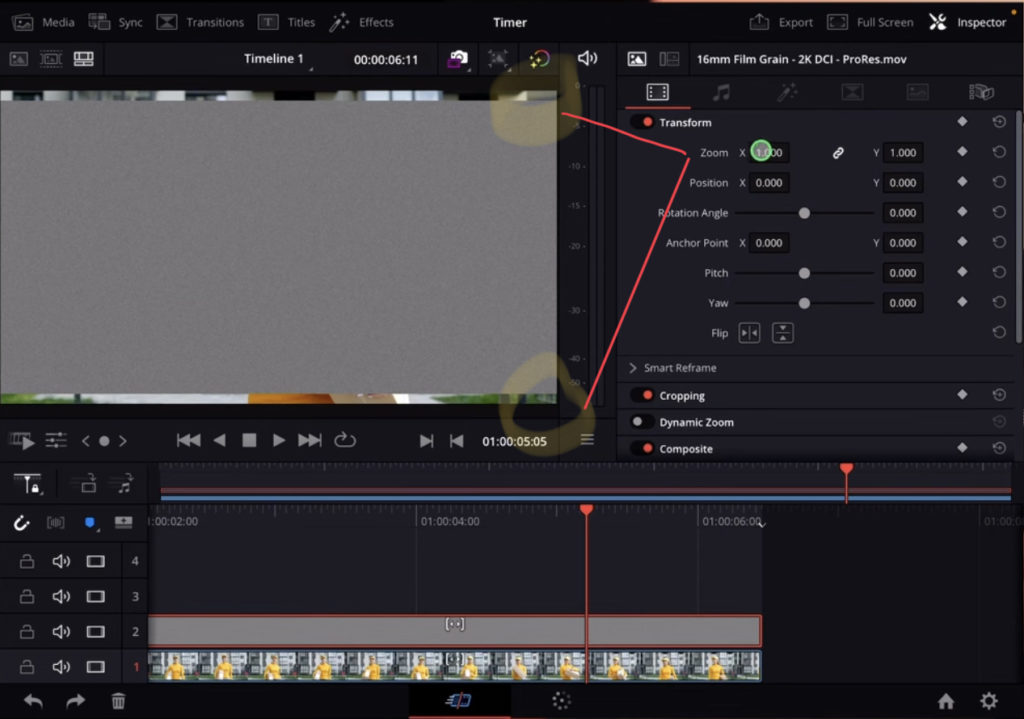
If you use any FIlm Grain Pack you will find the Film Grain Clips that you can add to your Timeline. Make sure the Grain fits your aspect ration. In my example the 2k DCI aspect ratio of my Film Grain is a different aspect ration then my 16:9 Timeline. So i went into the inspector and changed the Zoom to make sure the Film Grain fits.
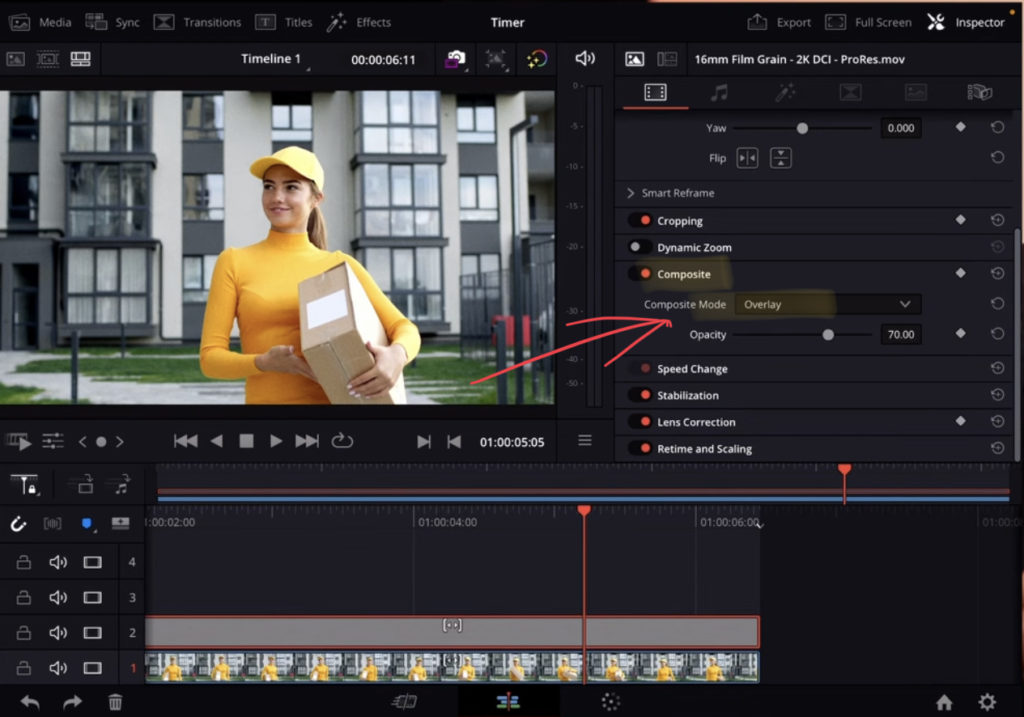
To use the Film Grain go to the Composite Mode and either use “Overlay” or “Screen”. Use the handle to change the Film Grain softness as you like. When you are in the EDIT Page you can zoom into your Viewer by using your fingers. This way you will see the grain better.
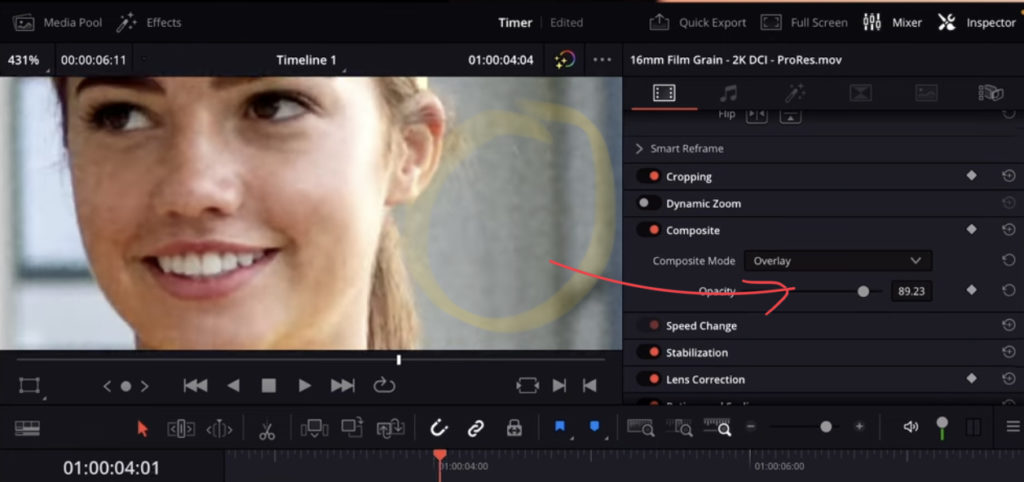
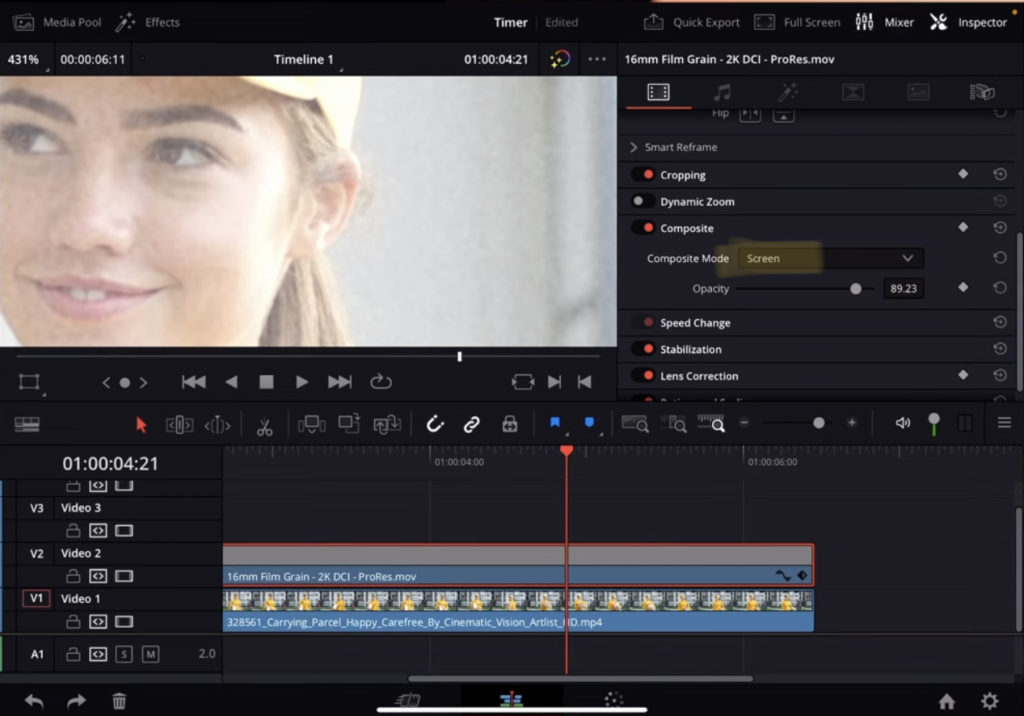
Screen will give you a brighter image. I personally prefer Overlay. But it also depends on which Film Grain you are using and how you would like your final Movie to look like.
If you want to host your own Online Course use CC360
I really believe, that CC360 is the best Platform to host your own Online Course currently on the market. And each week they introduce new features. Amazing. Check it out here.
BONUS: All DaVinci Resolve iPad Masterclass Students get the Transition Pack & the 8K Film Grain Pack for FREE!
You can either get the Transition Pack separate here: Seamless Transition Pack for DaVinci Resolve iPad. Or the 8K Film Grain Pack here: 8K Film Grain Bundle. but all of our DaVinci Resolve iPad Packs are a FREE Bonus for the DaVinci Resolve iPad Masterclass Students.
Check It Out here DaVinci Resolve iPad MasterClass: From Beginner To Pro.

Read Next
• How COPY Color Grade to MULTIPLE Clips in DaVinci Resolve iPad
• DO THIS to make DaVinci Resolve FASTER! (Instead of rage smashing your iPad)
• How To Delete Cache Files in DaVinci Resolve iPad
• How To Color Correct iPhone Footage in DaVinci Resolve iPad
• Easy Sync Audio & Video in DaVinci Resolve iPad


Ciao Daniel 🙂
Follow Me on YouTube, Facebook, and Instagram.
If you found this article helpful, share it.

