How To FAST continuous ZOOM Effect (DaVinci Resolve iPad)
In this article/video today i’ll show you the correct and easy way how to create the continuous ZOOM Effect in DaVinci Resolve for iPad that is used in Hollywood a lot. With this effect you give the illusion that the zoom continuous at the same speed and position even if the clips on the screen change. And fun fact, whit the correct method you can use as many clips as you want, it’s still the same simple steps.
Pro Tip: Make your Videos Cinematic (and save a tone of time) with our Seamless Transition Pack for DaVinci Resolve iPad.

Contents
- [Video] How To FAST continuous ZOOM Effect (DaVinci Resolve iPad)
- Don’t do this! This is wrong…
- Step 1: The correct and easy way to create the continuous ZOOM Effect in DVR for iPad
- Step 2: Change the start Position Zoom value for all the clips.
- Step 3: Add a Adjustment Clip from the Effects Tab
- Step 4: Change the Adjustment Clip duration
- Step 5: Add the First Keyframe (Start Position)
- Step 6: Add the Second Keyframe (End Position + Zoom Value)
- If you want to host your own Online Course use CC360
- BONUS: All DaVinci Resolve iPad Masterclass Students get the Transition Pack & the 8K Film Grain Pack for FREE!
[Video] How To FAST continuous ZOOM Effect (DaVinci Resolve iPad)
Don’t do this! This is wrong…
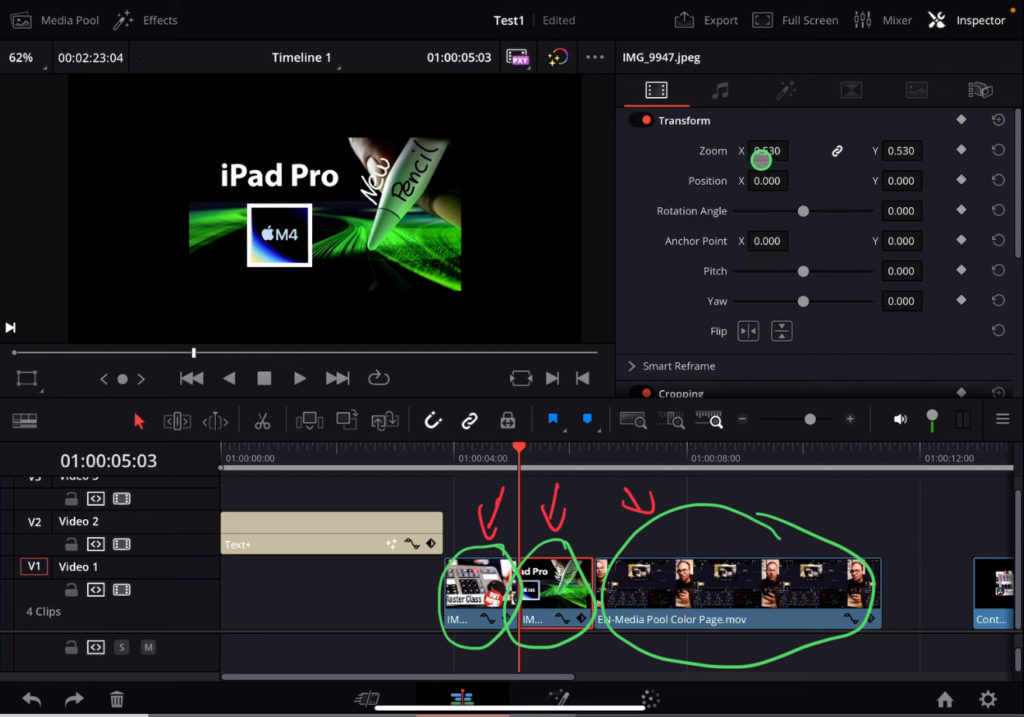
Attention: There are a multitude of Problems with this approach, let me explain:
1. You have to be very precise with the values you use, are the values off the whole zoom effect will actually look cheap and shit.
2. For each clip you want to use you have to create 2 additional keyframes… That means, if you want to create this effect with a fast paste of clips… let say 100 clips… it will take you forever to create this effect…
3. What if you are not happy with the result? You want to change the speed?… Now you have to go back and change ALL KEYFRAMES AGAIN… = LOSER.
No, what if i tell you, that you can make this effect with just 2x keyframes and done! Let me show you how:
Step 1: The correct and easy way to create the continuous ZOOM Effect in DVR for iPad
Btw. Everything i show in this Video and in the article today works in the CUT PAGE and also in the EDIT PAGE. I personally just prefer working in the EDIT PAGE because you can do more stuff. But you can follow along with the CUT PAGE aswell.
Tip: If you don’t know how to get the other pages (FUSION, FAIRLIGHT, EDIT) on the iPad read this article first: How to UNLOCK ALL PAGES in DaVinci Resolve for iPad Pro
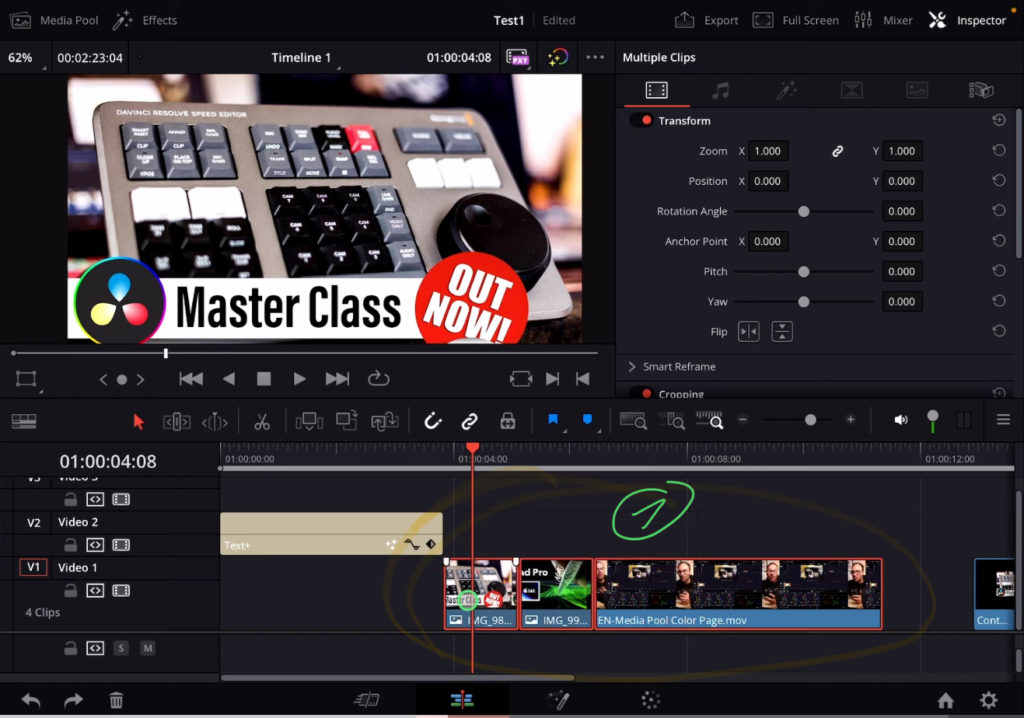
Step 2: Change the start Position Zoom value for all the clips.
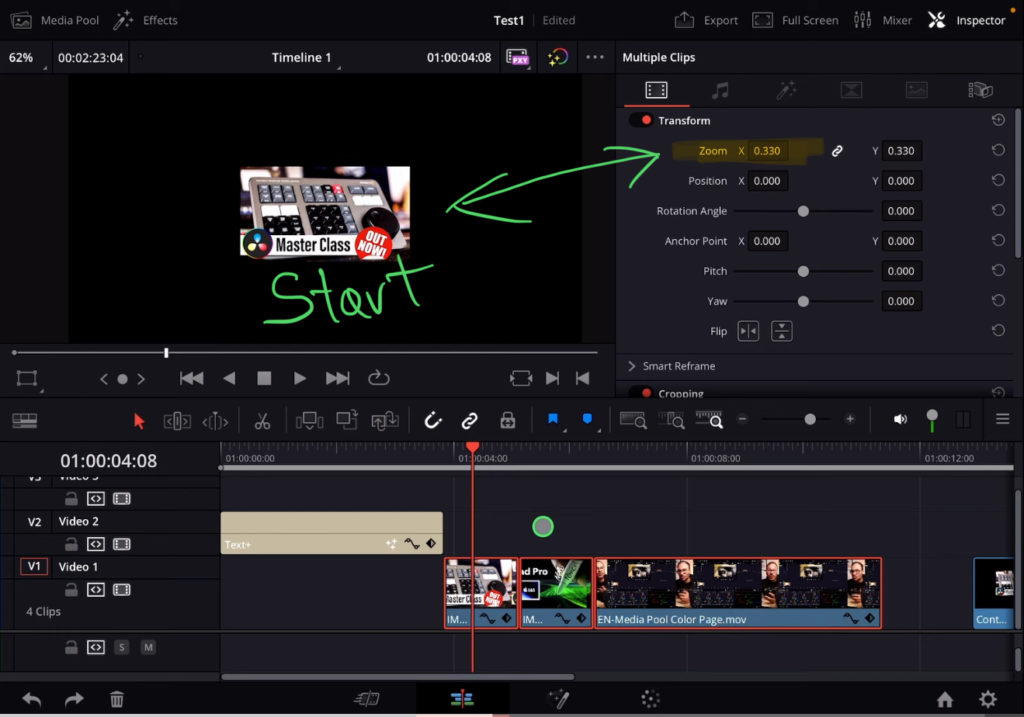
This step is important, that you make sure that all the clips you are using have the same Aspect Ratio and size on the screen. Obviously if you use completely random images, and videos that all vary in size, the effect will not work as you want. My recommendation: Use Clips with the same Resolution.
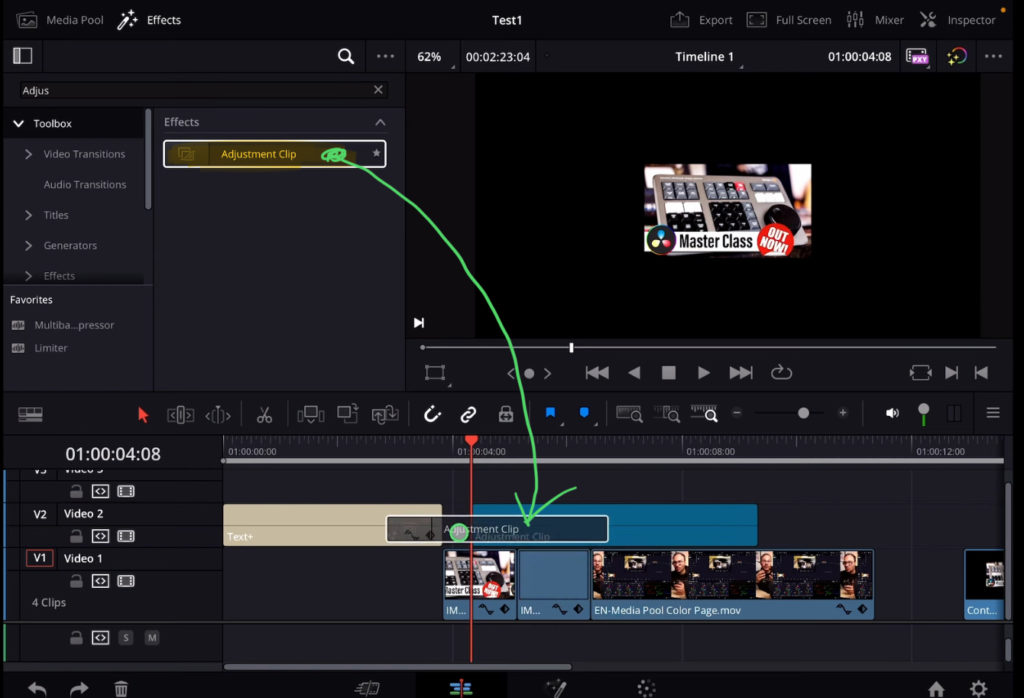
Step 3: Add a Adjustment Clip from the Effects Tab
Step 4: Change the Adjustment Clip duration
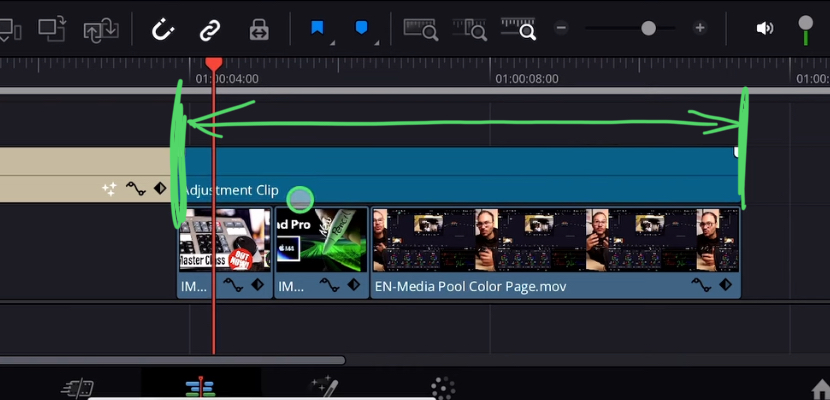
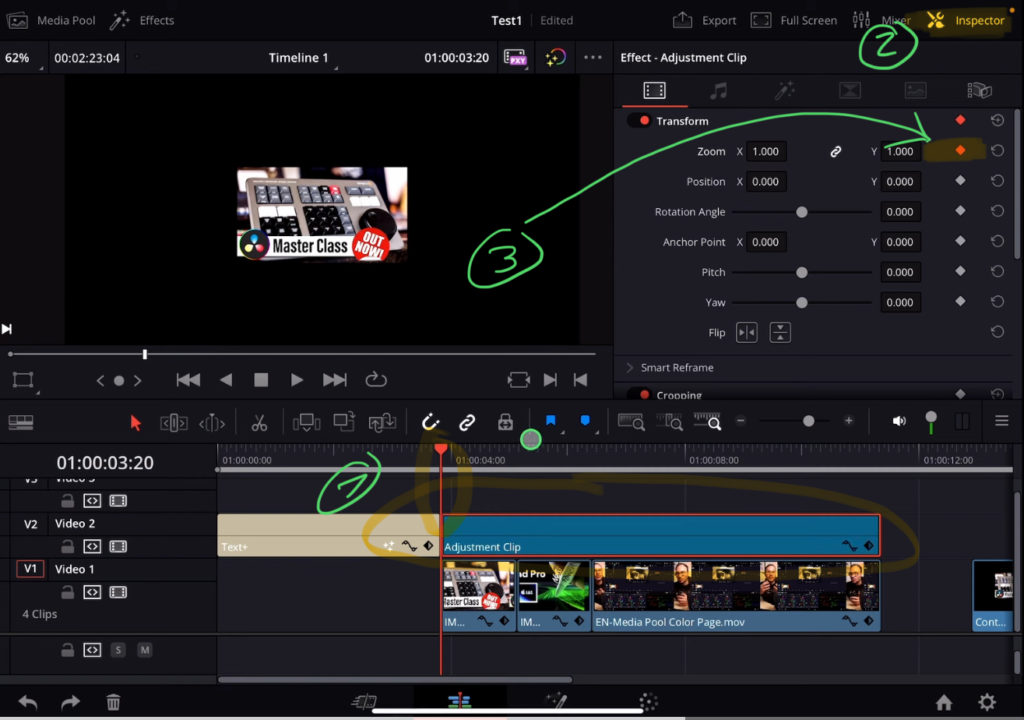
Step 5: Add the First Keyframe (Start Position)
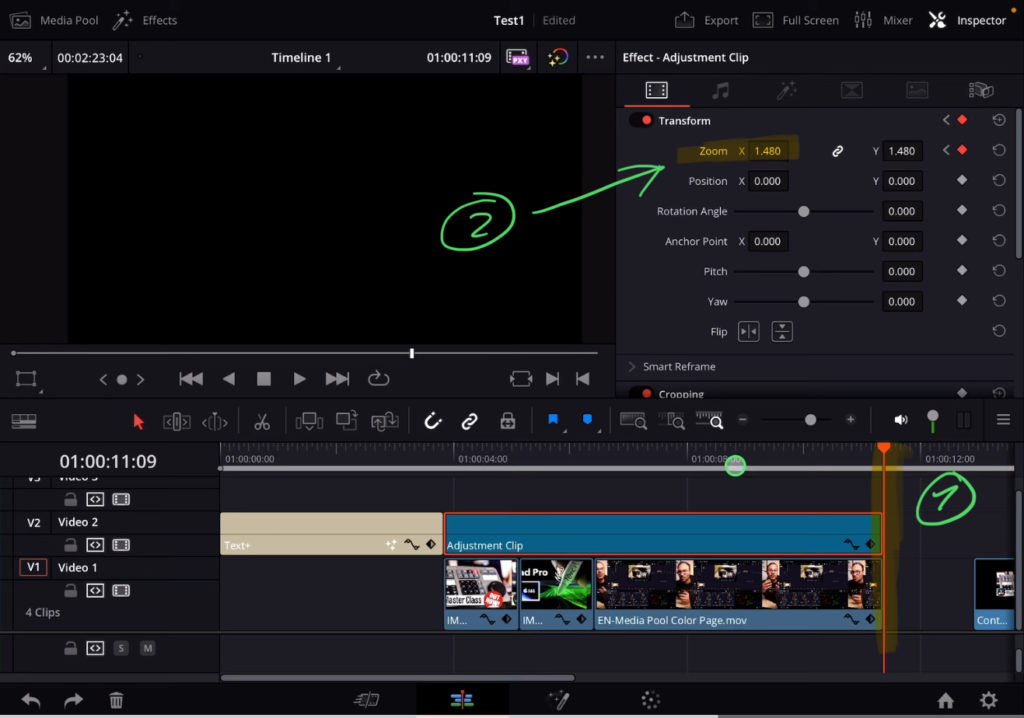
Step 6: Add the Second Keyframe (End Position + Zoom Value)
Good To Know: You can add and change the clips under the Adjustment Clip without ever changing the Zoom Effect. It will always be applied to all the clips underneath.
If you want to host your own Online Course use CC360
I really believe, that CC360 is the best Platform to host your own Online Course currently on the market. And each week they introduce new features. Amazing. Check it out here.
BONUS: All DaVinci Resolve iPad Masterclass Students get the Transition Pack & the 8K Film Grain Pack for FREE!
You can either get the Transition Pack separate here: Seamless Transition Pack for DaVinci Resolve iPad. Or the 8K Film Grain Pack here: 8K Film Grain Bundle. but all of our DaVinci Resolve iPad Packs are a FREE Bonus for the DaVinci Resolve iPad Masterclass Students.
Check It Out here DaVinci Resolve iPad MasterClass: From Beginner To Pro.
Read Next
• How COPY Color Grade to MULTIPLE Clips in DaVinci Resolve iPad
• DO THIS to make DaVinci Resolve FASTER! (Instead of rage smashing your iPad)
• How To Delete Cache Files in DaVinci Resolve iPad
• How To Color Correct iPhone Footage in DaVinci Resolve iPad
• Easy Sync Audio & Video in DaVinci Resolve iPad