How To Delete Cache Files in DaVinci Resolve iPad
In this article i show you how you can delete the Cache files from DaVinci Resolve on your iPad. Also i will show you how you can redirect the Cache Files location to an external Hard Drive. Because by default the Cache will always be stored onto your iPad.
Contents
- [Video] Delete Cache Files & Change Cache File Directory
- How to check your iPad Storage
- Step 1: Delete DaVinci Resolve iPad Cache Files in the Files App
- Step 2: Delete Cache Files using a Shortcut for current Project
- Step 3: New Feature in DaVinci Resolve iPad: Cache Manager
- Step 4: Clear the Bin called “recently deleted Files” in Photos and Files
- Step 5: How To change the DaVinci Resolve iPad Cache File Location
[Video] Delete Cache Files & Change Cache File Directory
How to check your iPad Storage
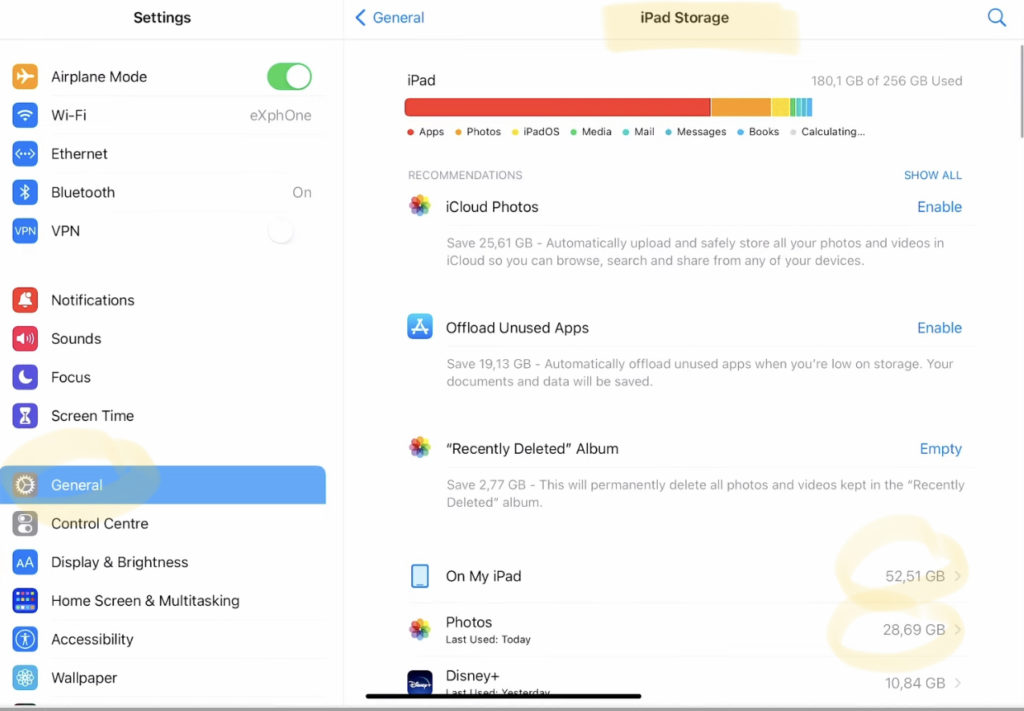
To see how much storage you still have left go to the iPad Settings and navigate on the right side to General. Under General you will find iPad Storage. This will take some time to check the system and will show you exactly how much storage you still have left. Additional it will show you which apps use the most storage. This comes handy if you have to clean up your iPad. Sometimes Apps like Disney+, Netflix and co have still downloaded Movies that you can delete.
In my case i have alot of Videos in the On My iPad (Files App) and in the Photos App. So basically deleting files there will immediately give me more space.
Step 1: Delete DaVinci Resolve iPad Cache Files in the Files App
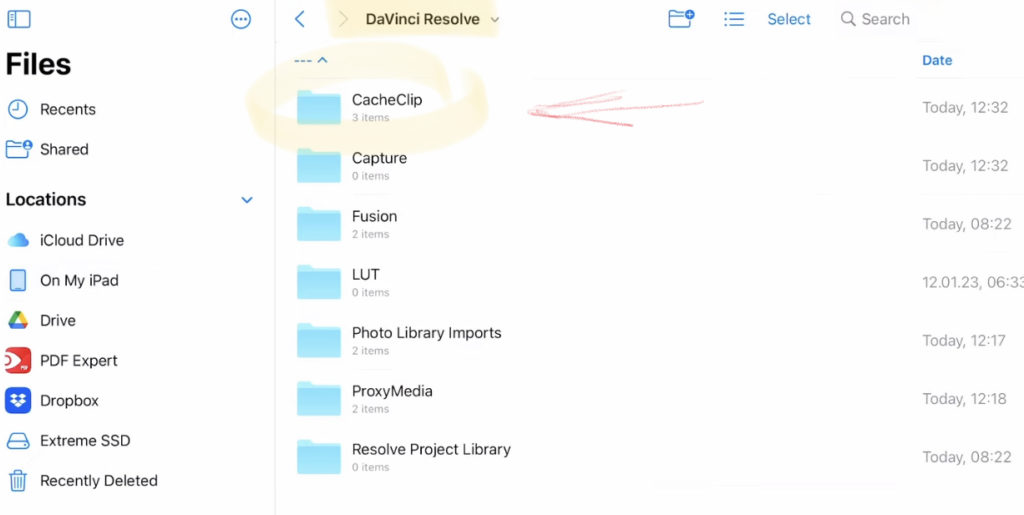
Open the iPad Files App and go to the Folder called DaVinci Resolve. Inside this Folder you will find a CacheClip Folder. Basically delete all the files inside the CacheClip Folder.
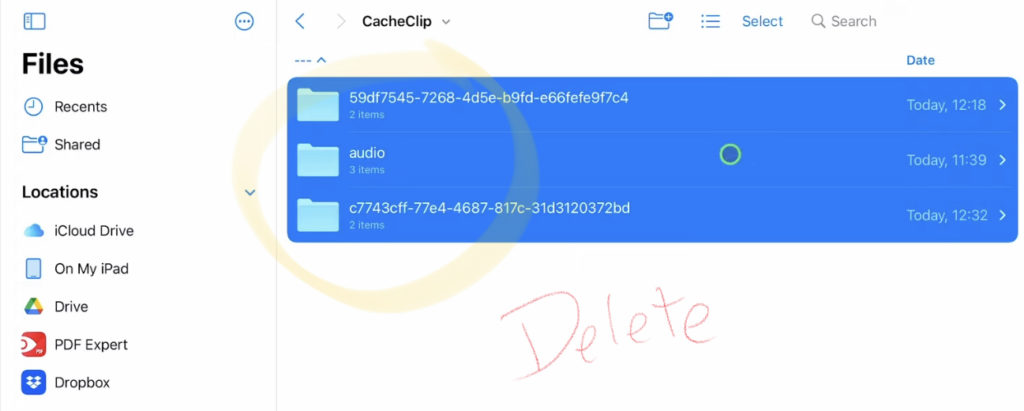
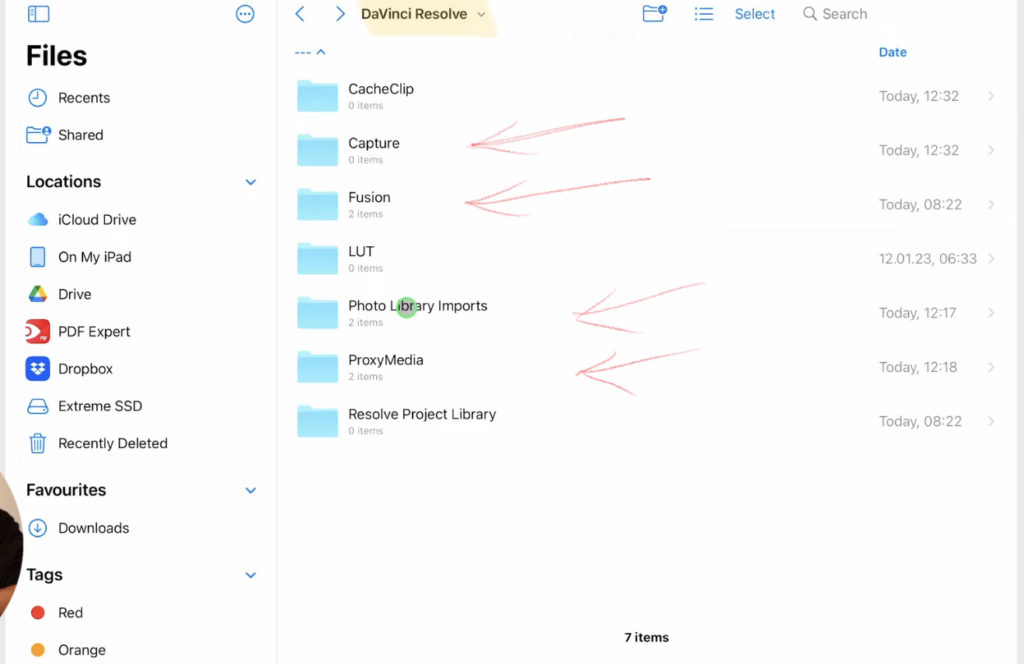
Additional to that you can also delete the ProxyMedia Files or the Images you created that will be in the Capture Folder. If you worked with Fusion Tab, all these Files will sit in the Fusion Tab.
Step 2: Delete Cache Files using a Shortcut for current Project
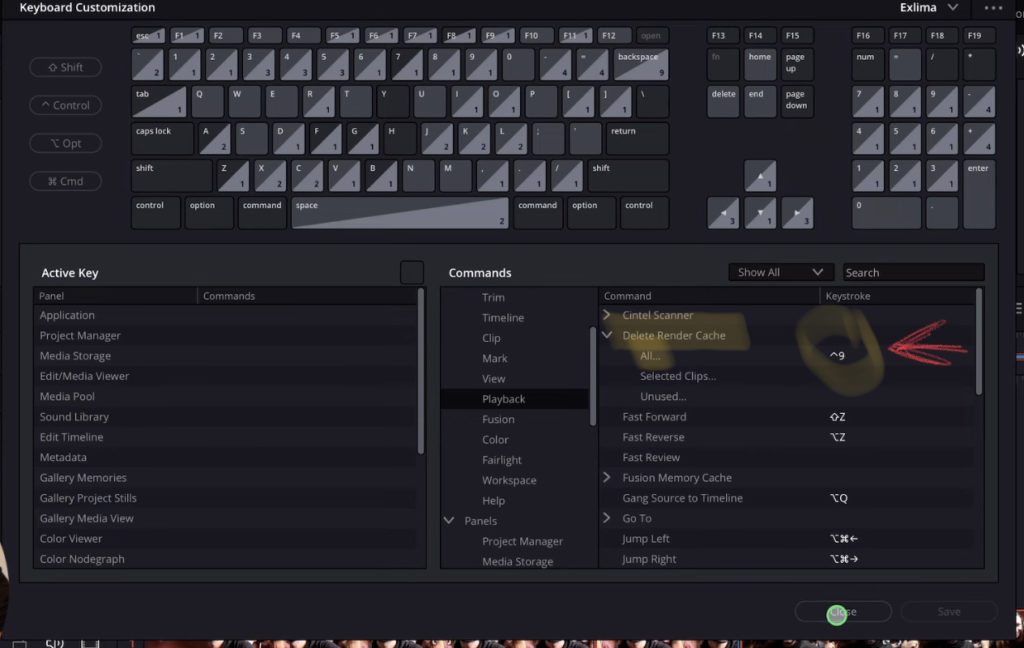
If you open the Shortcuts Menu (Option + Command + K) and go to Playback. You will find a Folder Delete Render Cache. Give a Shortcut to the Command “All…”.
Info: This will only delete the Cache Files from the current Project!
Step 3: New Feature in DaVinci Resolve iPad: Cache Manager
To open this new Feature you have to give it a Shortcut. So open the Shortcuts Menu (Option + Command + K).
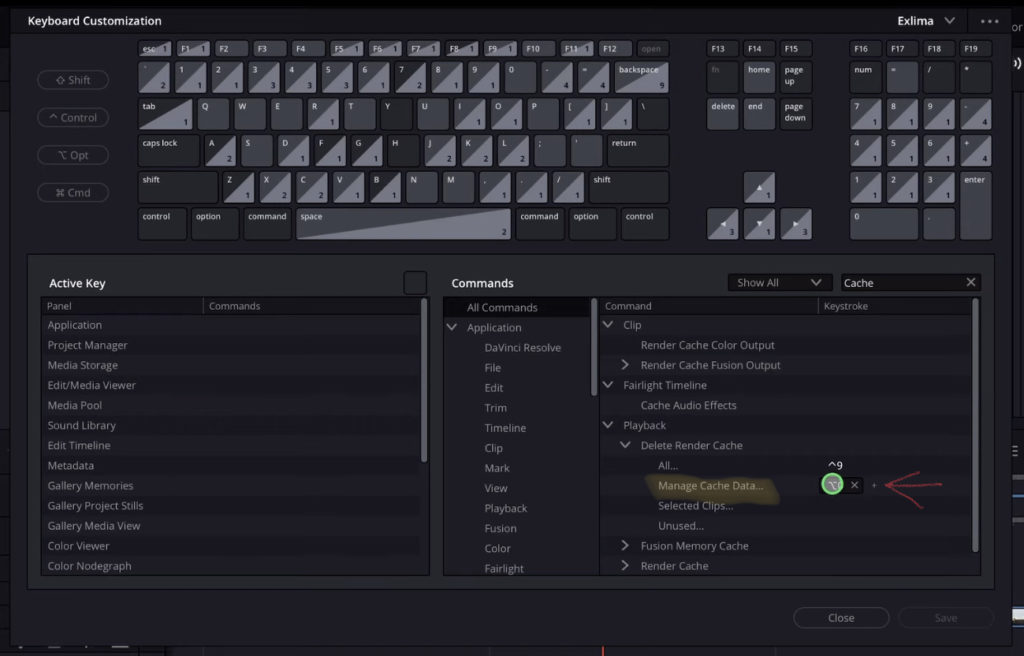
Search for Cache and you will find a Folder Playback. Inside a Folder Delete Render Cache. And there give the Command “Manage Cache Data…” a Shortcut.
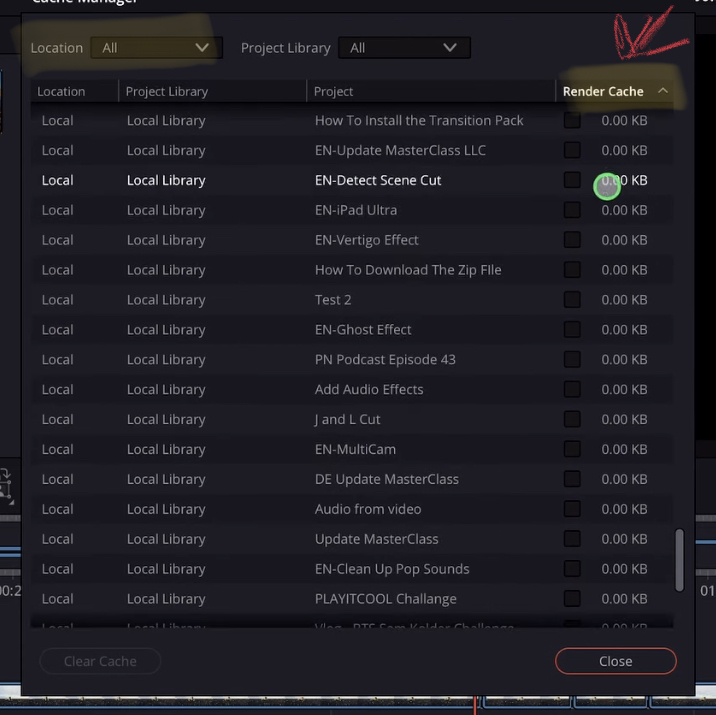
Open the Cache Manager with the Shortcut and you will get this window that will show you all of your Cache Files. On the top left you can also change the view from Local to All.
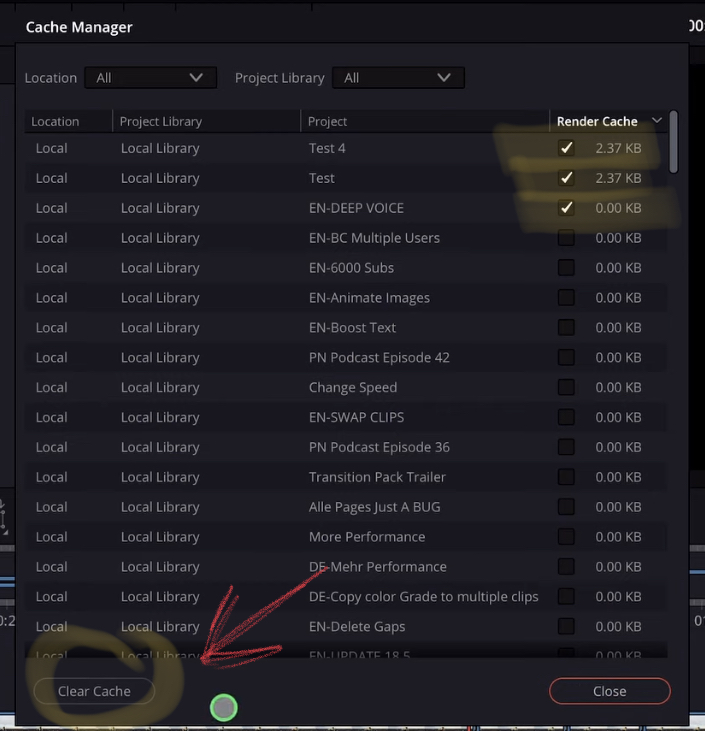
To delete Cahce files you can sort the files by size and just mark as many as you like and click the Button Clear Cache. Done.
Step 4: Clear the Bin called “recently deleted Files” in Photos and Files
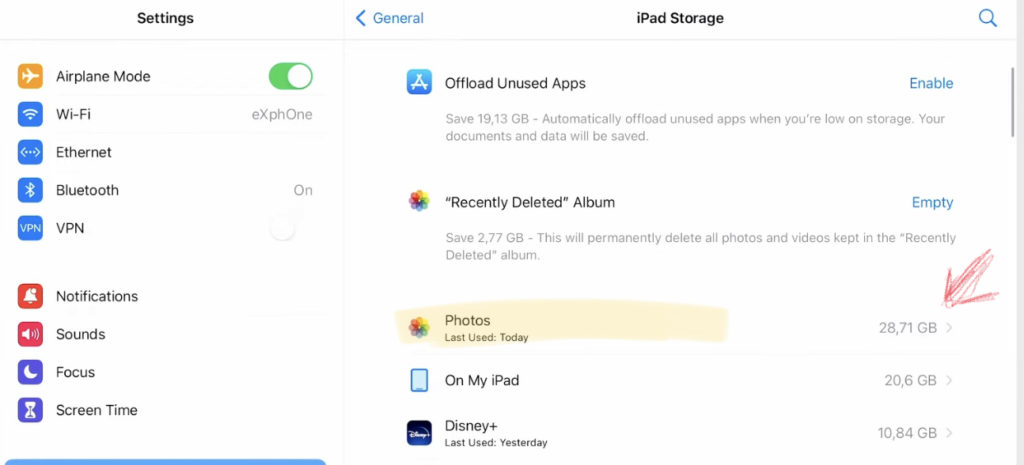
Inside of the Settings where you see the iPad Storage you can also click on the Photos app.
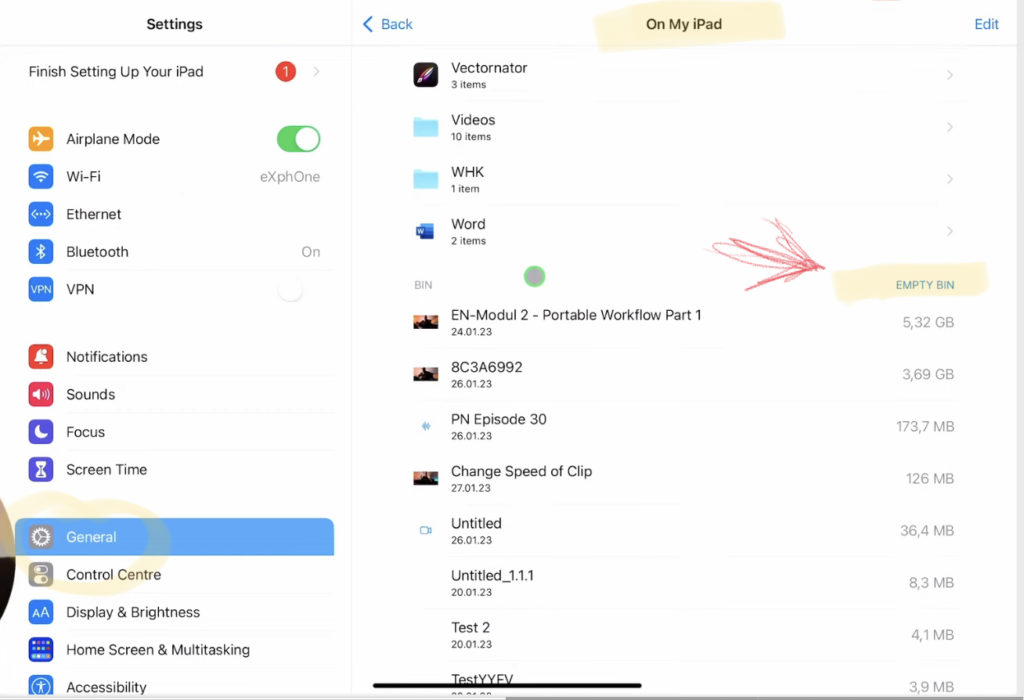
In the next window you can scroll down. Here you can click on the EMPTY BIN to delete all the Files that where deleted in the past.
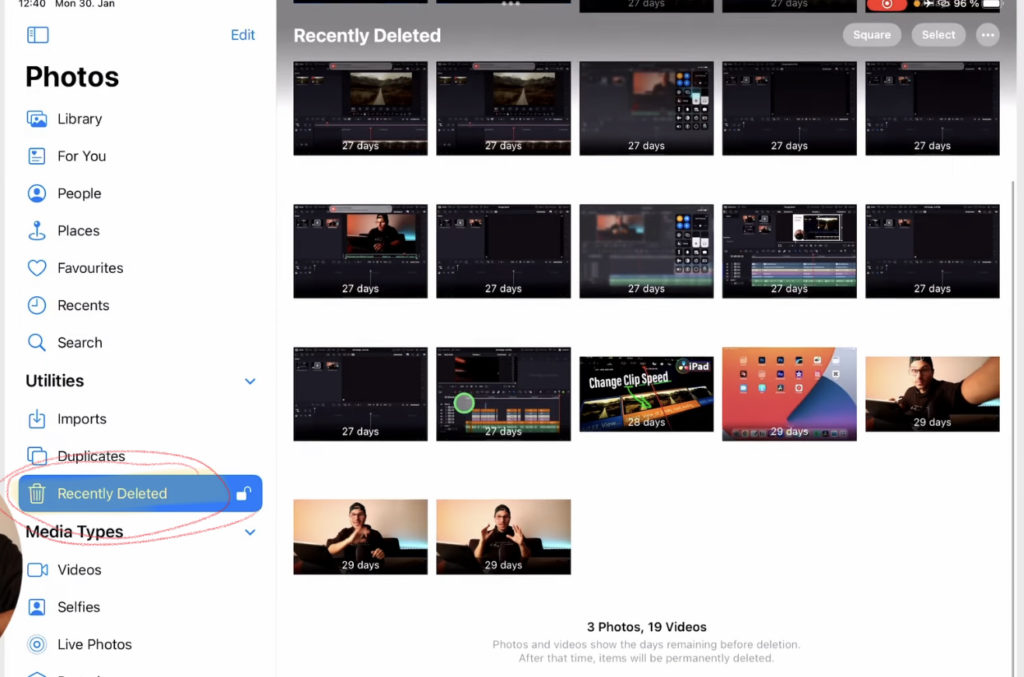
Inside of your Photos App you can also look for your Videos and delete the one you don’t need. Especially Slow Motion Videos take up alot of space. After you deleted them go to the Recently Deleted Folder. Only after you cleared the files there you will have the space available.
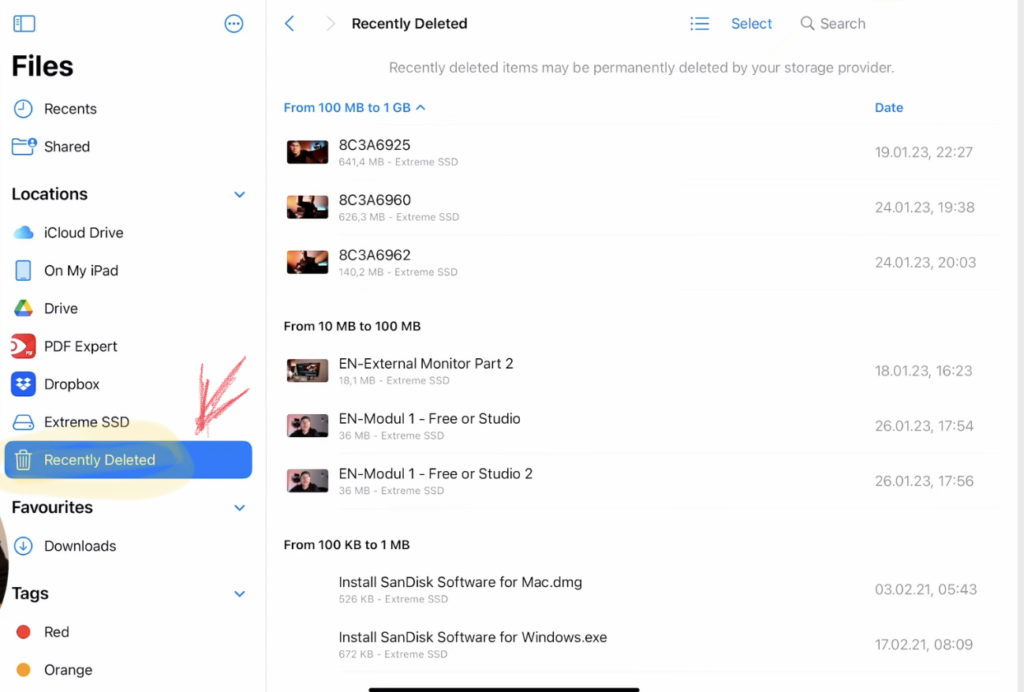
You can do the same when you open the Files App. Delete Files you don’t need anymore. There is a Recently Deleted Folder aswell. Make sure to clear the Files inside.
Step 5: How To change the DaVinci Resolve iPad Cache File Location
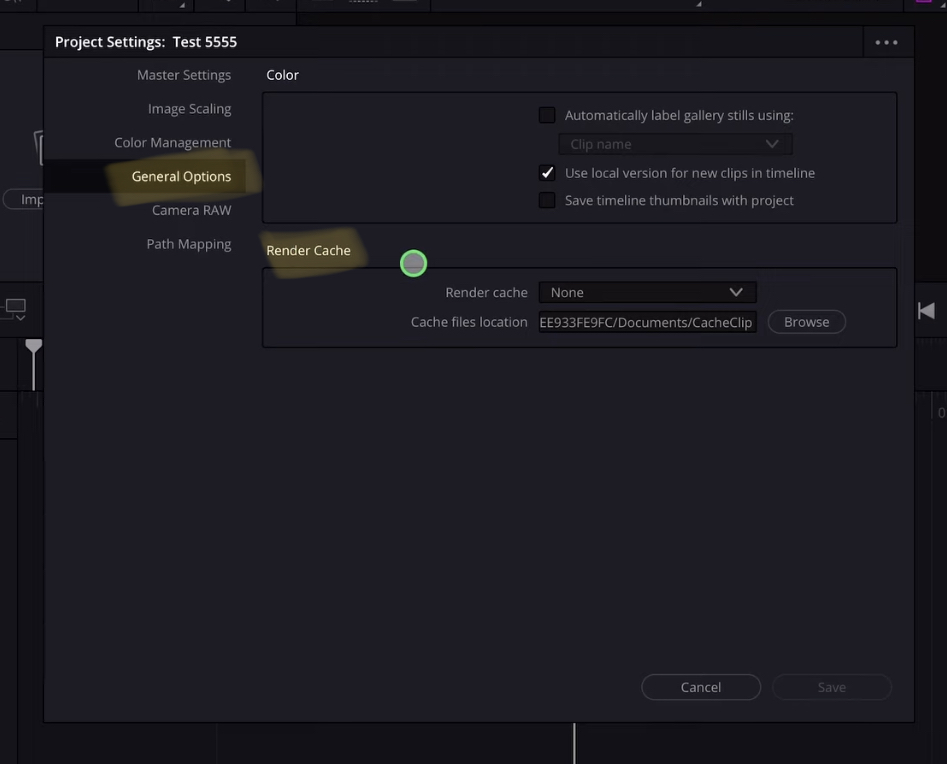
Open the Project Settings and go to General Options on the left side. Here you will find Render Cache Settings. You can change the Location by clicking on the Button “Browse”.
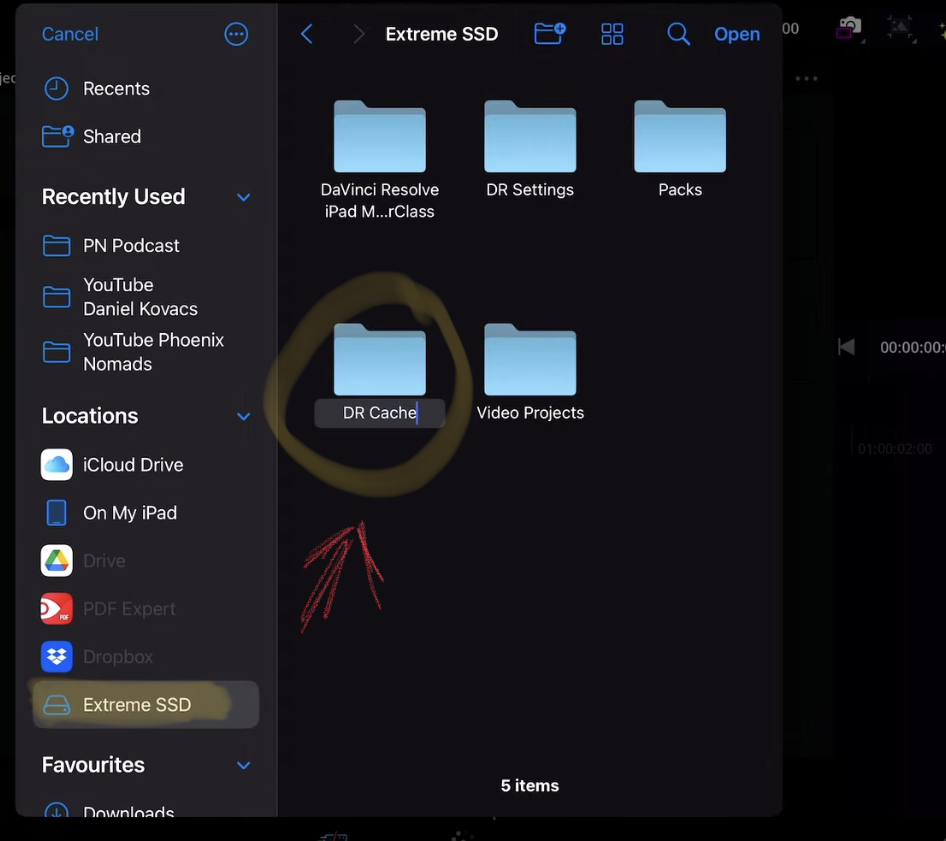
In my case i created a new Folder Called DR Cache on my SSD. But if you stop here. These settings will only apply to the current Project. If you start a new Project it will go again to the default settings, which is the internal location. If you want that. Perfect. I show you know, how you can create a Preset from the new settings. Click on the three dots on the top right of the project settings menu.
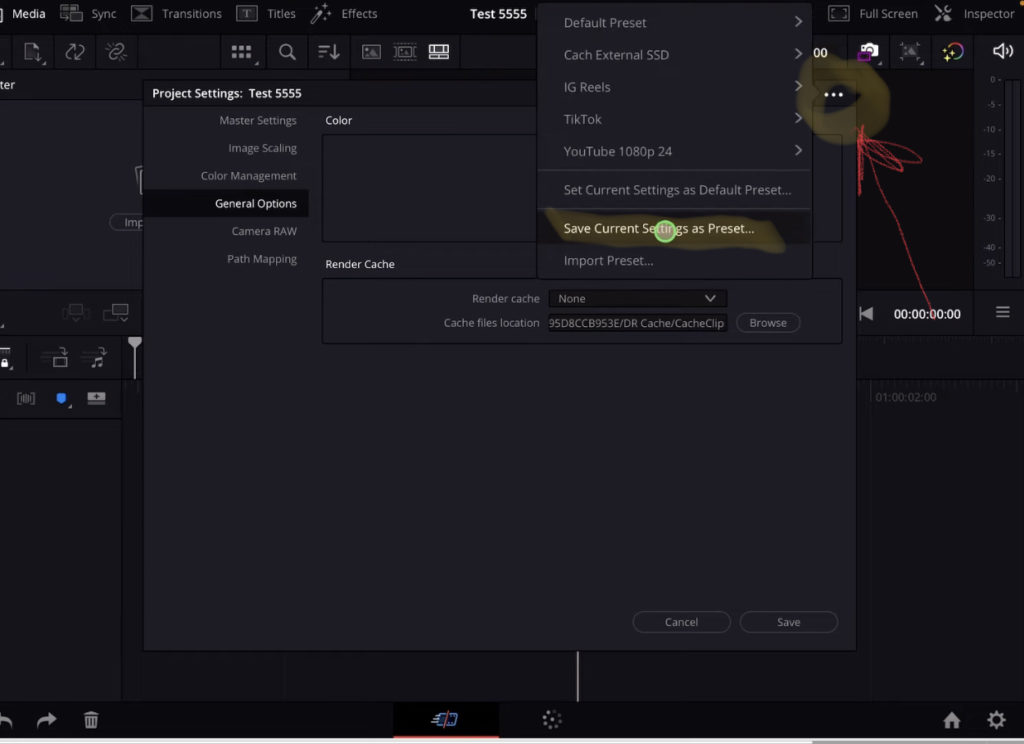
Click on “Save Current Settings as Preset…” and give it a new name like Cache Files on SSD.
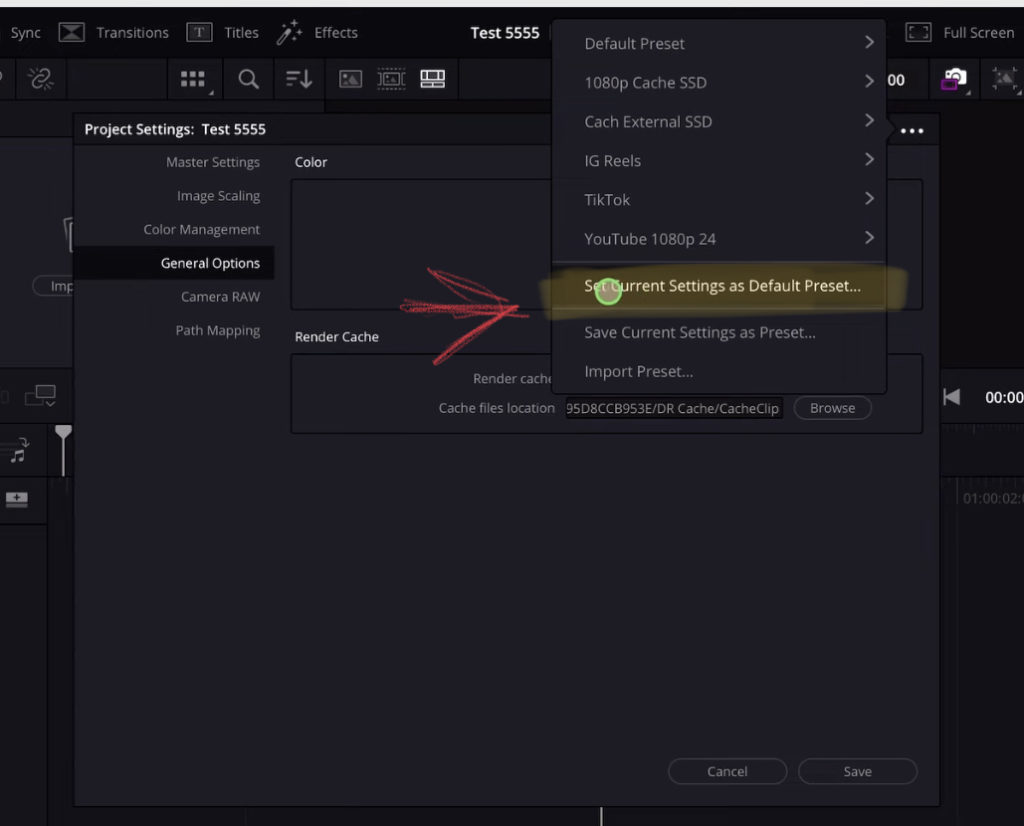
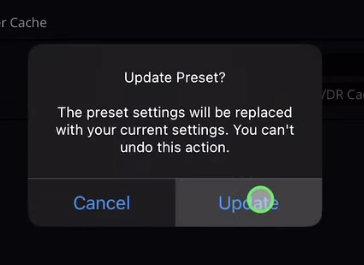
But wait, you are not done. You created a Preset. But you still have to tell DaVinci that from now on it should use this new created preset as the default preset when creating new projects. So click on the three dots on the top left again and select “Set Current Settings as Default Preset…”. Now every time you create a new Project it will take these new settings. And the Cache File will be on the external SSD.
Pro Tip: If you want to learn more about DaVinci Resolve iPad Check Out the DaVinci Resolve iPad MasterClass: From Beginner to Pro here.


