How To Create simple AIRPLANE MAP Animation in DaVinci Resolve iPad
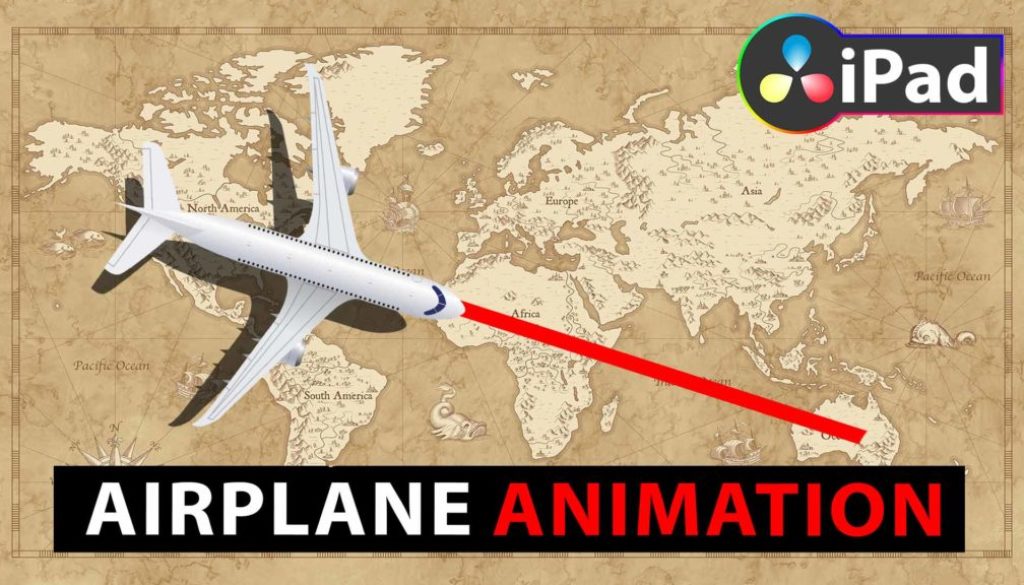
Do you still remember the Indiana Jones Movies? Where we had these nice animated map transitions when Indy was flying from one Country to another. Today we will do a Airplane Map Animation using DaVinci Resolve for the iPad. Have Fun.
Pro Tip: Make your Videos Cinematic (and save a tone of time) with our Seamless Transition Pack for DaVinci Resolve iPad.

Contents
- [Video] How To Create simple AIRPLANE MAP Animation in DaVinci Resolve iPad
- Step 1: Get the Map and a transparent Airplane
- Step 2: Orientation of the Airplane
- Step 3: Create Keyframe to Animate the Airplane
- Step 4: Create a Red Line (Use Solid Color)
- Step 5: Create Keyframes to Animate the red line
- If you want to host your own Online Course use CC360
- BONUS: All DaVinci Resolve iPad Masterclass Students get the Transition Pack for FREE!
[Video] How To Create simple AIRPLANE MAP Animation in DaVinci Resolve iPad
Step 1: Get the Map and a transparent Airplane
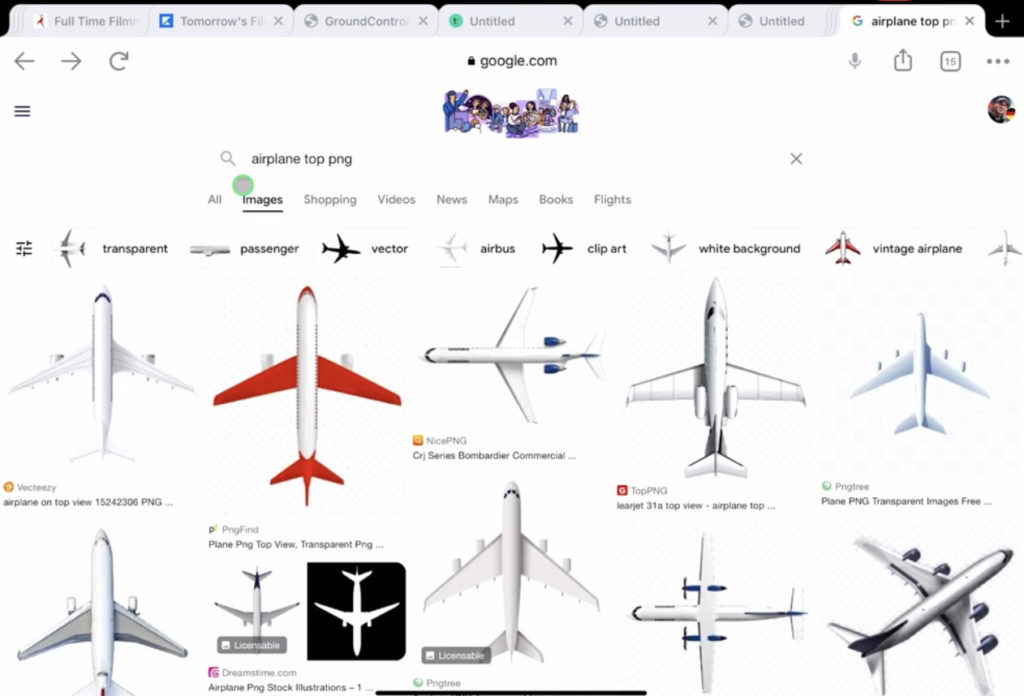
For a simple Map and Airplane Animation you can use Google to find a Map and a Transparent Airplane. I searched for “airplane top png” – Because PNG are mostly already with a Transparent Background.
Step 2: Orientation of the Airplane
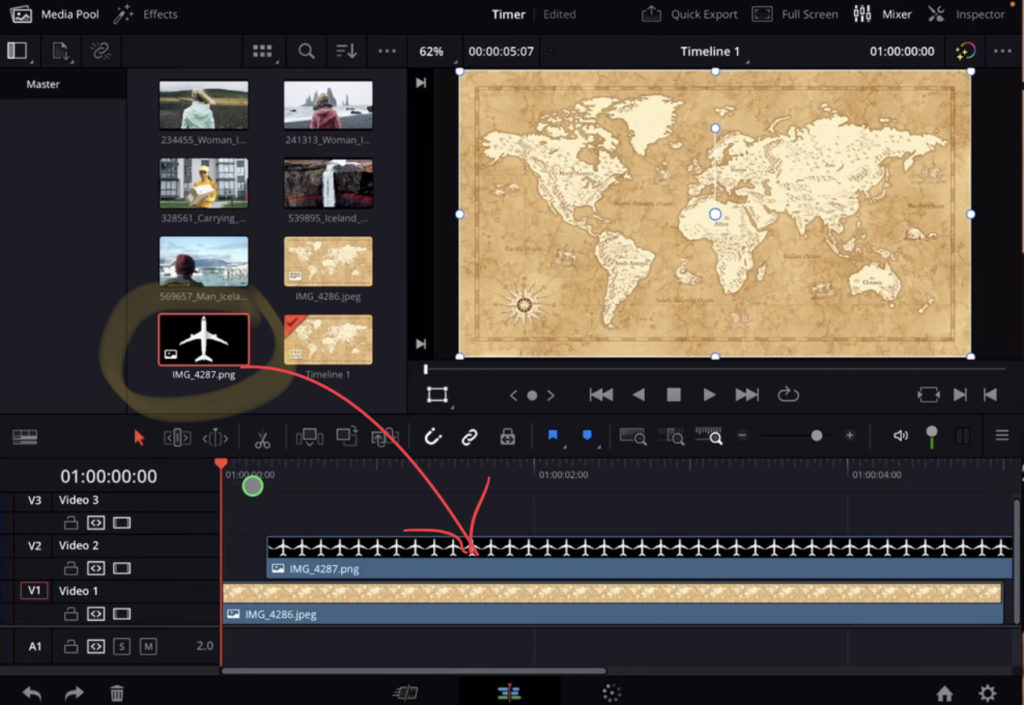
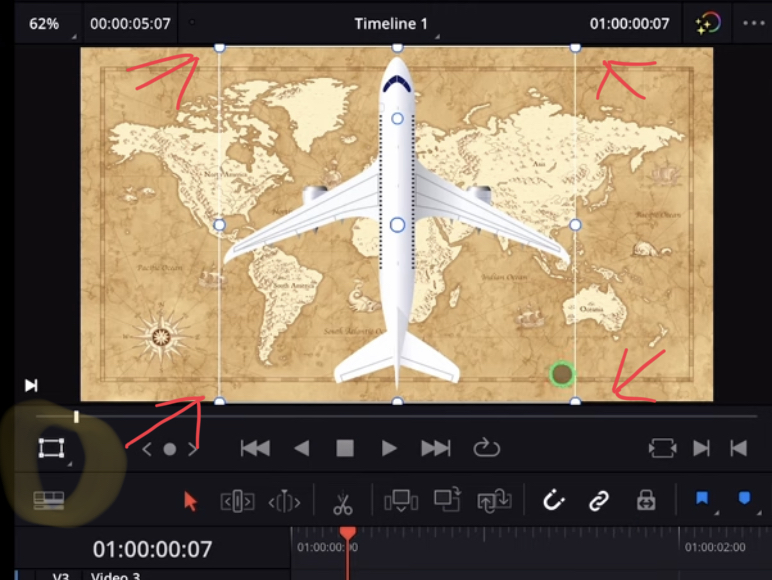
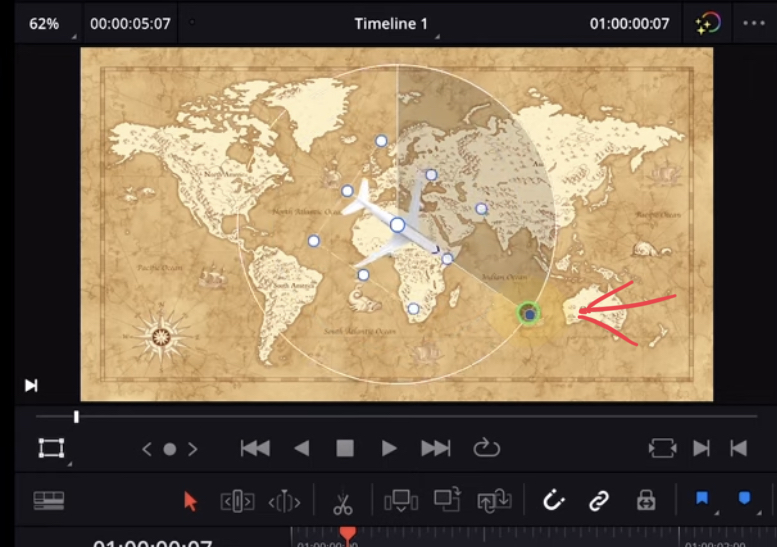
Step 3: Create Keyframe to Animate the Airplane
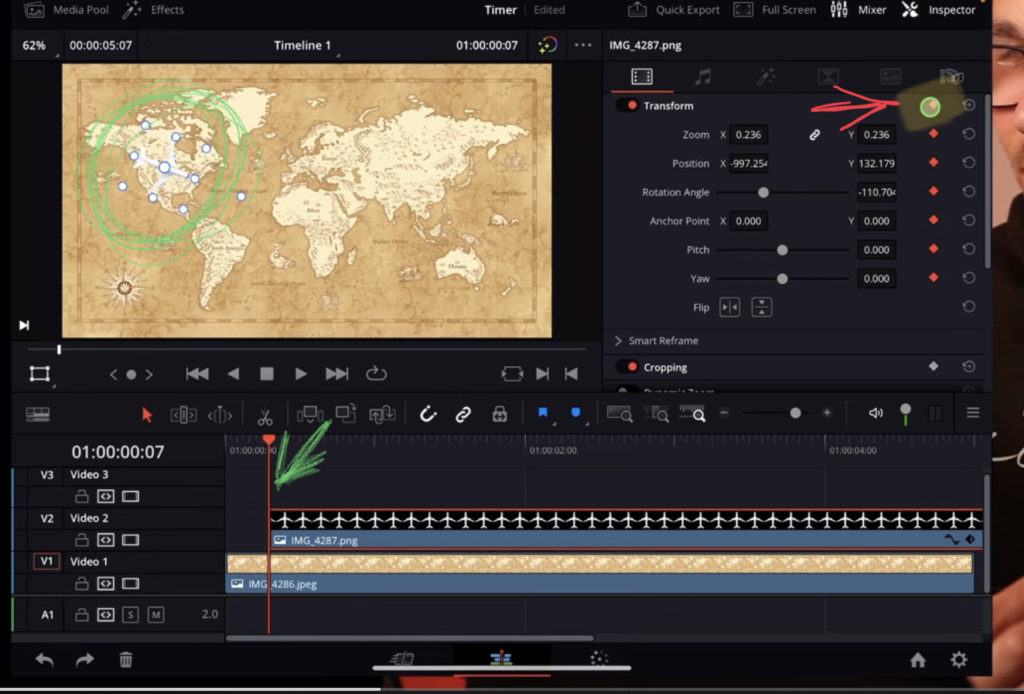
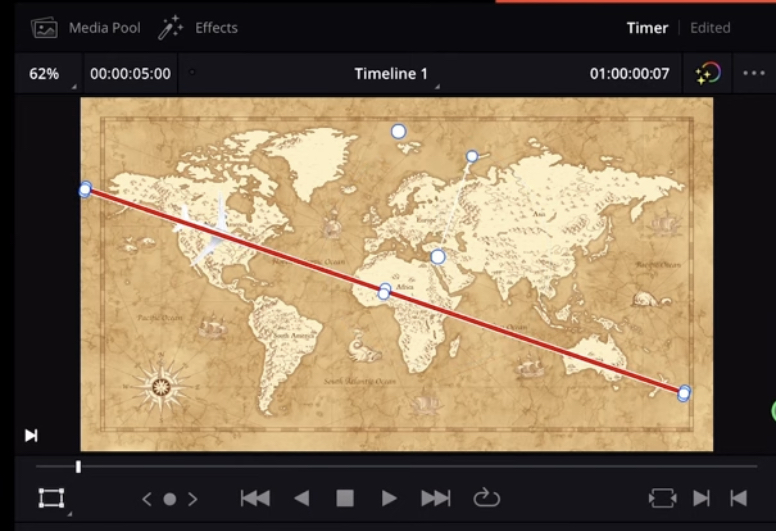
To create a animation with the Airplane go to the beginning of your clip on the timeline and position your airplane where it will start. In my example we will fly from America to Australia. Select the Airplane clip and open the inspector. After the Airplane has the right position and rotation click on the little dot in the top right next to Transform to create your first keyframe for all parameters.
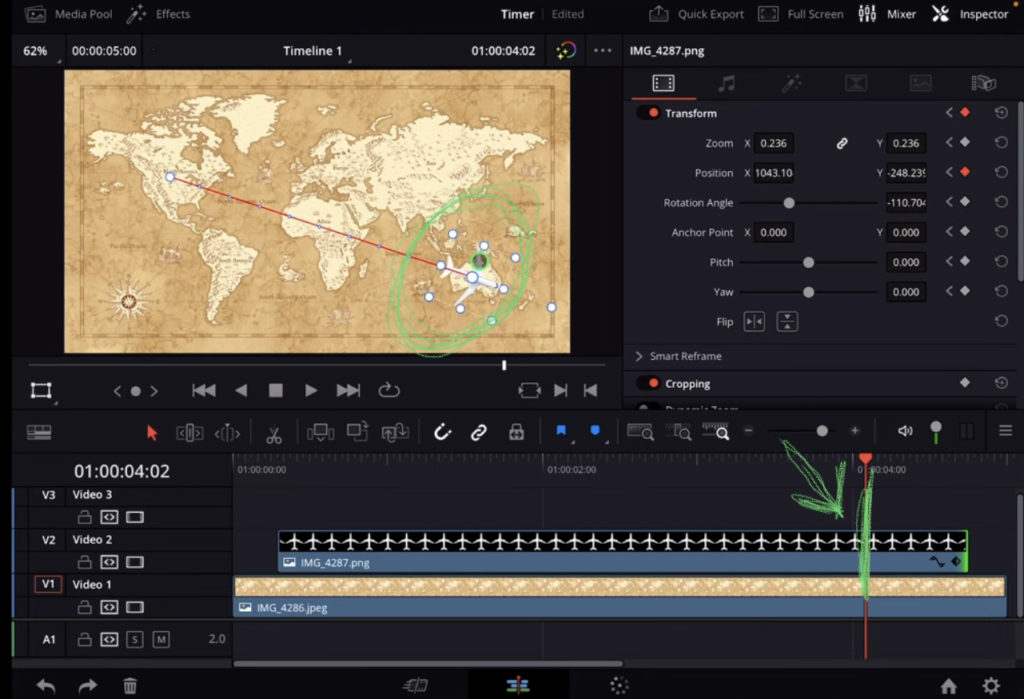
Change your Timeline position to the end position where the airplane will be in australia. In order to still see the airplane on the screen i keep a bit more of the clip extended which i will trim after setting the keyframe. Now simply Drag & Drop the Airplane in the viewer window and bring it to the end position. The second Keyframe will be automatically created for you. That’s it, the Airplane will already be animated.
But in order to make this animation a bit better, we will also create a red line that follows the airplane.
Step 4: Create a Red Line (Use Solid Color)
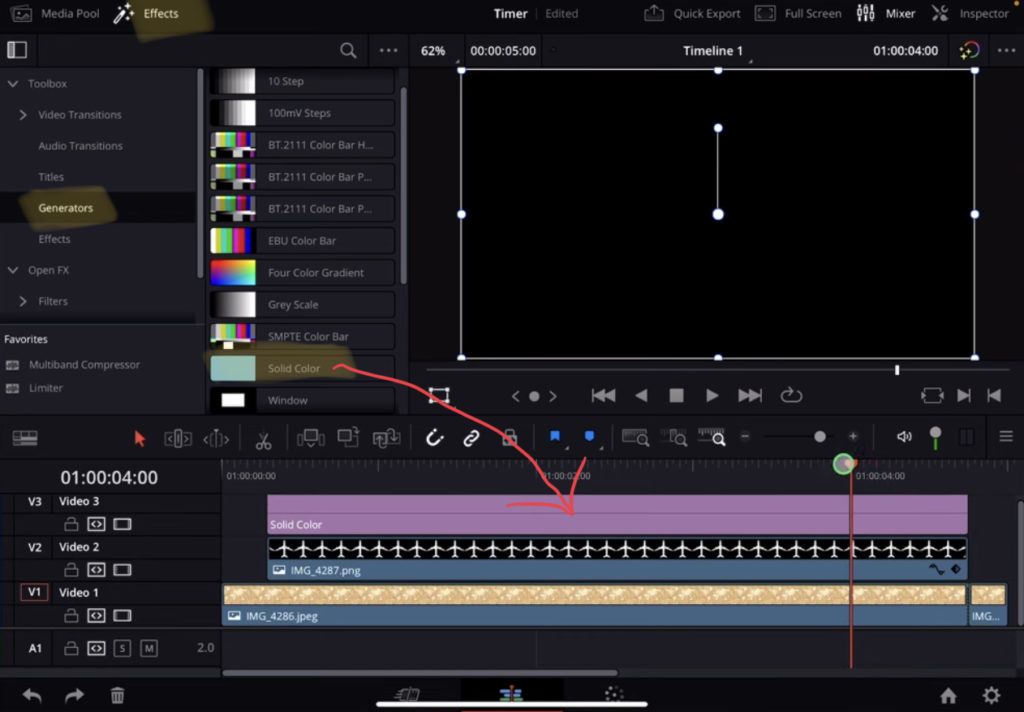
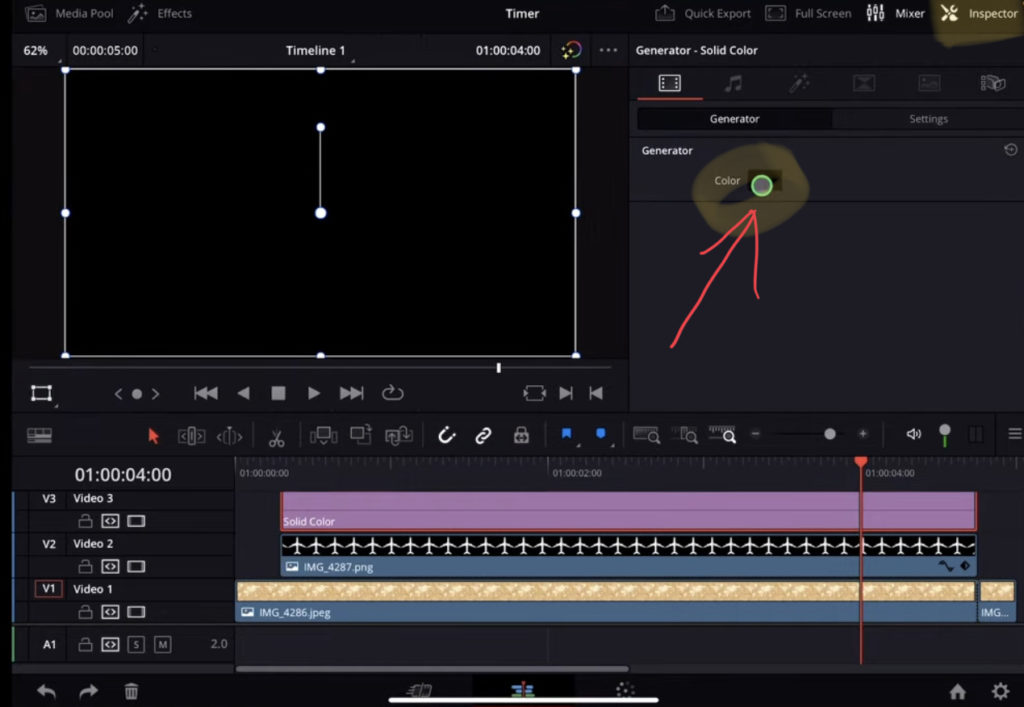
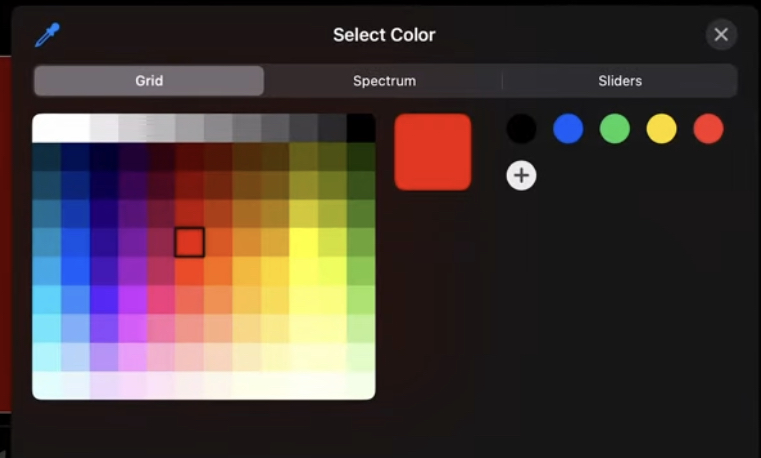
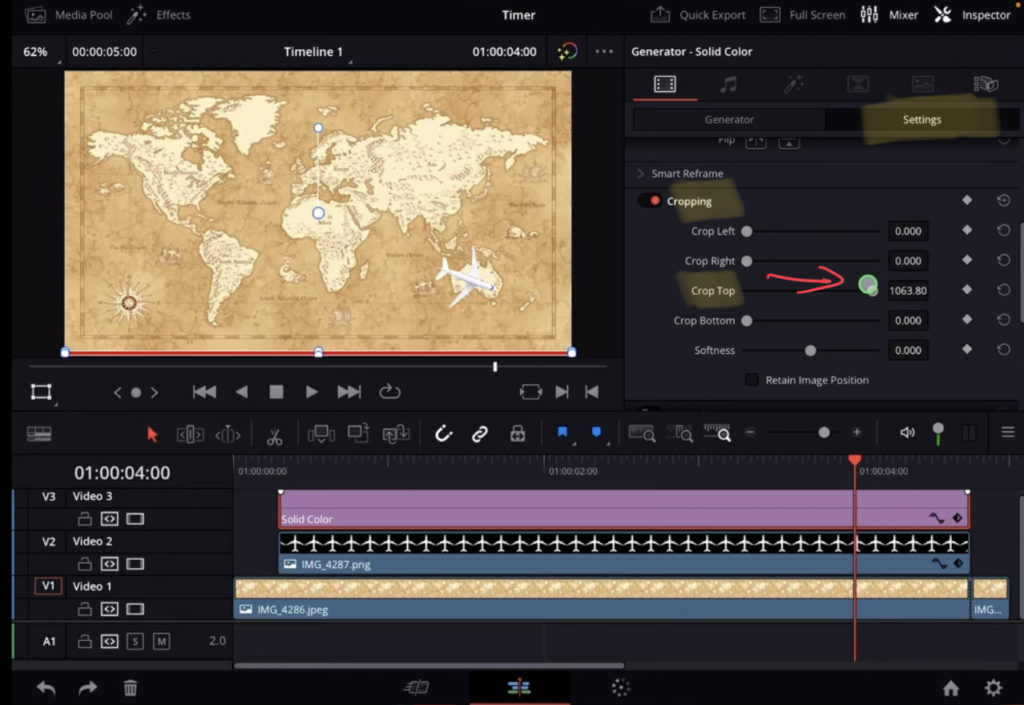
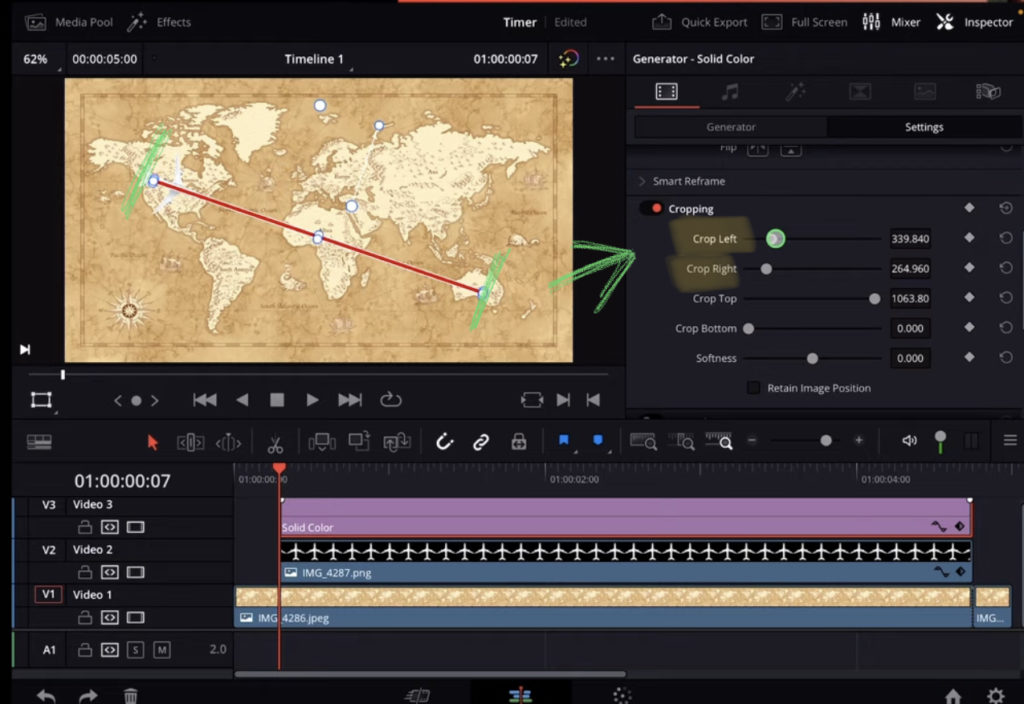
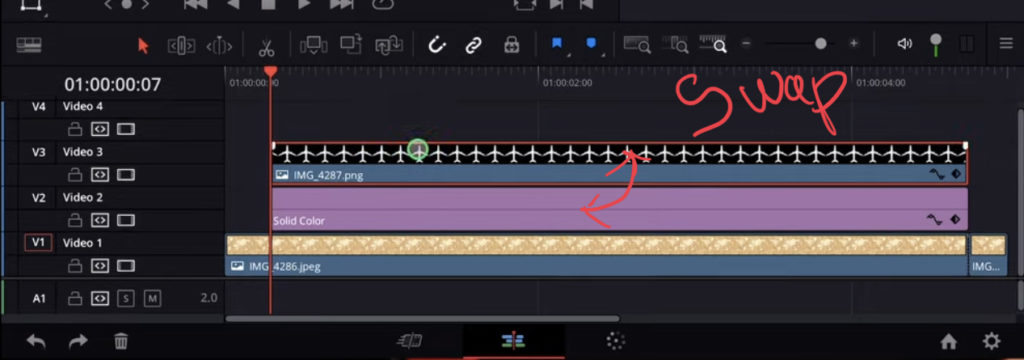
Step 5: Create Keyframes to Animate the red line
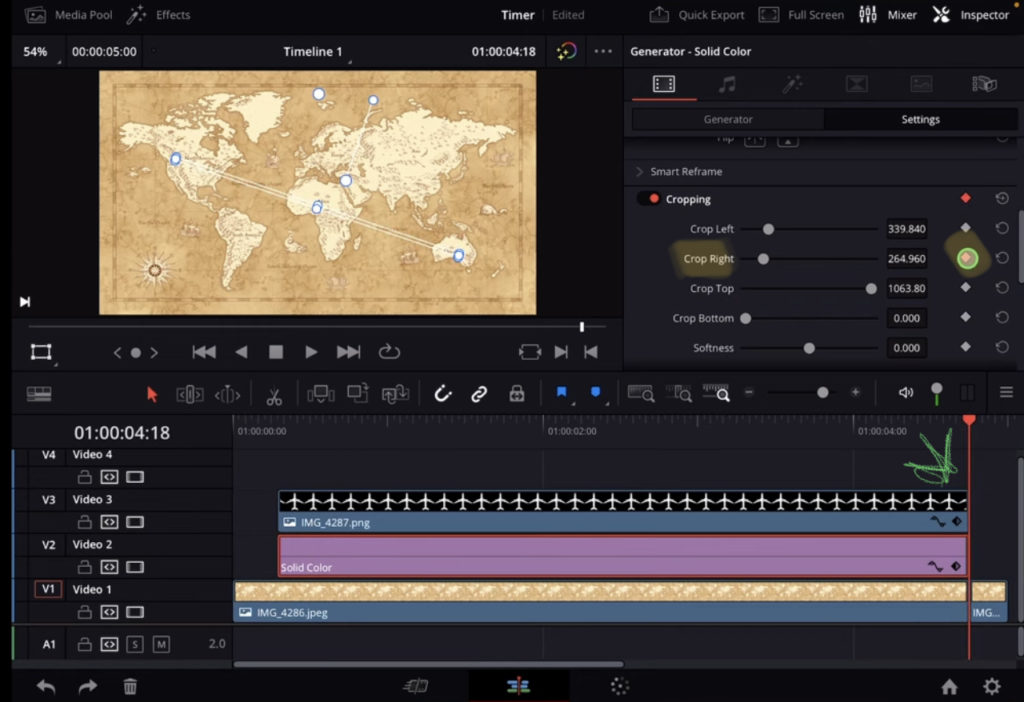
Same thing as before with the airplane animation. This time we start the Keyframes with the end position. So bring your Timeline to the end of the clip and create the first keyframe for Crop Right. Click the little dot next to Crop Right in the Inspector.
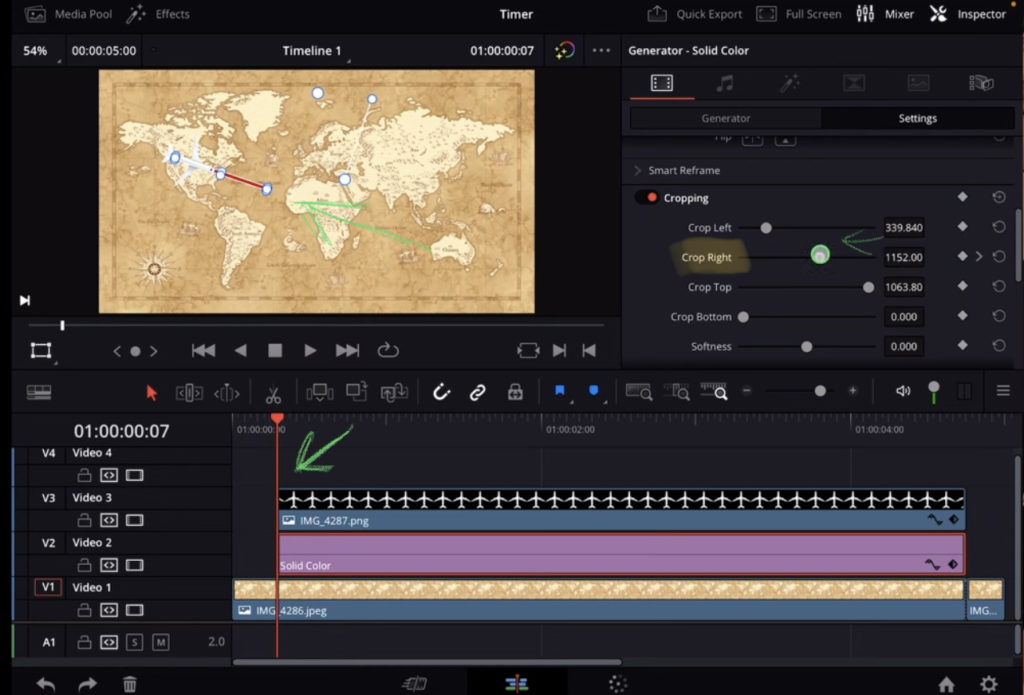
Bring the Playhead to the beginning of the Clip and reduce the Crop Right value. Done. Now when you hit play you will see our little animation.
If you want to host your own Online Course use CC360
I really believe, that CC360 is the best Platform to host your own Online Course currently on the market. And each week they introduce new features. Amazing. Check it out here.
BONUS: All DaVinci Resolve iPad Masterclass Students get the Transition Pack for FREE!
You can either get the Transition Pack separate here: Seamless Transition Pack for DaVinci Resolve iPad. Or all of our DaVinci Resolve iPad Packs are a FREE Bonus for the DaVinci Resolve iPad Masterclass Students.
Check It Out here DaVinci Resolve iPad MasterClass: From Beginner To Pro.

Read Next
• How COPY Color Grade to MULTIPLE Clips in DaVinci Resolve iPad
• DO THIS to make DaVinci Resolve FASTER! (Instead of rage smashing your iPad)
• How To Delete Cache Files in DaVinci Resolve iPad
• How To Color Correct iPhone Footage in DaVinci Resolve iPad
• Easy Sync Audio & Video in DaVinci Resolve iPad


