How to create a CIRCLE CROP / MASK in DaVinci Resolve iPad
Today i will show you how you can create a CIRCLE CROP or a circle MASK in DaVinci Resolve iPad Pro. This is best used for Screen Recording Tutorial while you still want that your audience can see you explaining things.

Contents
[Video] How to create a CIRCLE CROP / MASK in DaVinci Resolve iPad
4 easy steps to create a Circle Crop in DaVinci Resolve on iPad
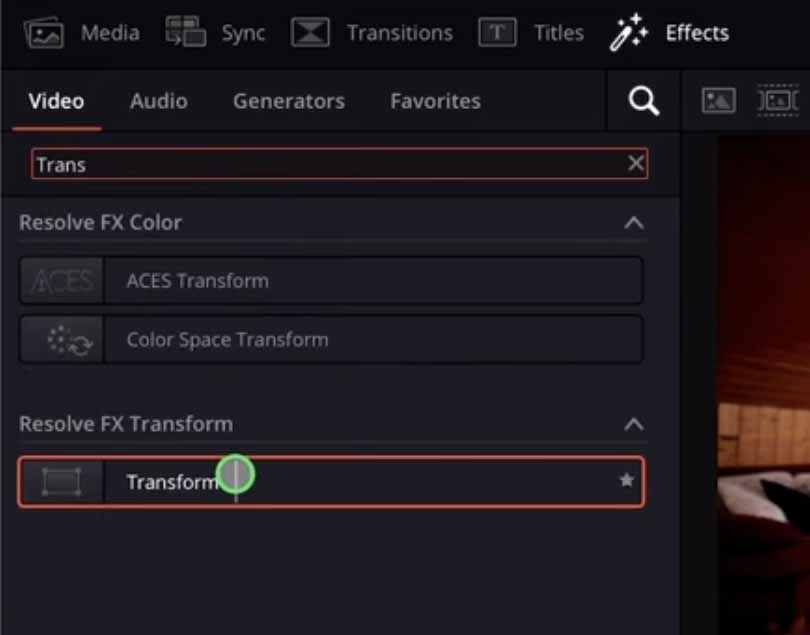
Step 1: Go to Effects and apply the Transform Effect to the desired Clip.
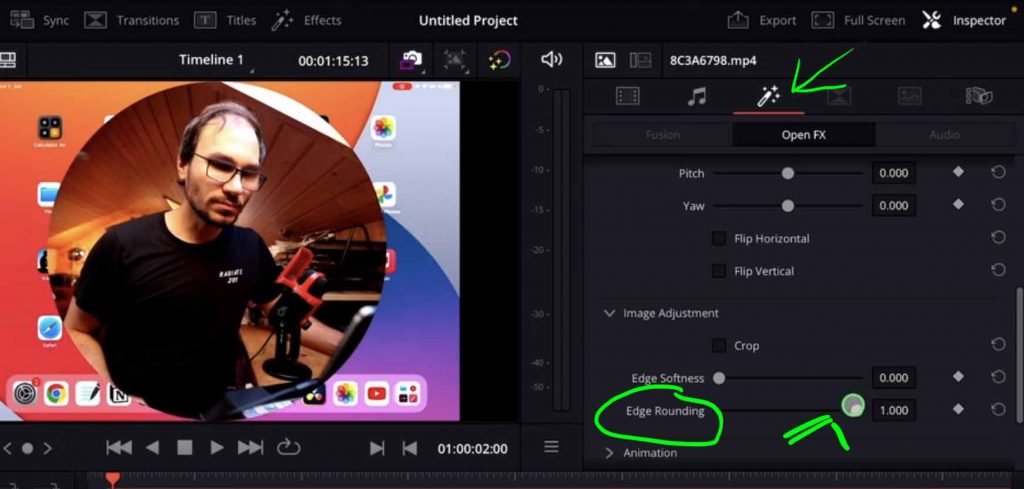
Step 2: Open the Inspector and scroll down to Image Adjustment. Increase the value of Edge Rounding to 1.000 to get the Circle Cutout.
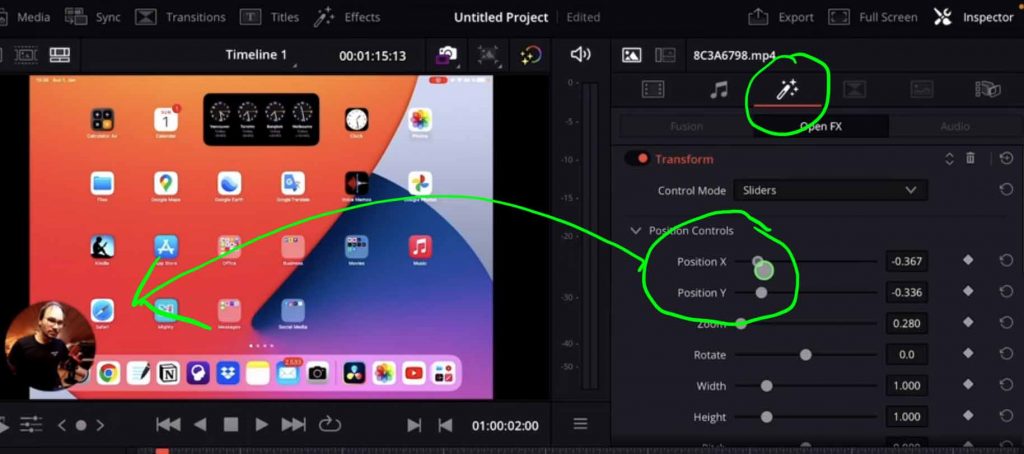
Step 3: Under Position Controls of the Transform Effect you can change the size (Zoom) and the Position (X,Y)
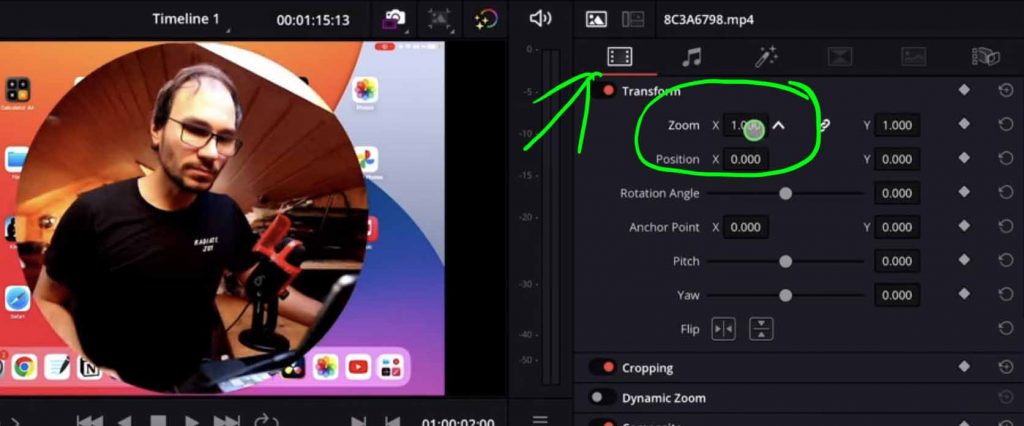
Step 4: In the Inspector go back to the Video Tab (The first Tab) and change the Zoom and Position values to change the image size and Position inside the circle. Done!
Pro Tip: I always make a copy of my original Clip and create the Circle Cutout on the Copy on the top layer. I keep both clips. And when ever i want, i can jump back to full screen with the first clip. Or show my iPad screen and show the circle Cutout.


Ciao Daniel 🙂
Follow Me on YouTube, Facebook, and Instagram.
If you find this helpful: Share It with your friends!
