How To Add Audio Effects 🔊 DaVinci Resolve iPad
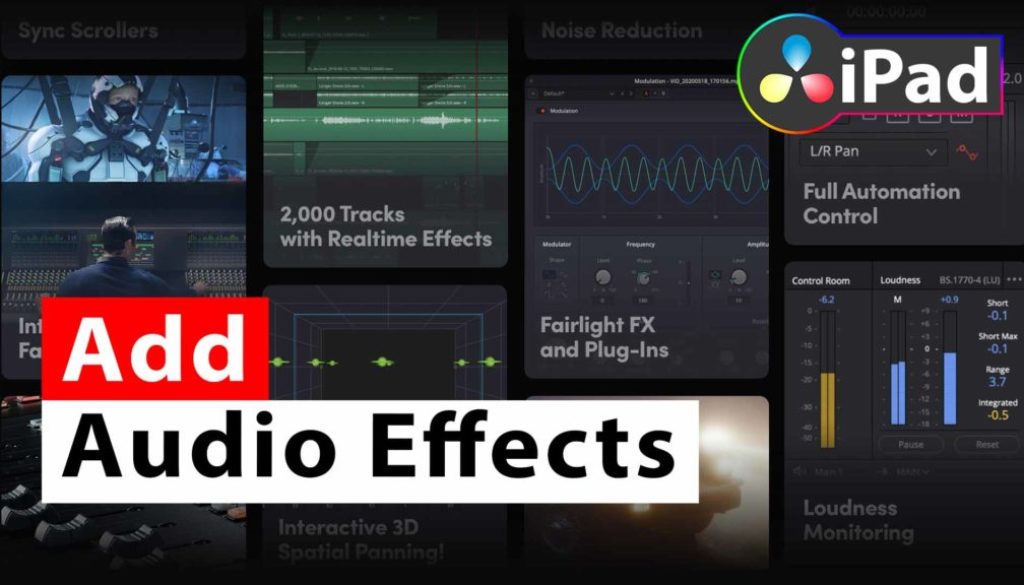
In this article i will show you how you can add Audio Effects using DaVinci Resolve for the iPad.
Pro Tip: Make your Videos Cinematic (and save a tone of time) with our Seamless Transition Pack for DaVinci Resolve iPad.

Contents
- [Video] How To Add Audio Effects 🔊 DaVinci Resolve iPad
- No Audio Mixer in Fairlight Page? What to do?
- Where to find the Audio Effects in the Edit Page?
- Using Audio Effects in your Timeline
- Add another Audio Effect the Multiband Compressor
- How to open the specific Audio Effect Settings again?
- How to create Presets from Audio Effect Settings?
- BONUS: All DaVinci Resolve iPad Masterclass Students get the Transition Pack for FREE!
[Video] How To Add Audio Effects 🔊 DaVinci Resolve iPad
No Audio Mixer in Fairlight Page? What to do?
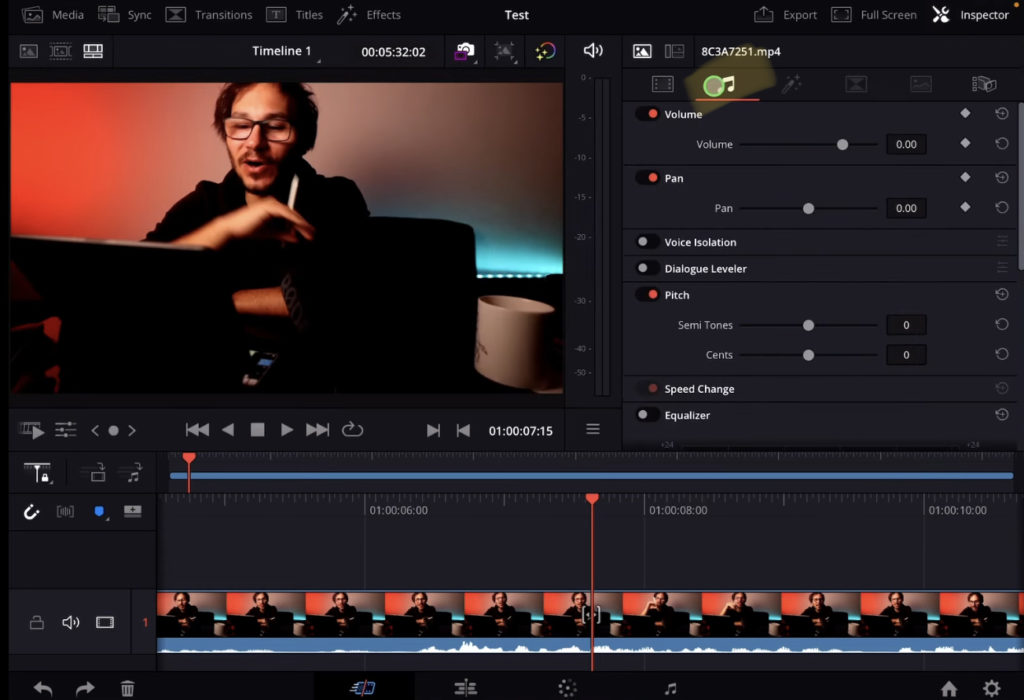
Even if we found the hack to unlock all of the Pages in DaVinci Resolve for the iPad. It’s basically just a simple shortcut. Read more about that in this article here.
We also have the Fairlight Page which is the page designed to do all the Audio work. The one Problem we currently have is that the Audio Mixer is not working. (Could be changed in a future DaVinci Resolve iPad update) But for most basic audio editing and even for some advanced audio effects you don’t need the Fairlight Page.
First, like in the image above. Every clip that you select has his own audio settings in the inspector. Here you will find some basic settings even an equaliser.
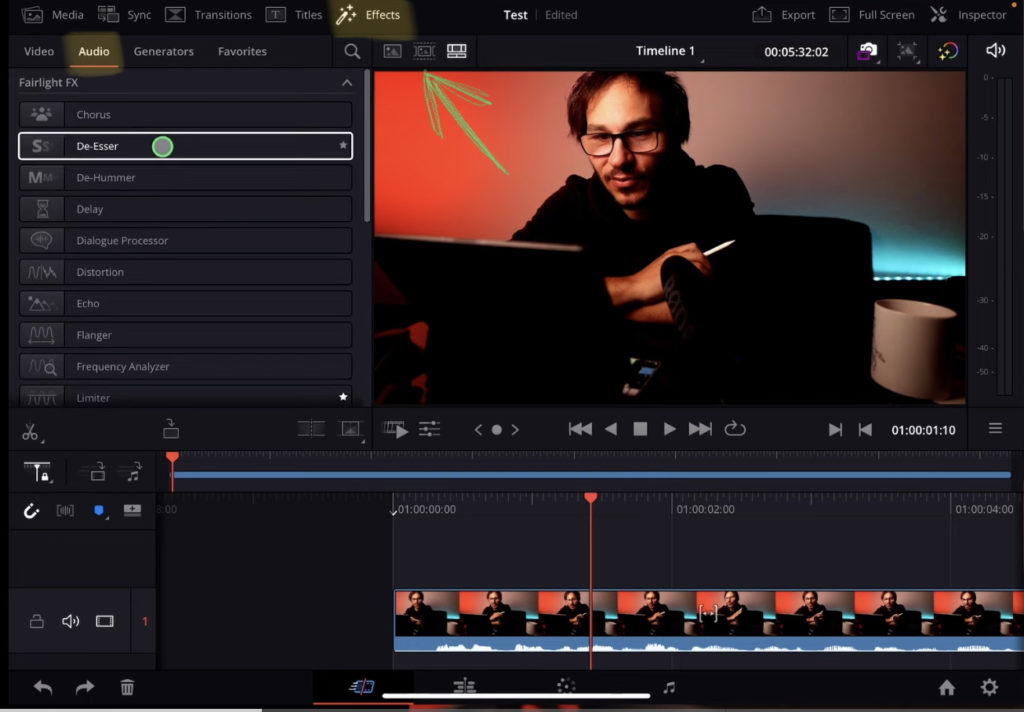
To do some more advanced audio editing you find the Audio Effects in the Cut Page under Effects (Top) and a sub category called Audio. All of these Audio Effects you can simple Drag & Drop either to a specific clip of even to a complete track. That way, all of your adjustments will effect every clip on that Track.
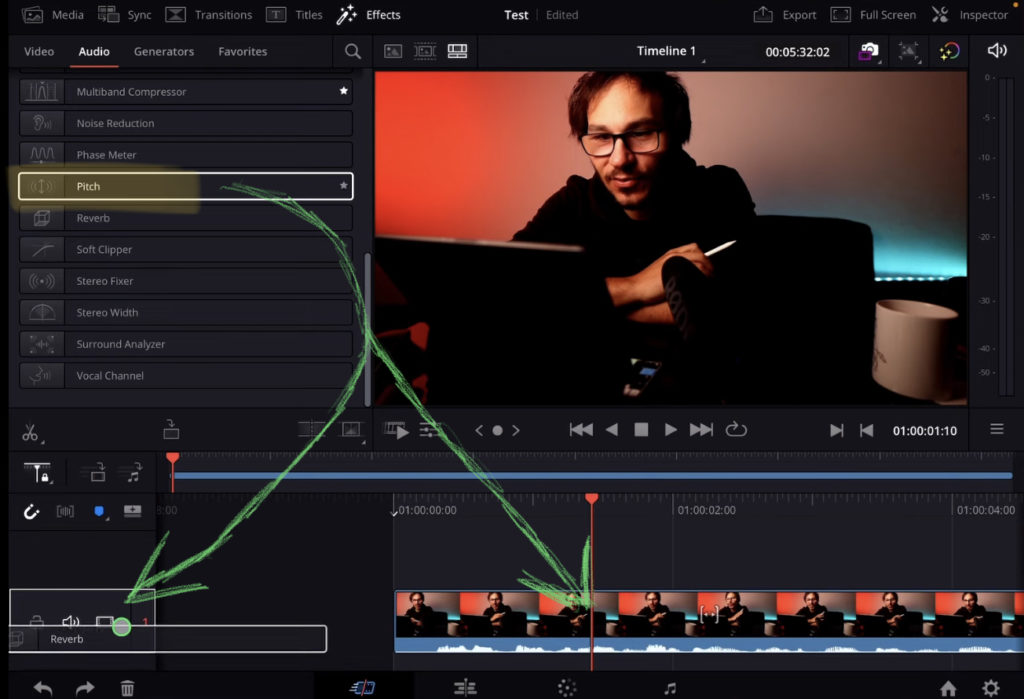
Where to find the Audio Effects in the Edit Page?
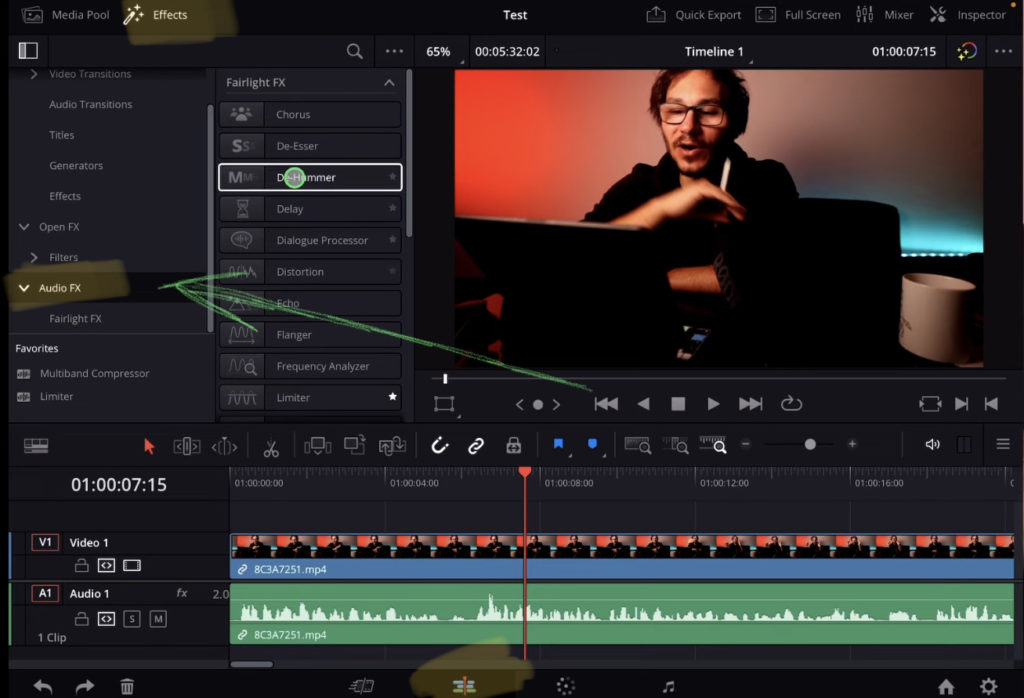
The same Audio Effect you will also find in the Edit Page. Go to the Effects (Top) and instead of the Audio Tab you will find different categories on the left. Simply click on the Audio FX. Here are all the Audio Effects.
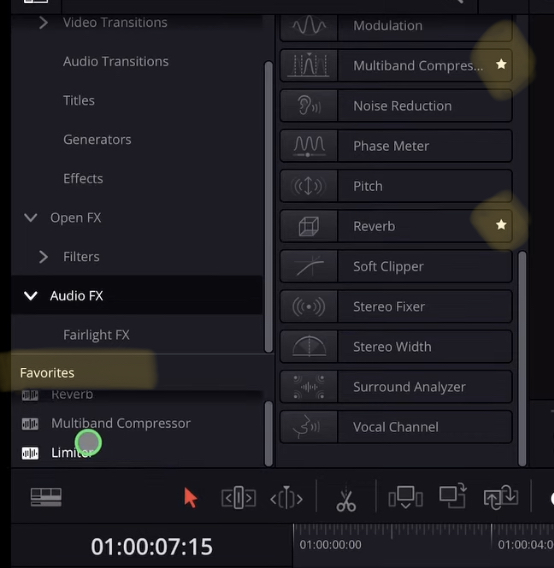
Btw. you can also create your own Favourites by clicking the little star icon on the right of each Audio Effect. Here in the Edit Page you will see the Favourites on the bottom of the Effects panel.
Using Audio Effects in your Timeline
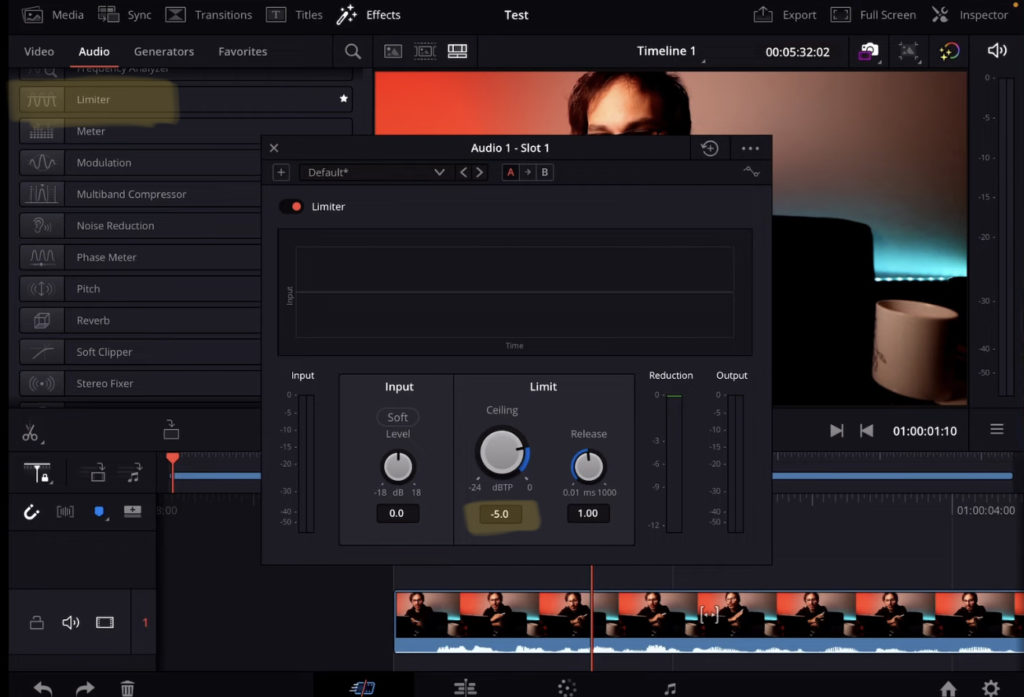
In this example i applied the Limiter Audio Effect to the complete Audio Track. After you dropped an Audio Effect to a clip or track, that Audio Effect as his own settings. And a separate window will open.
Good to know: With a Limiter you can cap the peak audio on a specific value. For example used a Limiter with -5. That means nothing will be louder then -5.
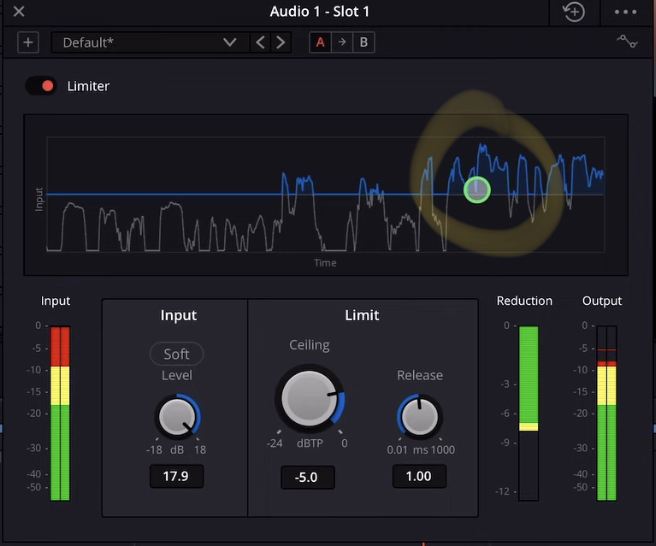
Everything above the -5 will be limited to -5. See the image above. I love to place an Limiter onto my complete track. That way i know nothing will surprisingly peak.
Add another Audio Effect the Multiband Compressor
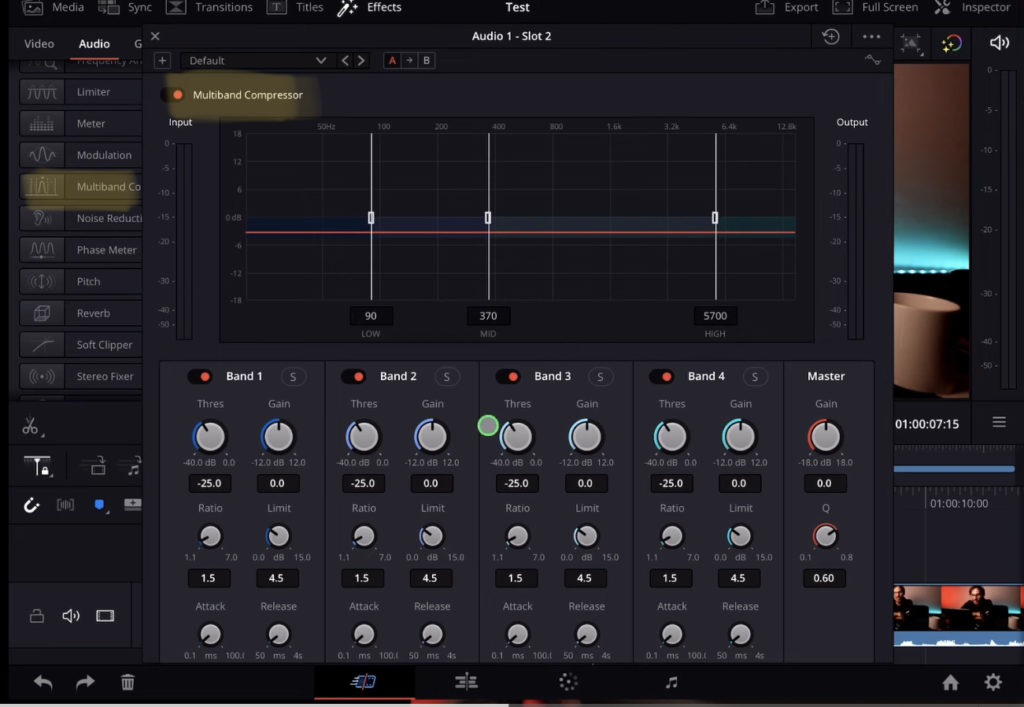
You will notice that sometimes you can get the same results with different Audio Effects. For Example even the Limiter has a gain setting. That means i can also boost my audio and make everything louder.
But instead of using the gain from the Limiter i love to work with the Multiband Compressor. With this Audio Effect i can boost specific frequencies. Like boost the low and mid and reduce the highlights. Also as the name indicates. It includes some compressor settings for all bands.
Good to know: A compressor brings the loudest and quite sound closer together.
How to open the specific Audio Effect Settings again?
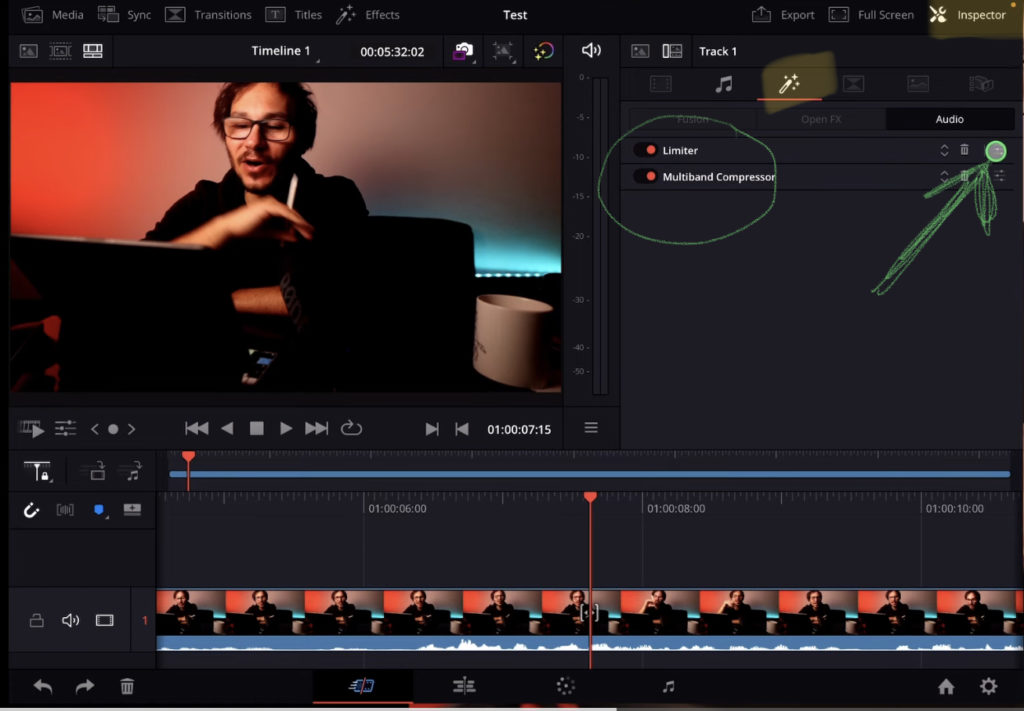
After you added Audio Effects to your clips or the Track simply select the clip or the track and open the inspector. In the inspector next to the Audio Tab you will also find a Effects Tab. inside of this Tab you will see all the added Effects. To reopen the specific Settings Window click on the settings icon on the right next to the Effect.
How to create Presets from Audio Effect Settings?
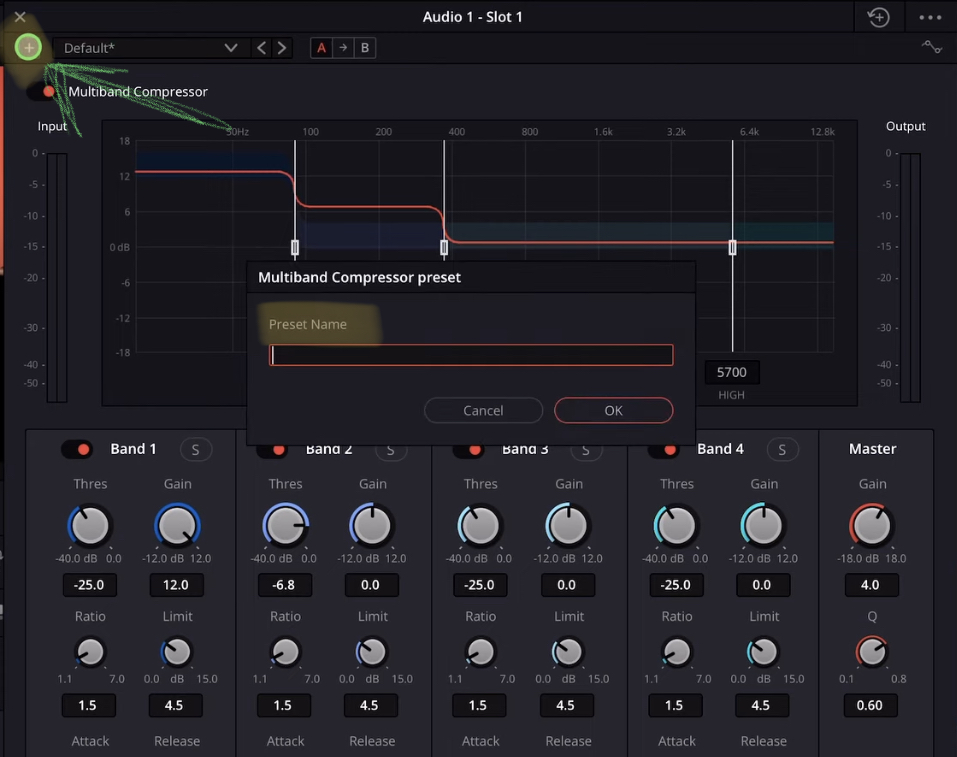
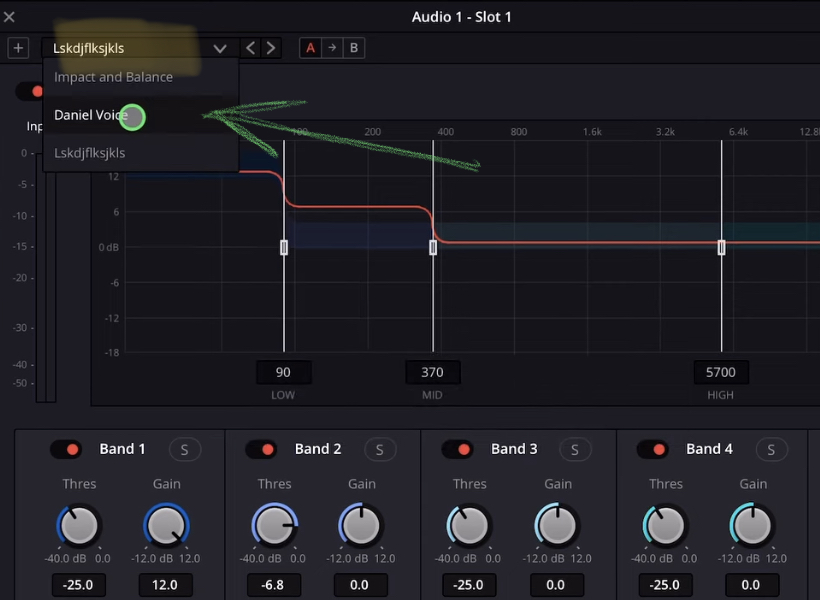
Each Audio Effects Window has his own settings. But you can save these settings as a preset. Simply click on the + icon on the top left of that window. A new window opens and you can save the current settings as a preset.
BONUS: All DaVinci Resolve iPad Masterclass Students get the Transition Pack for FREE!
You can either get the Transition Pack separate here: Seamless Transition Pack for DaVinci Resolve iPad. Or all of our DaVinci Resolve iPad Packs are a FREE Bonus for the DaVinci Resolve iPad Masterclass Students.
Check It Out here DaVinci Resolve iPad MasterClass: From Beginner To Pro.

Read Next
• How COPY Color Grade to MULTIPLE Clips in DaVinci Resolve iPad
• DO THIS to make DaVinci Resolve FASTER! (Instead of rage smashing your iPad)
• How To Delete Cache Files in DaVinci Resolve iPad
• How To Color Correct iPhone Footage in DaVinci Resolve iPad
• Easy Sync Audio & Video in DaVinci Resolve iPad

