DaVinci Resolve iPad: Vertical Videos Guide
In this article i will show you how you can create Vertical Timelines for TikoTok, Instagram Reels and YouTube Shorts in DaVinci Resolve for the iPad.
Contents
[Video] How to edit Vertical Videos in DaVinci Resolve iPad
Solution 1: You already work in a Timeline and notice you want to change it
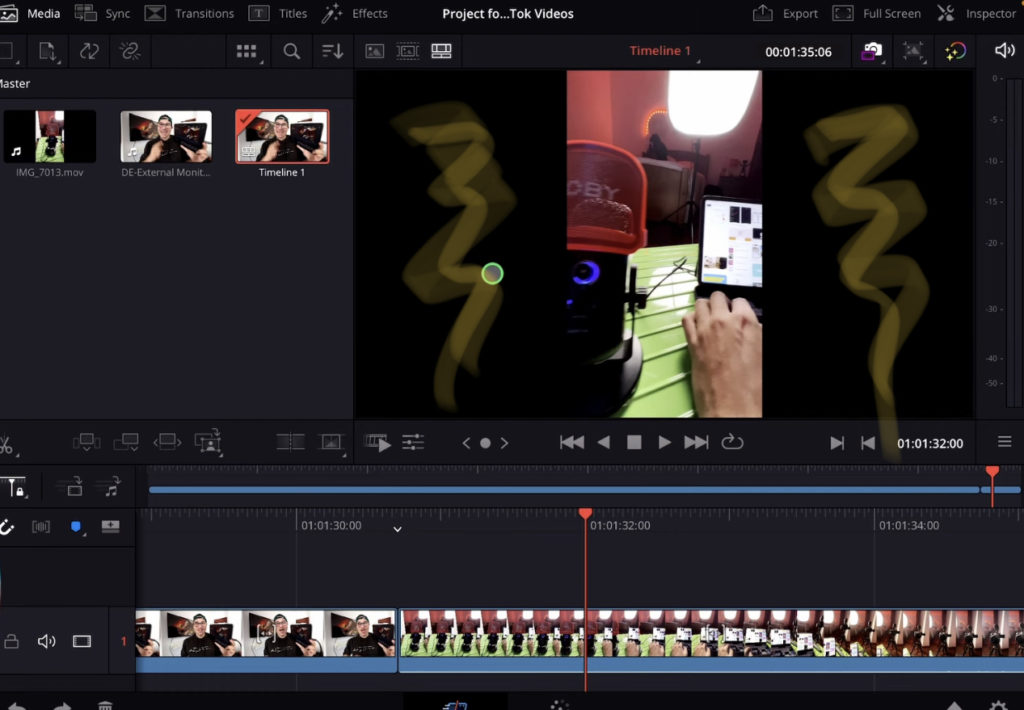
When you have a regular Timeline (in my example its a 1920×1080 Full HD Timeline) and you drag a Vertical Video on to the Timeline you will get these ugly Black Bars on the left and the right. Especially if you want to actually create a vertical video, this is not how you want to work in DaVinci Resolve iPad.
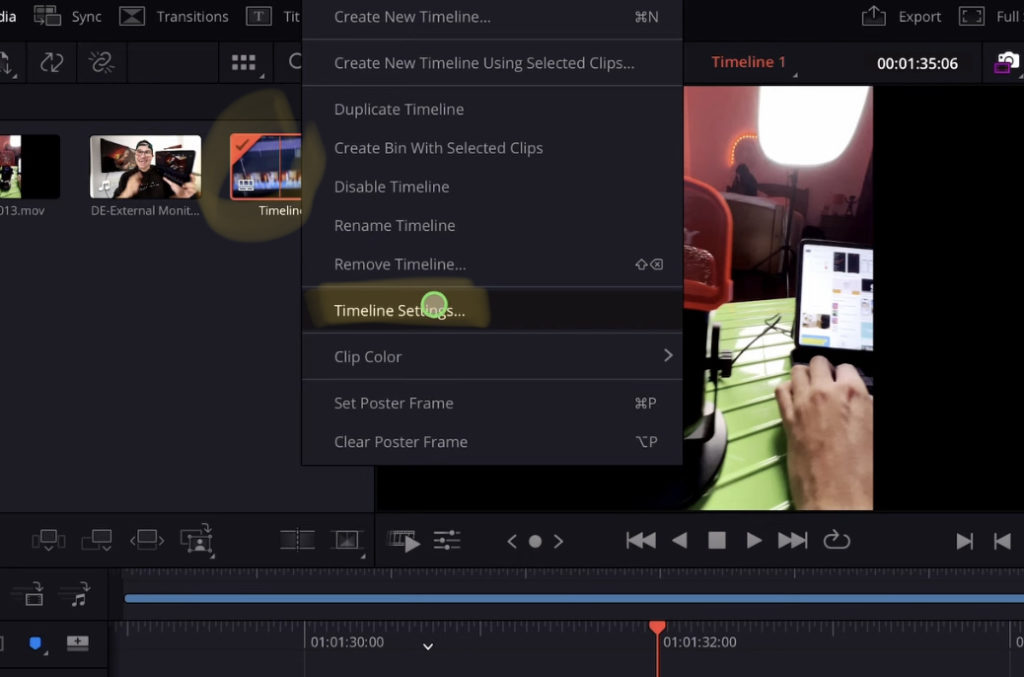
Right click on the Timeline (longer press with pencil) in the Media Pool and go to the Timeline Settings…
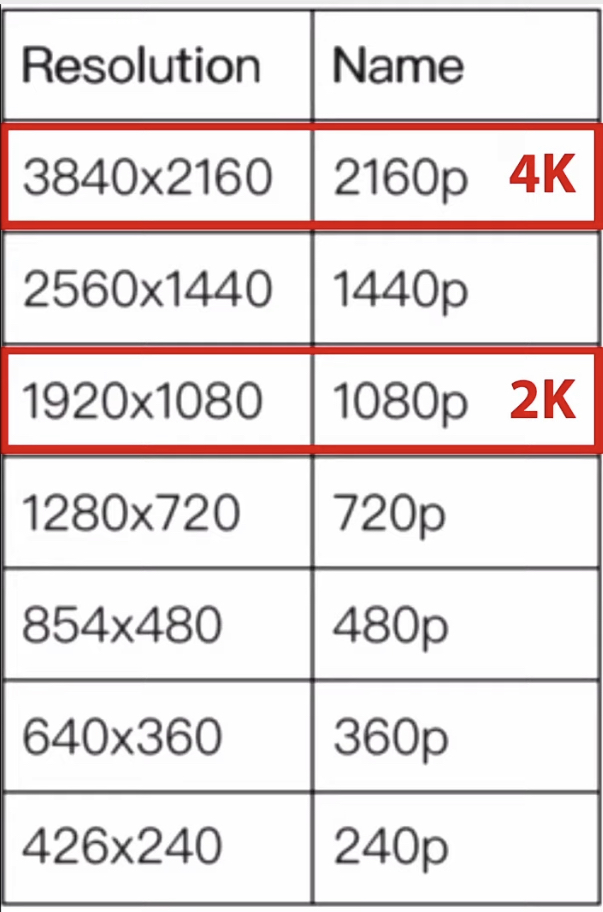
Use this Cheat Sheet to figure out what Aspect ratio you need. In order to make it Vertical you just have to flip the numbers. For example a traditional 1920×1080 (2K Full HD) Horizontal Video would become 1080×1920 Vertical Video. You get it?
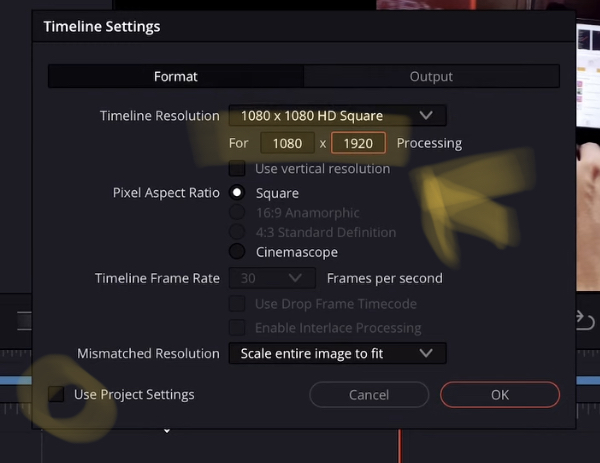
So in the Timeline Setting Window uncheck the Box “Use Project Settings” and type in the Numbers of your Timeline Aspect Ration. In my case i flip the Numbers and type in 1080×1920. – Done! Now you have a Vertical Timeline.
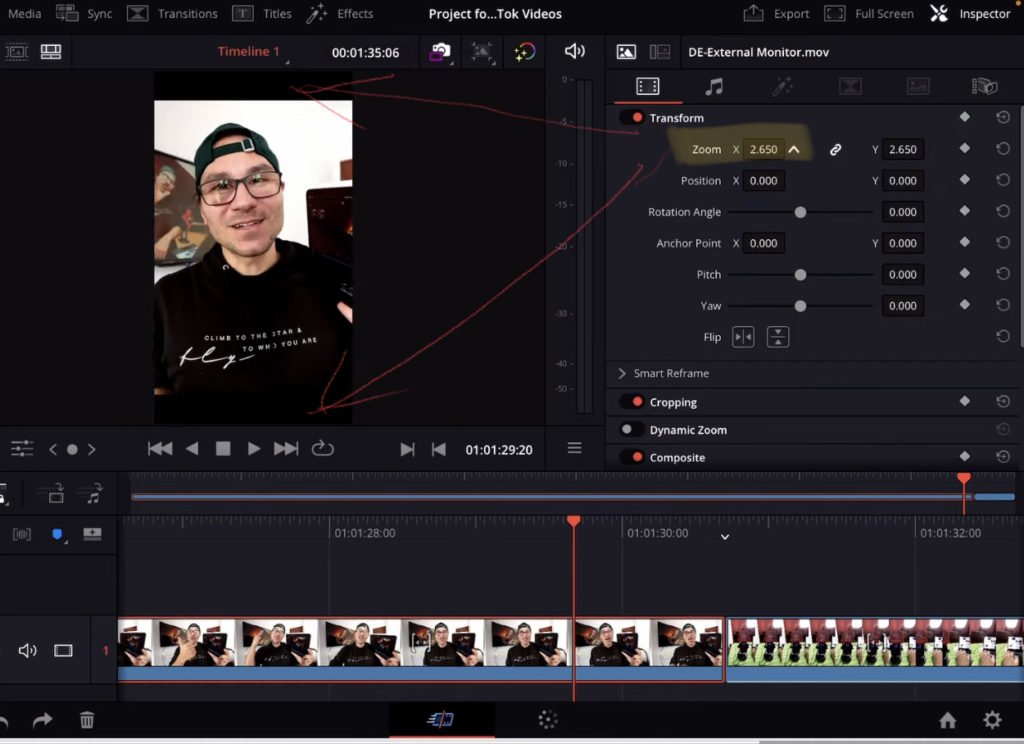
Info: What about if you bring in a Horizontal Video into that timeline? DaVinci by default settings will try to fit your video into the Timeline aspect ratio. That means your Video will now have black bars on the Top and on the Bottom. In that case go into the Inspector and change the Zoom value to fill the frame.
Solution 2: Change Timeline Project Settings before you start.
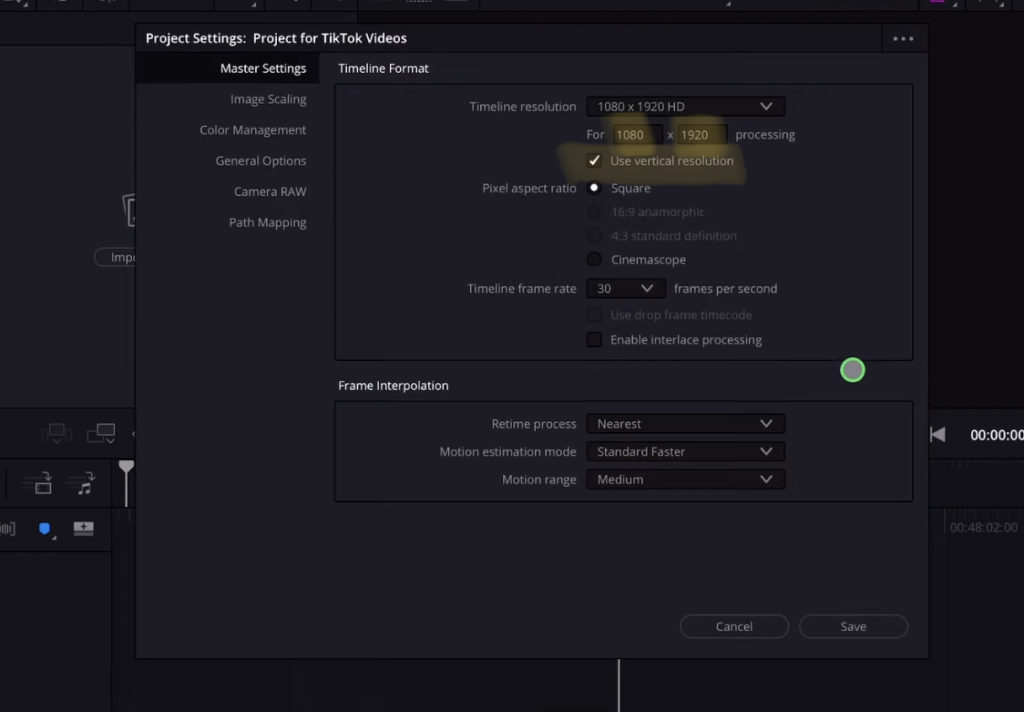
The other solution is to actually go into your Project Settings and change the Resolution there. You can also click on the Check Box “Use Vertical Resolution” – Make sure your numbers are flipped. In my case 1080×1920. Hit save, and when you now create a new Timeline it will already be a Vertical Timeline.


