How To VERTIGO ZOOM in DaVinci Resolve iPad
Today i will show you how you can create the famous Vertigo Zoom Effect inside of DaVinci Resolve for the iPad. Its also called the dolly zoom technique. Originally you would create this effect inside the camera by using the moment of the dolly in opposite direction to the zoom. For example if you move towards your subject you would start the zoom closer on the subject and decrease the zoom while the camera gets closer and closer. This filmmaking technique is perfect for conveying a character’s panic, stress, or realisation level.
This effect was first introduced by director Alfred Hitchcock in the 1958 movie Vertigo.
Today i will show you 2 ways how you can achieve this digitally in DaVinci. First method with keyframes and second method (more easier way) with the Dynamic Zoom Effect.
Pro Tip: Make your Videos Cinematic (and save a tone of time) with our Seamless Transition Pack for DaVinci Resolve iPad.

Contents
[Video] How To Create VERTIGO ZOOM EFFECT in DaVinci Resolve iPad!
First method: Using Keyframes
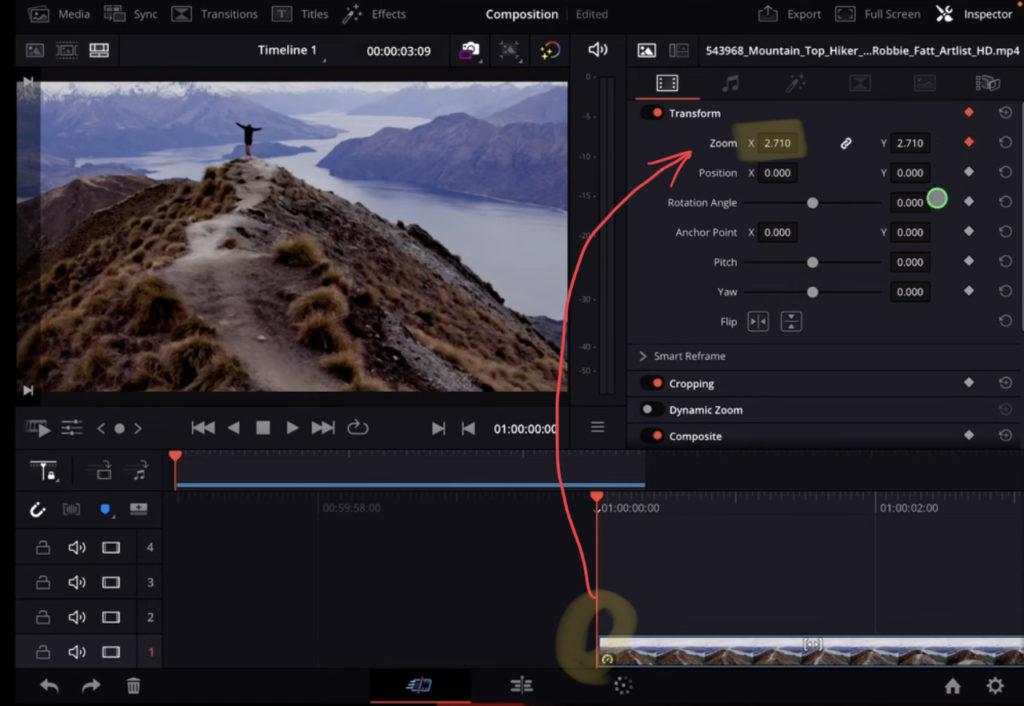
You can alway create this effect by using keyframes. Go to the start of your clip. In my example i use a drone moving forward. The first keyframe i start with already zoomed in to my frame. Change the zoom value in the inspector and click the little dot on the right side next to the Zoom value. This will create your first keyframe.
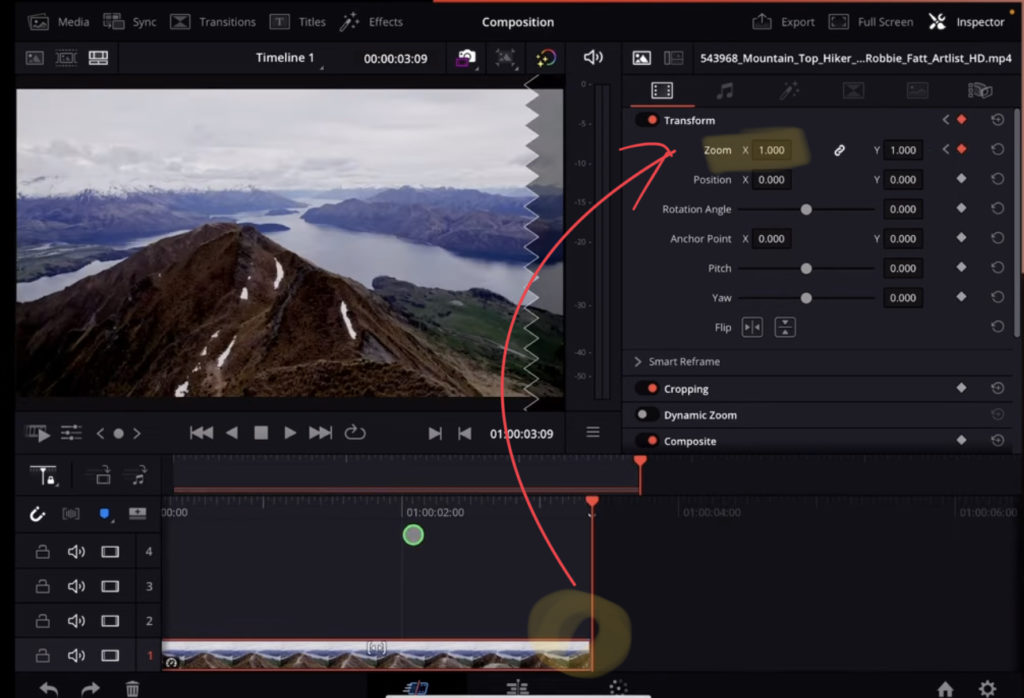
For the second keyframe go with your playhead to the end of the clip. Now you can simply double tab on the Zoom letter and it will reset the zoom values to 1. Done, this will automatically create the second keyframe.
Second Method: Use Dynamic Zoom (Easy way)
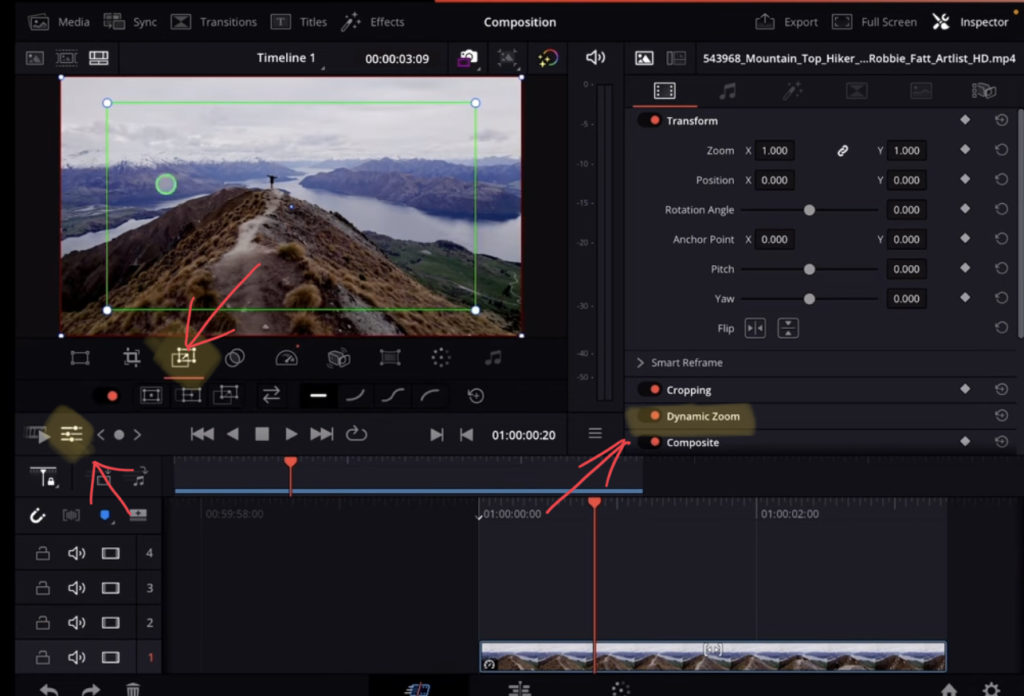
DaVinci Resolve has a feature that is not available in most other editing software and it is called Dynamic Zoom. Click your clip you want to add the Dynamic Zoom and you will find it in the inspector when you scroll down to Dynamic Zoom. By default this is turned off. Turn it on and open the settings icon under your viewer. This will open up a new row with icons. The third icon from the left is the dynamic zoom settings. When you click this you will see two boxes in your frame. A green Box which represents the start of your clip. And the red box represents the end position.
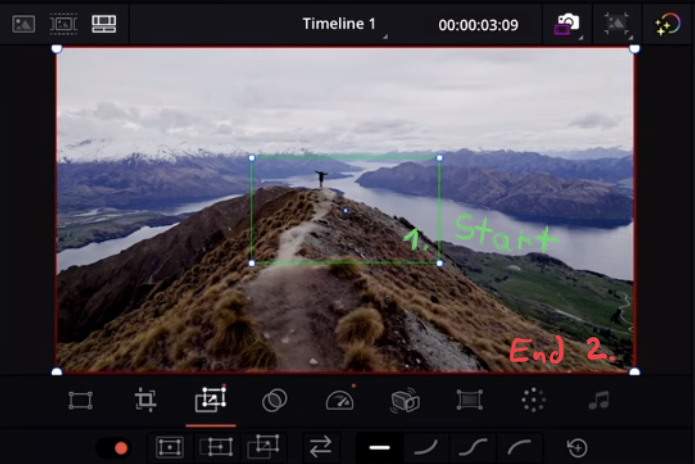
To create the Vertigo Effect using the Dynamic zoom change the green box and use the handles to make it smaller. See the screenshot above. This will be where the clip starts. We keep the red box as it is. This will be the End Position. Done. If you play your Timeline you will already see that DaVinci does all the magic for us.
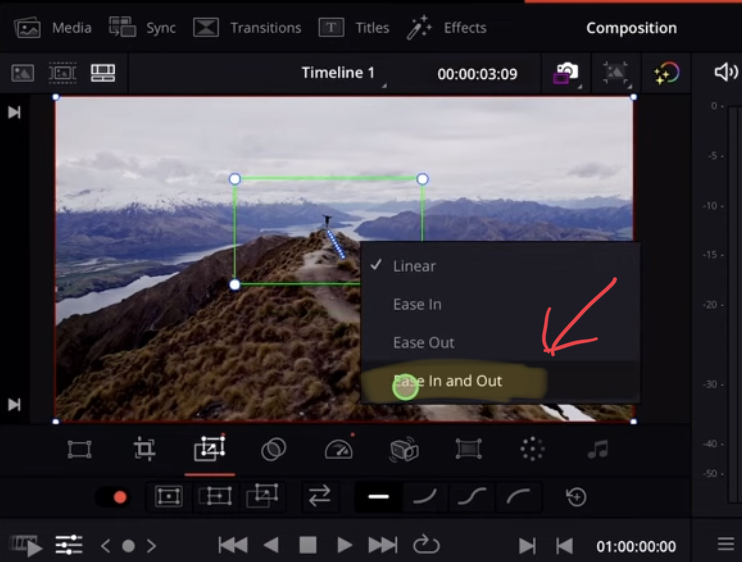
To make the animation even more smooth you can add an ease In and Out. Right Click on the Corners of your Box and you will get the drop down menu. Select “Ease In and Out”.
BONUS: All DaVinci Resolve iPad Masterclass Students get the Transition Pack for FREE!
You can either get the Transition Pack separate here: Seamless Transition Pack for DaVinci Resolve iPad. Or all of our DaVinci Resolve iPad Packs are a FREE Bonus for the DaVinci Resolve iPad Masterclass Students.
Check It Out here DaVinci Resolve iPad MasterClass: From Beginner To Pro.

Read Next
• How COPY Color Grade to MULTIPLE Clips in DaVinci Resolve iPad
• DO THIS to make DaVinci Resolve FASTER! (Instead of rage smashing your iPad)
• How To Delete Cache Files in DaVinci Resolve iPad
• How To Color Correct iPhone Footage in DaVinci Resolve iPad
• Easy Sync Audio & Video in DaVinci Resolve iPad


