I CUT THIS VIDEO IN 3 SECONDS! 😱 This will change Editing forever!
Speed is everything! Guys i really mean it. This A.I. Tool called RECUT cuts automatically all the breaths and dead space out of your Videos for you in just a second and it gets even better it also creates editable Timeline Projects that you can use in DaVinci Resolve, Final Cut Pro, Premiere Pro and ScreenFlow! And yes, you can bring in the Project File even to DaVinci Resolve on the iPad (Just for those people who a curious, because this Blog is about the iPad Filmmaking stuff) – But let’s show you what i mean.
Ps. Definitely watch my video where i show you RECUT in action.
Discount: GET $10 OFF RECUT with this Link here.
Pro Tip: Make your Videos Cinematic (and save a tone of time) with our Seamless Transition Pack for DaVinci Resolve iPad.

Contents
- [Video] I CUT THIS VIDEO IN 3 SECONDS! 😱 This will change Editing forever!
- How does RECUT work?
- How To edit Recut selection?
- Recut creates usable Project Files
- How To Import Recut XML File to DaVinci Resolve
- How To Import Recut XML File to DaVinci Resolve on the iPad
- Fazit: Speed is everything!
- BONUS: All DaVinci Resolve iPad Masterclass Students get the Transition Pack for FREE!
[Video] I CUT THIS VIDEO IN 3 SECONDS! 😱 This will change Editing forever!
How does RECUT work?

Do you spend hours manually removing silence from your videos? Recut removes the silence automatically in seconds.
Recut is using A.I. to detect all the dead space for you. It’s a super simple Tool where you Drag & Drop your clips into the Timeline and you basically done.
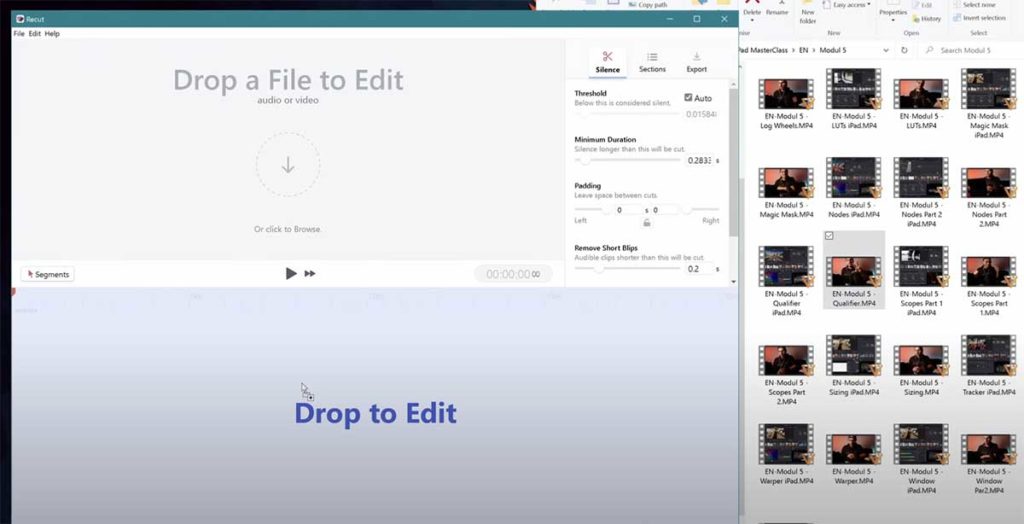
You can use multiple clips (Even Multicam) and change your settings like how many seconds before and after a cut is detected. Should Recut leave no space at all or some seconds? After you placed your Clips into the timeline it will automatically show you all the dead space in red.

How To edit Recut selection?

Just simply drag over the parts you want to delete and after they are selected hit “Delete” on your Keyboard.

After that your selection will turn red. But if you want something that Recut should keep in the Edit just select it again and hit “Delete” again. Done.
Info: Get more info on Recut here.
Recut creates usable Project Files
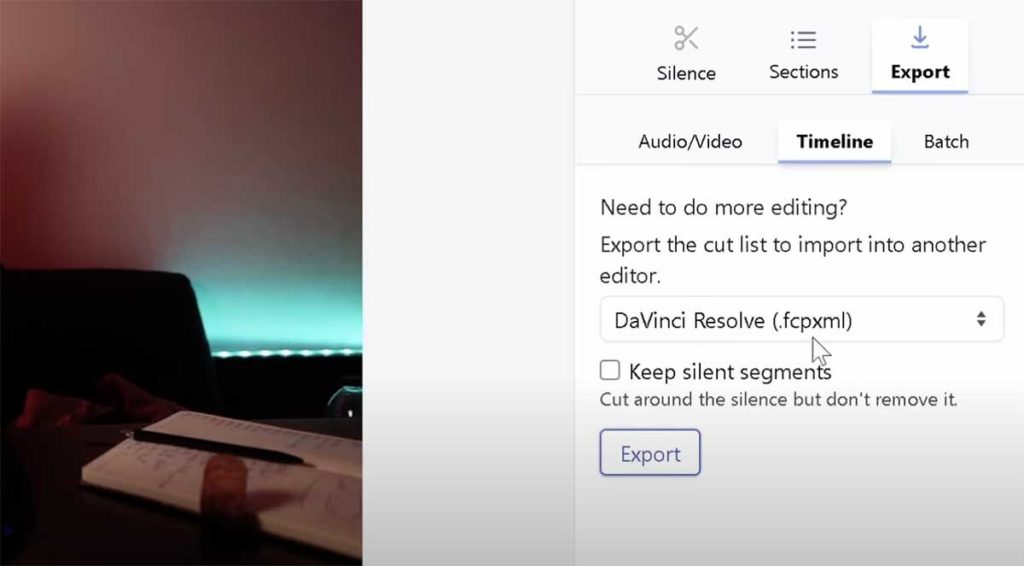
The best part about Recut is, that it creates actually usable Project Files. That means, even if you decide later you want some of the parts back. You can. Just change the Clips end like normal in a Project.
When you are done with your selection in Recut go to the Export tab and select to where you want to export. In my case its DaVinci Resolve. It will create a XML File that DaVinci can read and import.
How To Import Recut XML File to DaVinci Resolve
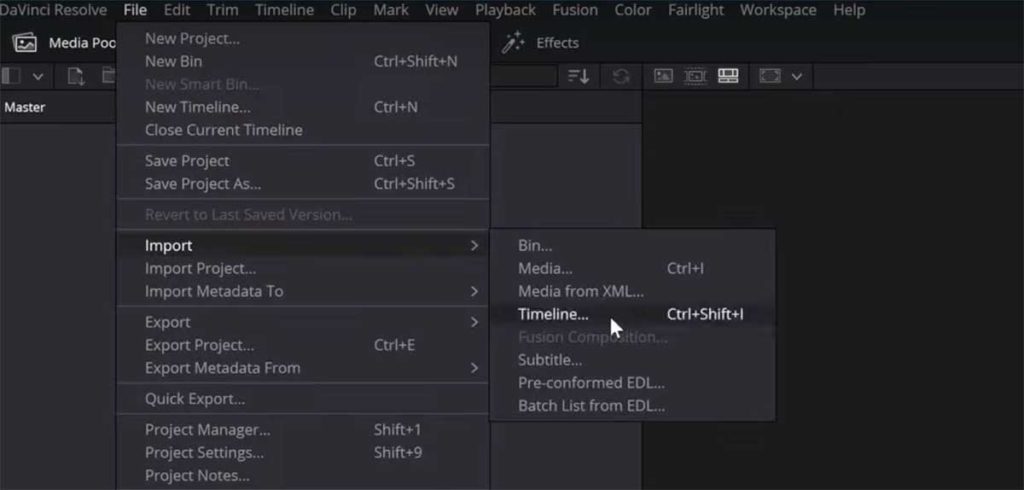
To import the XML File into DaVinci Resolve (Desktop) go to File/Import/Timeline…
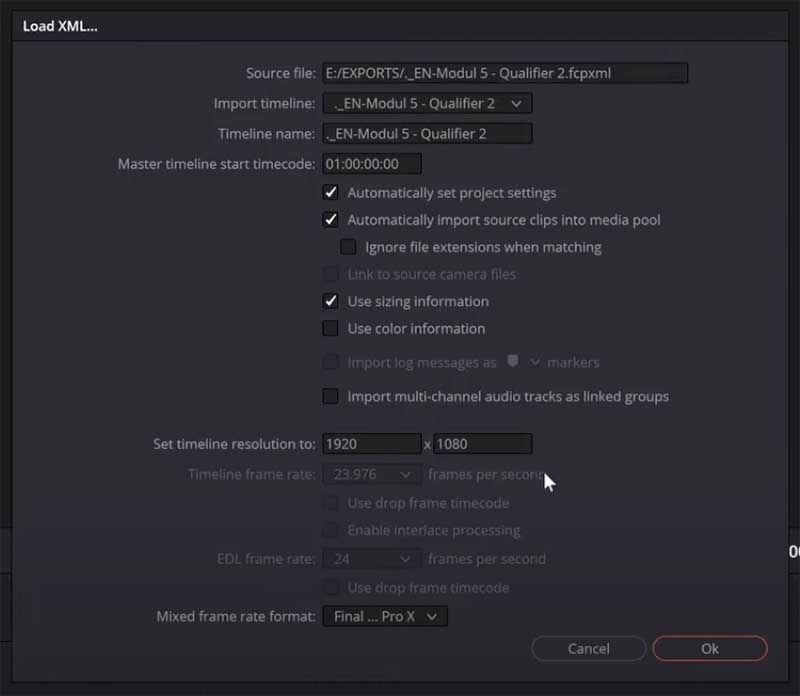
In the next window you can do some setting changes if you like. In my case its all good as default and i say Ok. And now you will have your Project in DaVinci Resolve that you can continue work on and do some edits. Recut is a Windows & Mac Tool. But they are also working on a iPad specific Version.
Pro Tip: GET $10 OFF RECUT with this Link here.
How To Import Recut XML File to DaVinci Resolve on the iPad
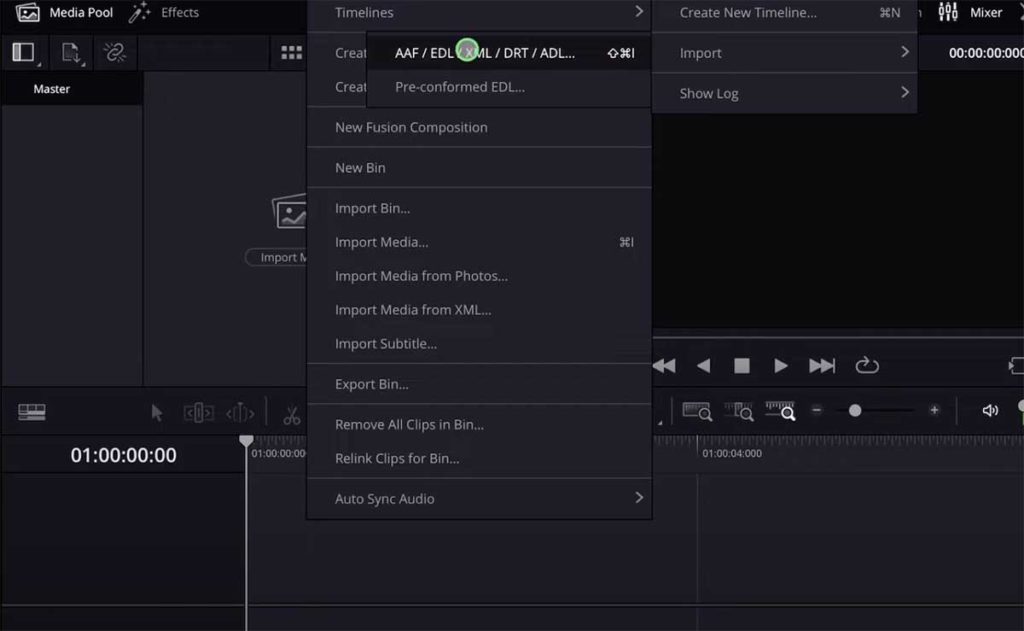
On DaVinci Resolve iPad the process is almost the same like on the Desktop. The only difference is that the Media Files are not automatically found on your Hard Drive. But you simply have the add the Media to the Media Pool and it works again.
First step: go to the edit page. (If you don’t know how to open the edit page, read this article here first where i explain how to get all the other pages on the iPad.)
Right click (longer press with pencil) on the Media Pool. Go to Timelines/Import and click on “AAF/ EDL / XML….” and choose the Recut XML File.
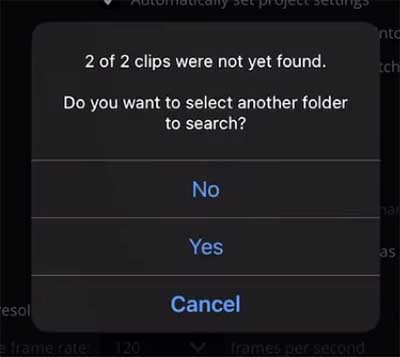
If you click on Yes, it still will not find the Media automatically (Maybe in a future DaVinci Update). So click on “NO“.
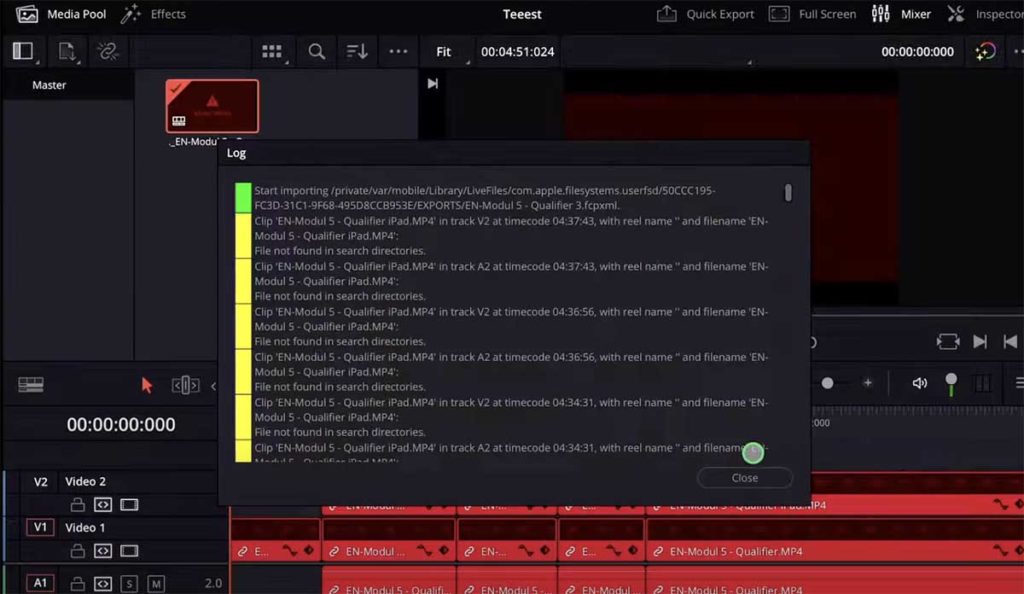
Don’t be confused, we will fix this mess in the next step. Here it basically shows you all the missing media. Just click on close.
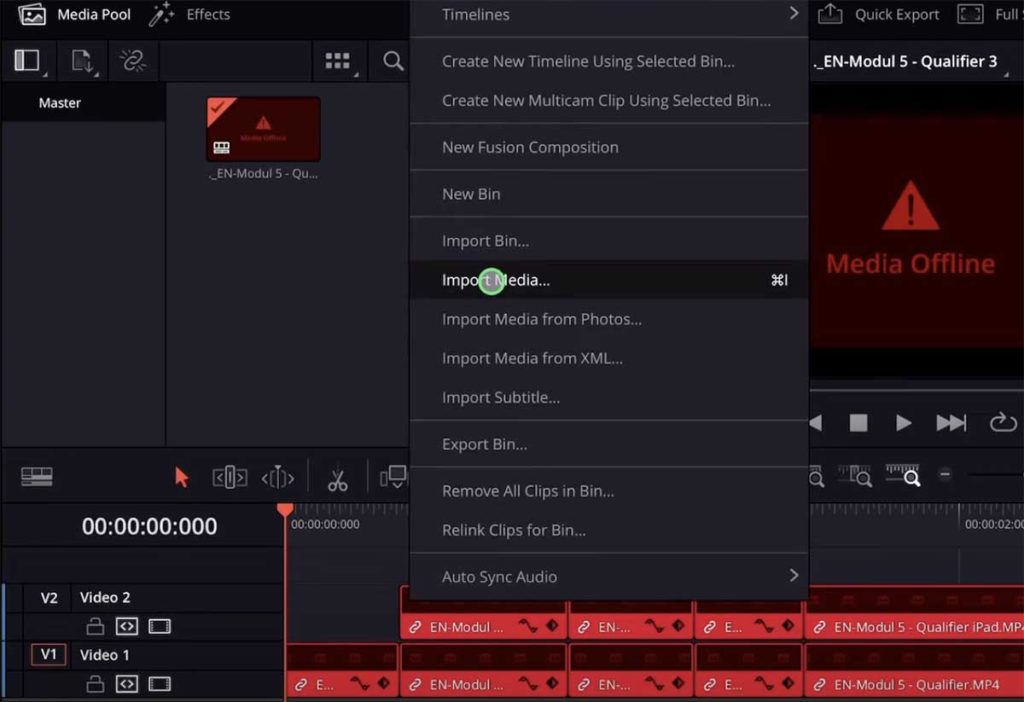
Normally if you have missing Media in DaVinci Resolve you would just click on the Re-Link Media icon (Top Left). But in this case the media is not even missing its not in the Media Pool at all. So we have to manually add the Media to the Media Pool. So right click on the Media Pool and select Import Media. Select all the Media that you need for your project and it will automatically recognise everything after it is added to the media pool.
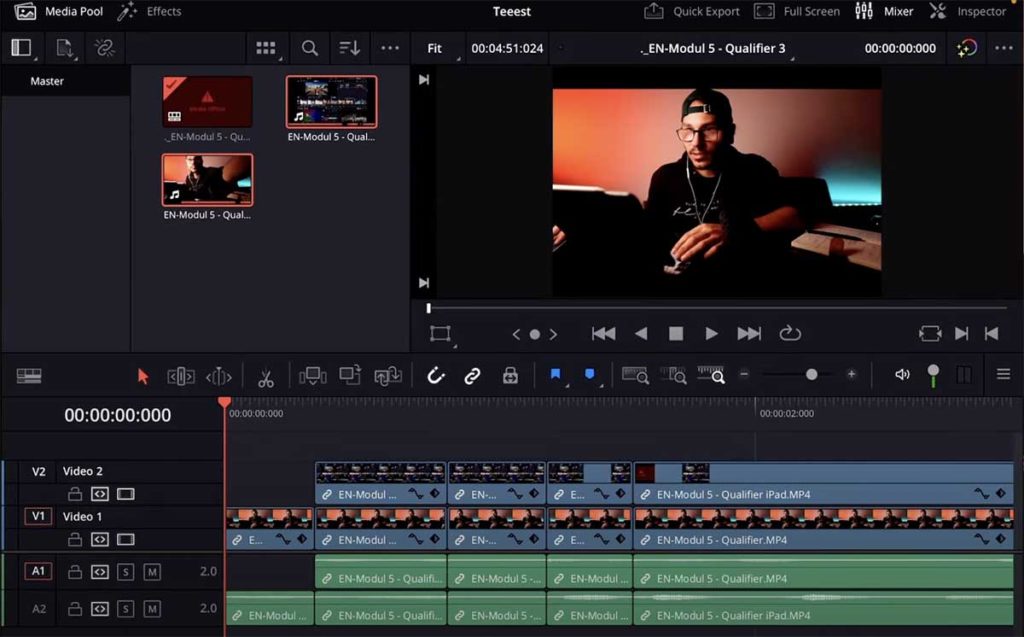
I got a Discount for us here: GET $10 OFF RECUT with this Link here.
Fazit: Speed is everything!
When it comes to video editing speed is really everything. The faster you are as an editor the more projects you can turn around. Just think about that. If a regular client work would take you 10 hours. And you can speed up the workflow and only need 5 hours you could literary take 2 clients at the same time. That means you earn double the income in the same time. So i mean it, when i say speed is everything!
So every tool, trick and tip that makes our editing workflow faster, why would you not adopt it? If you don’t your competition will…
So GET $10 OFF RECUT with this Link here. And enjoy the free printing Money Tool. In my case, you need just one Project and you will have the investment back. Cheers Daniel
BONUS: All DaVinci Resolve iPad Masterclass Students get the Transition Pack for FREE!
You can either get the Transition Pack separate here: Seamless Transition Pack for DaVinci Resolve iPad. Or all of our DaVinci Resolve iPad Packs are a FREE Bonus for the DaVinci Resolve iPad Masterclass Students.
Check It Out here DaVinci Resolve iPad MasterClass: From Beginner To Pro.

Read Next
• How COPY Color Grade to MULTIPLE Clips in DaVinci Resolve iPad
• DO THIS to make DaVinci Resolve FASTER! (Instead of rage smashing your iPad)
• How To Delete Cache Files in DaVinci Resolve iPad
• How To Color Correct iPhone Footage in DaVinci Resolve iPad
• Easy Sync Audio & Video in DaVinci Resolve iPad
