Grab Still / Screenshot from Timeline in DaVinci Resolve iPad (Workaround)
In this article i will show you a workaround on how you can grab a still (Screenshot) from your Timeline in DaVinci Resolve for the iPad. And i’m not talking about a iOS Screenshot. I’m talking about a high quality image straight from your Timeline. This workaround was necessary prior DaVinci Resolve Update 18.6. But since then we have the official way of grab Stills. To learn that read this article here: The easy way to take Screenshot from Timeline in DaVinci Resolve iPad
Contents
[Video] Grab Still from Timeline in DaVinci Resolve iPad
Step 1: Go to the Fusion Page
In order to get a Screenshot you need the Fusion Page. If you don’t know how you can get all the other Pages read the following article first.
Read this Article first: FULL DaVinci Resolve on iPad without a KEYBOARD
Step 2: Right Click on the Viewer Window
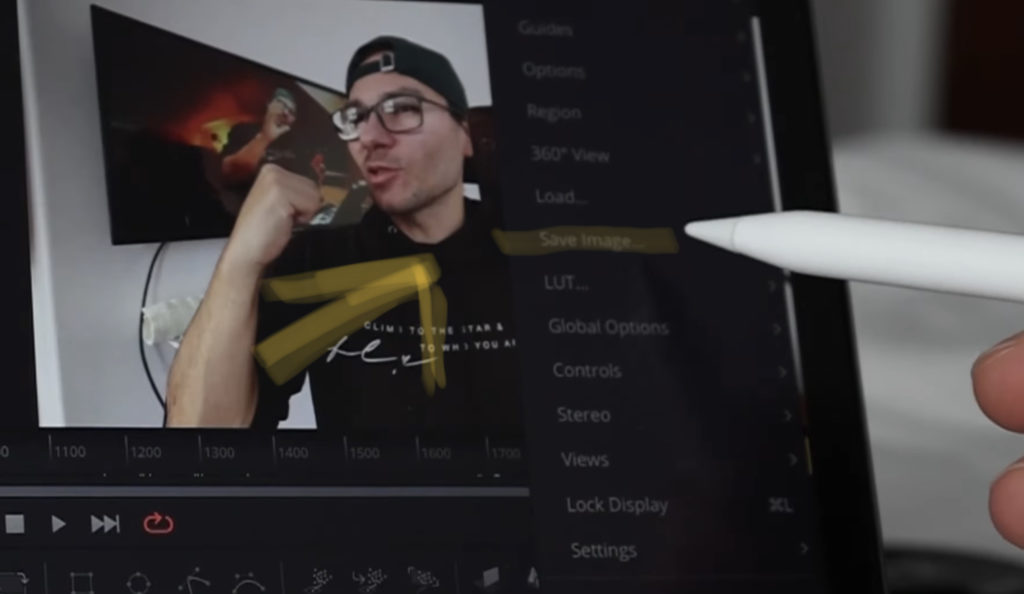
In the Fusion Page right click on the Viewer (Make sure the Playhead is on the position you want the grab a screenshot) and then click on Save Image…
Step 3: Change the Path to Capture
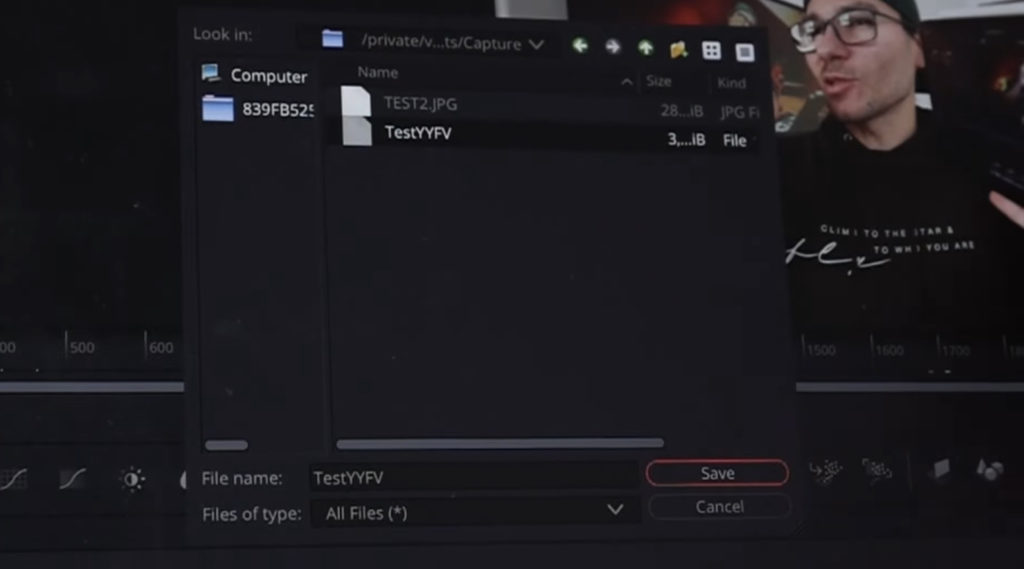
On my iPad i could simply click on the Folder with the numbers name on the left side. Then navigate to: \Documents\Capture
Step 4: Change Files Type to JPEG
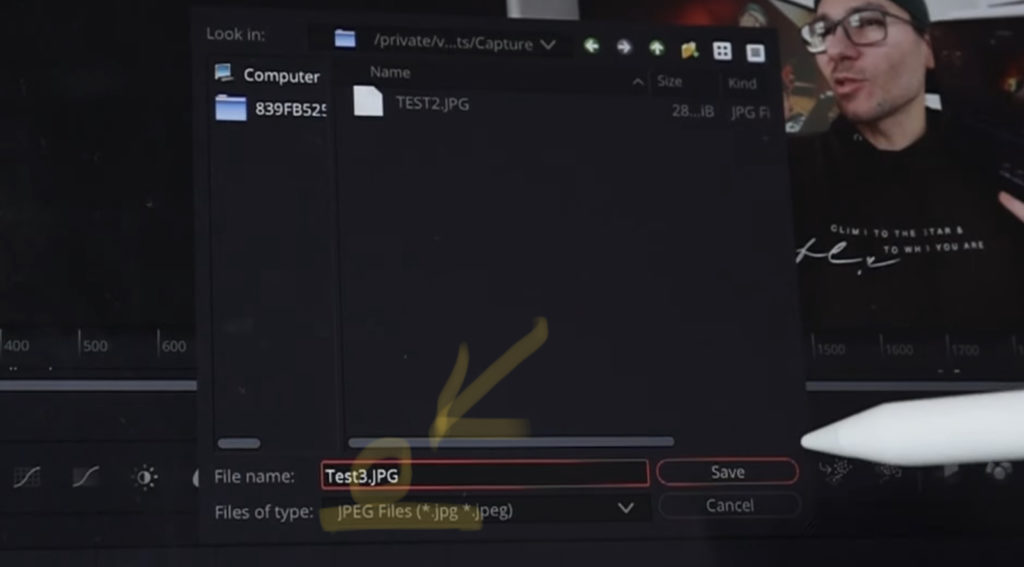
In order to correct a correct file on the iPad you have to change the Files of type to JPEG Files. And also you have to manually type in the ending *.JPG.
Important: You also have to type the file ending to the File Name. For example: Test3.jpg
Step 5: To open the Still open the Files App
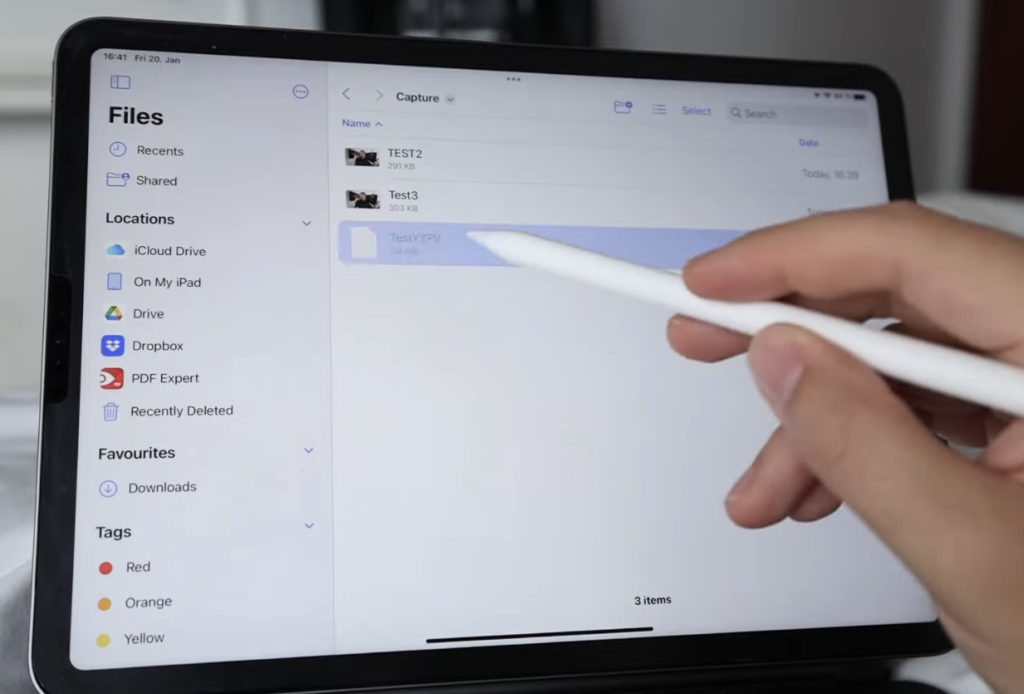
Open the Files App on your iPad and Navigate to the DaVinci Resolve Folder. Inside the DaVinci Resolve Folder you will also see the Folder Capture. Like you see in the Screenshot, if you forget to write the ending .jpg your Screenshot can not be viewed. If you typed it correct your screenshot a ready to be copied.

