3 Ways How To Change Clip Speed in DaVinci Resolve iPad
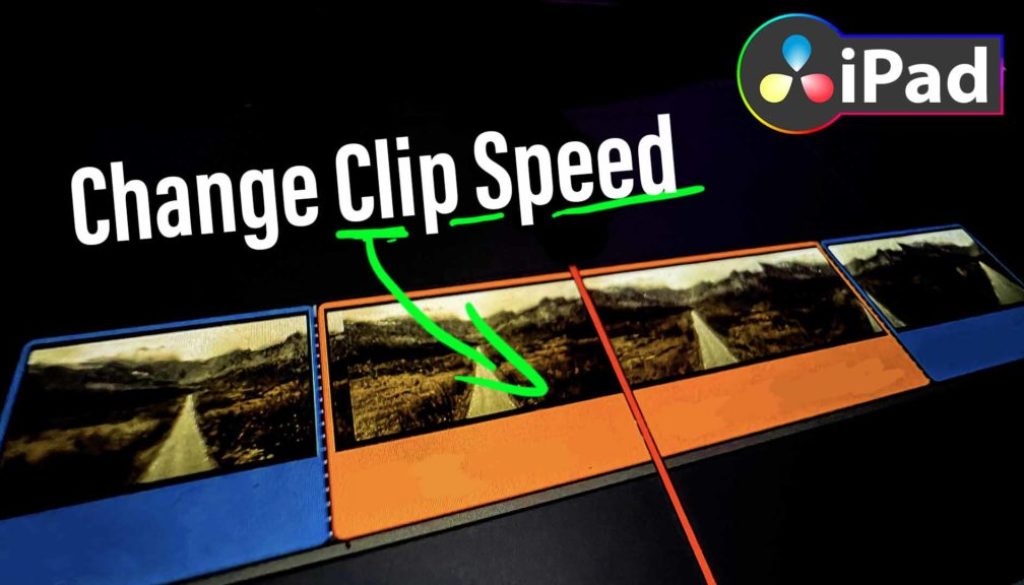
In this article i will show you three different ways how you can change the Clips Speeds of Clips in your Timeline in DaVinci Resolve for the iPad.
Contents
[Video] Top 3 Ways How to Change Clips Speed in DaVinci Resolve iPad
Solution 1: Change Speed in the Cut Page
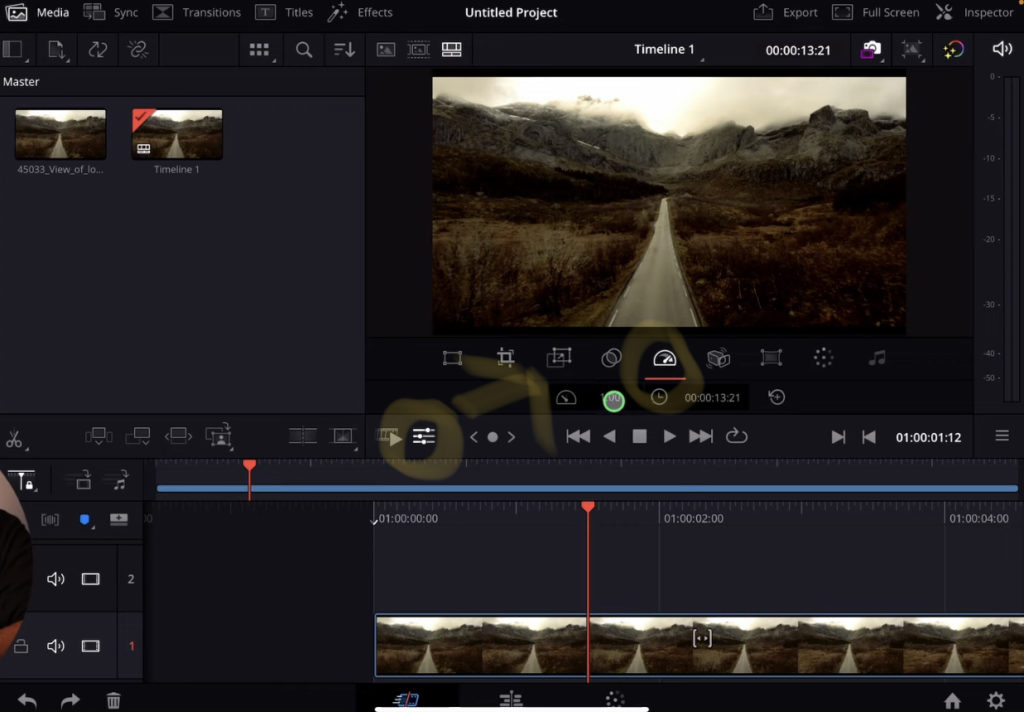
For Solution Number One you can change the Speed of a Clip in the CUT Page by selecting the clip and than click the little icon (adjustments – see screenshot) or by pressing the shortcut “R” on the keyboard. You will see a new menu apear under your viewer with a bunch of settings. Go and click on the Speedometer icon. Here you can change the Speed value: 1.00 equals to 100% speed. So if you type in 5.00 it will be 500% Speed.
Solution 2: Change Speed in the Edit Page
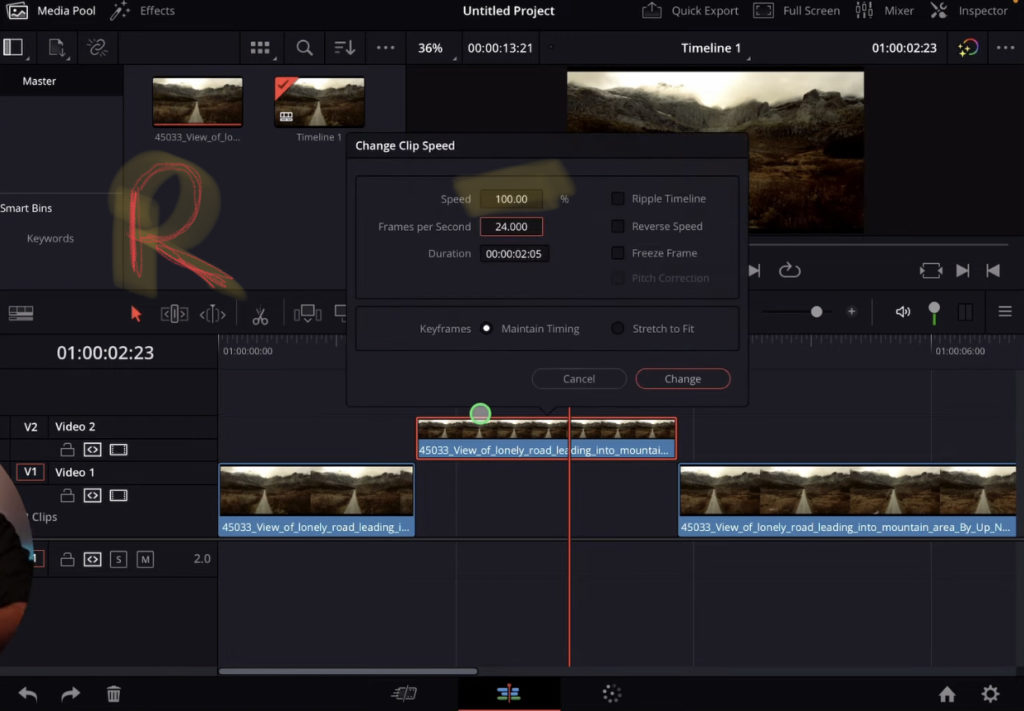
You can also change the Speed in the Edit Page. If you select a Clip there and Press “R” on the Keyboard or right click on the clip (longer press with pencil or finger) – A window will open where you can change the speed value in percent. The difference here to the Cut Page. Your clip length will stay the same. Only the speed will be increased. That results in dragging the rest of the clip into the clip area. If you want exactly that perfect.
In my case many times i want the the clip cuts stay the same. Beginning and End point. So by increasing the Speed by for example 200% the clip should now only be half the length. Or another example, lets say i have one slot in my timeline where i have space for the clip. But i want that the clip is matching the free spot. How can u do this?
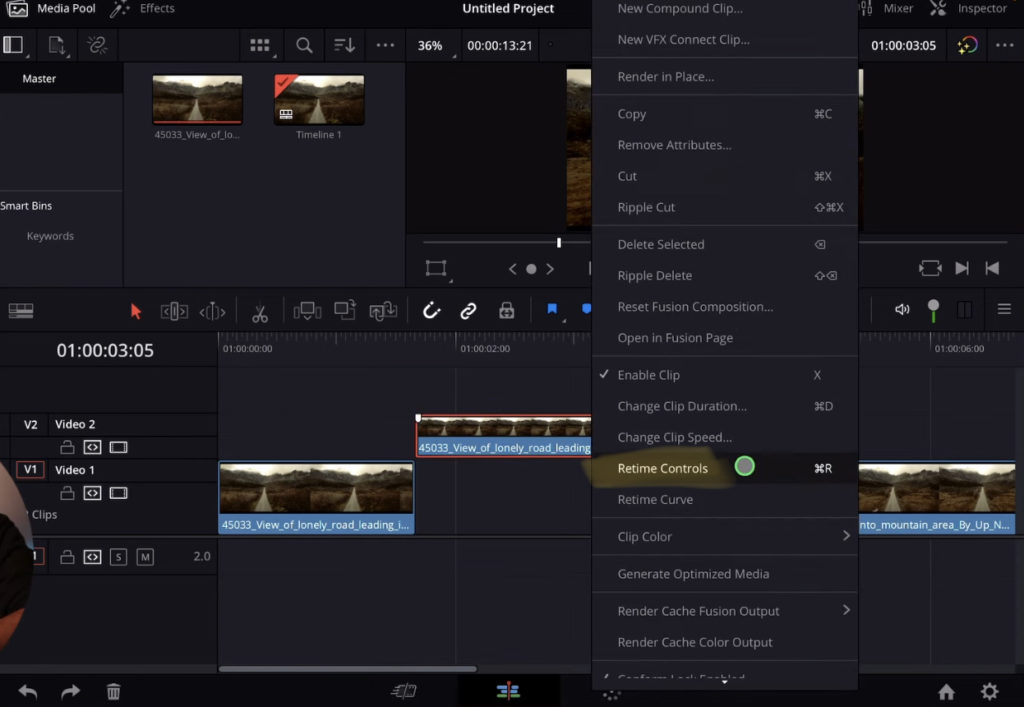
In that case we would not use Change Clips speed rather go right click and open Retime Controls. Now you see the the Clip change his view. (Small arrows are showing under the clips) – In this Retime Control mode you can change the Clip length by clicking on the one of the both ends and dragging the clips smaller. Now the Speed will be increased. But the In and Out Point of that clips stays the same.
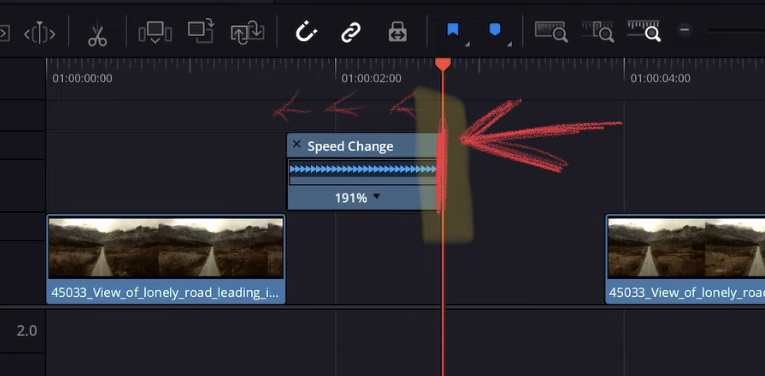
You can see that the speed was change by the percentage value that goes up the smaller you drag your clip.
Solution 3: Multiple Speeds on one Clip
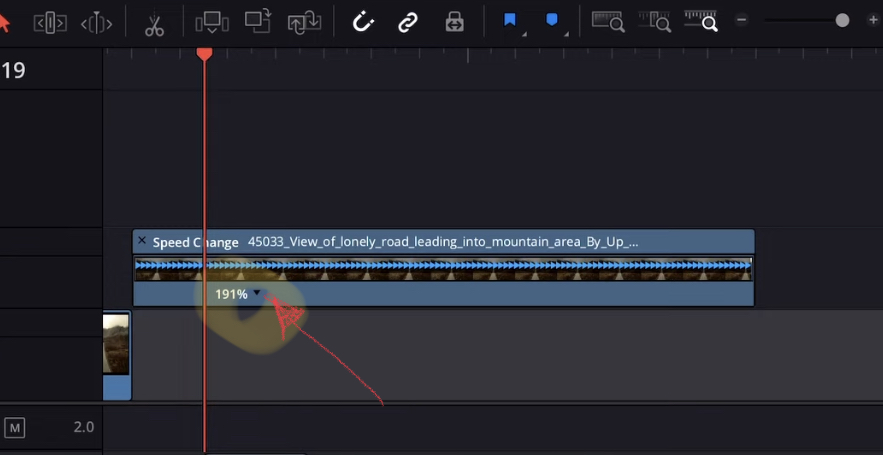
To create multiple speeds in one clip (without cutting the clip – Because you could always old school just cut the clips and change the speed of each clip) inside of Retime Controls when you place the playhead where you would like that a different speed starts click on the little arrow icon next to the speed percentage value.
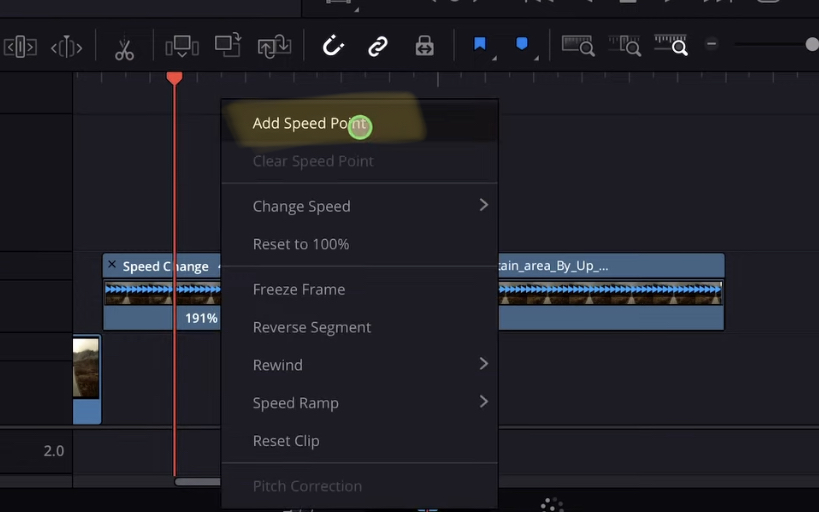
Now click on Add Speed Point and you will see that your clip has a second Speed Value an a little handle apeart. Do this as many times you want your clips to be in different speed sections. In my example i add another Speed Point to the end part of my clip:
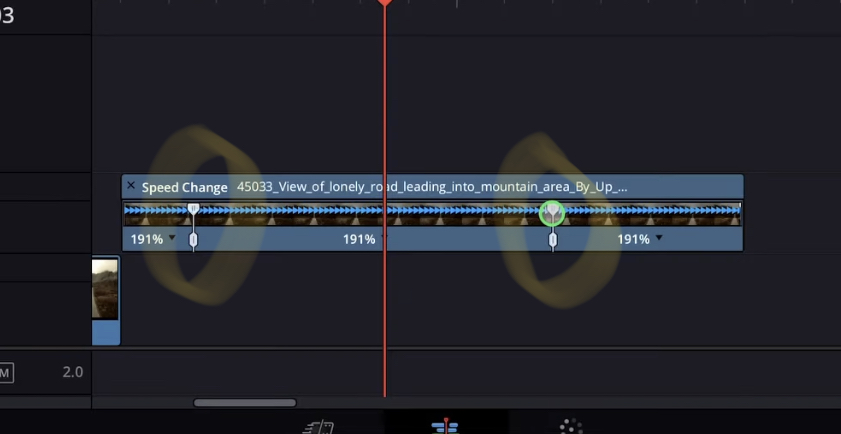
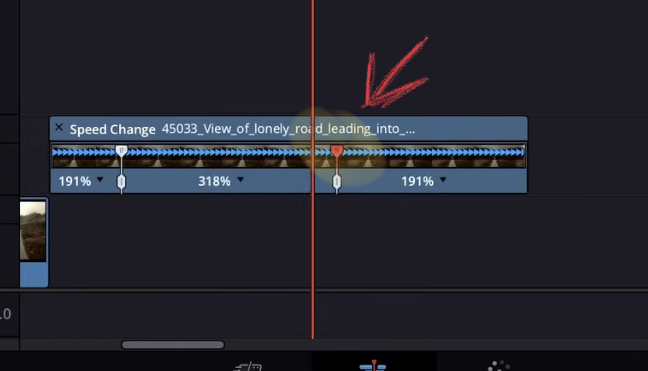
To change the speed of the different parts of your clips simply click on the little handles and like before drag to the left or right to change the speed.
How to create Speed Ramping in DaVinci Resolve iPad?
You already learned the first step into creating smooth speed ramps in DaVinci Resolve for the iPad. I created another tutorial just for the Speed Ramp in this article here: “DaVinci Resolve iPad: Smooth Speed Ramp Tutorial”
If you want to become a DaVinci Resolve iPad Pro Check Out our Online Course DaVinci Resolve iPad MasterClass: From Beginner to Pro.

